|
PA2JJB Ham-radio station |
|
Foto-Album Allerlei |
|
![]()
![]()
Distributor SteppIR for the USA Distributor SteppIR for England and Europ
Other Dutch SteppIr-Users: PD9CN PA9JO
|
|
|
When you like to control your SteppIr by your tranceiver
you need a S13 seriable-cable (link to the drawing)
but when you like to control your tranceiver & SteppIr
you need a Y-cable (link to the drawing)
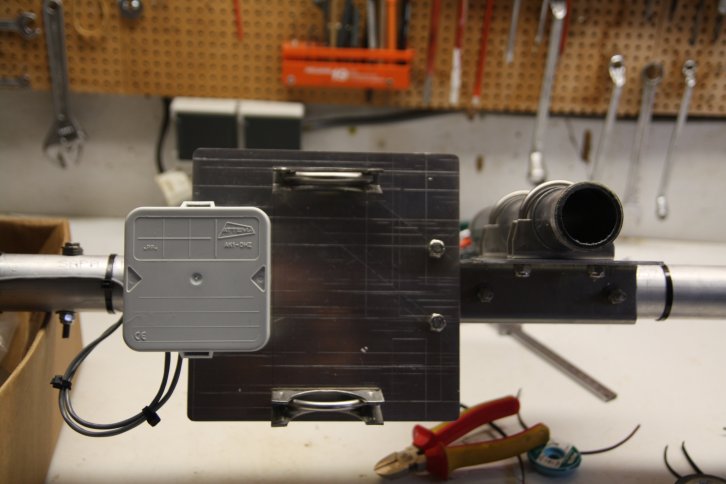
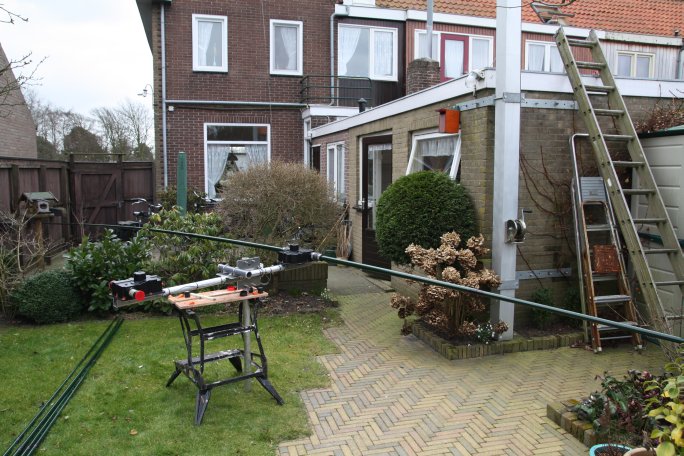
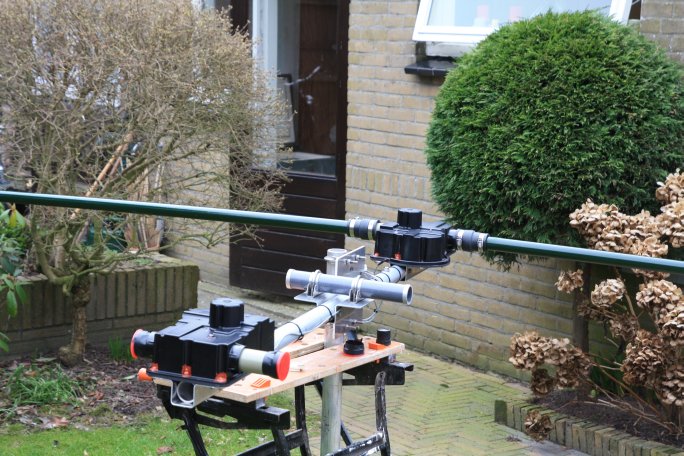
Here is my one-cable-solution
A SteppIR Autocable-Switch
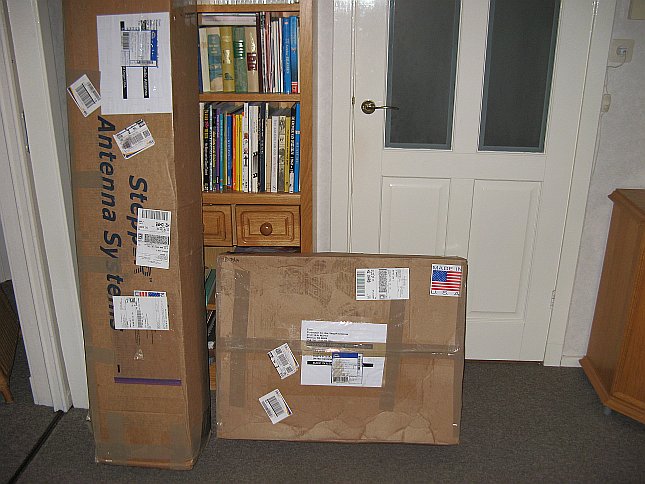
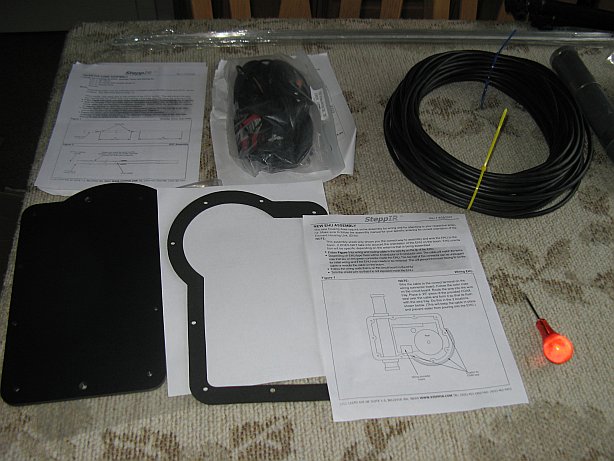
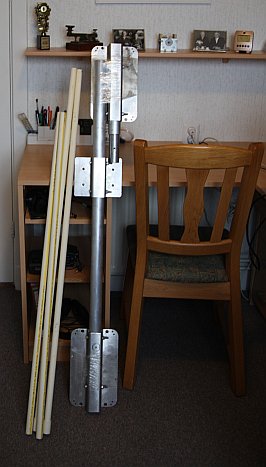
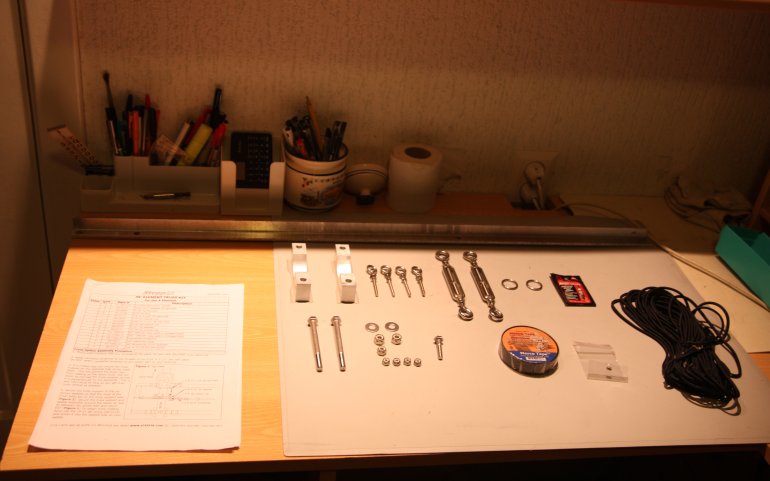
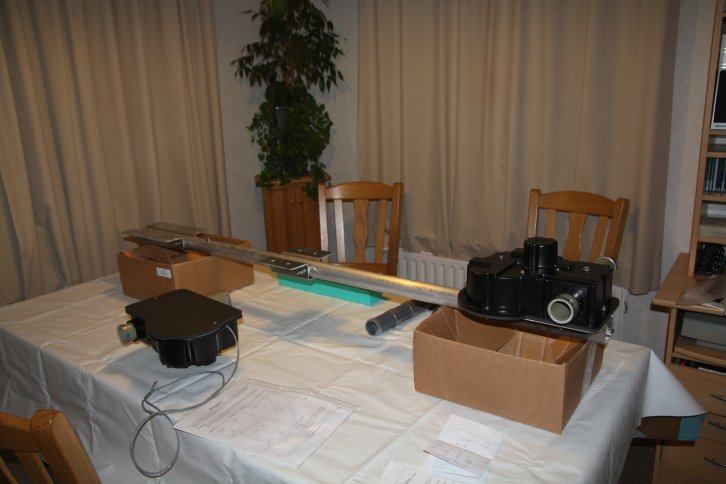
STEPPIR-Antenna-kit has arrived 05-02-2011
|
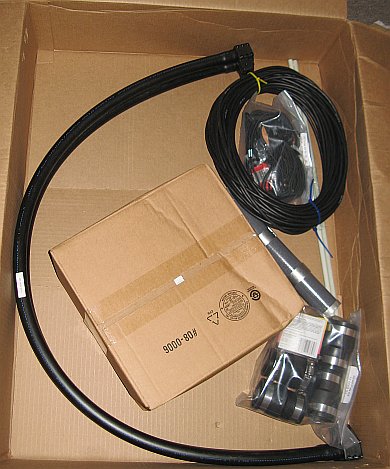 |
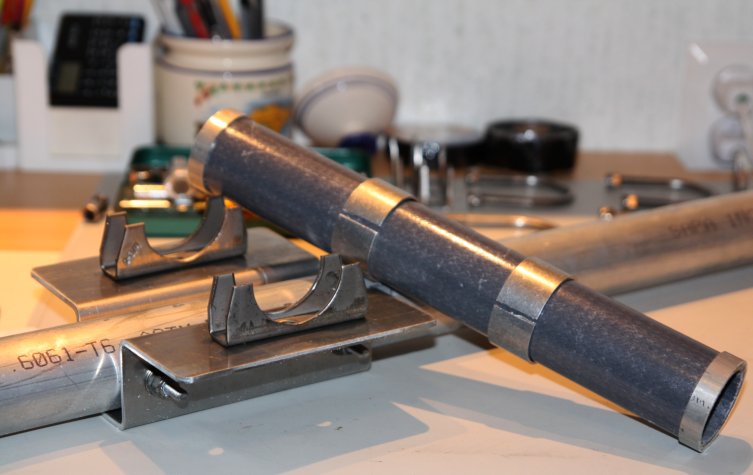
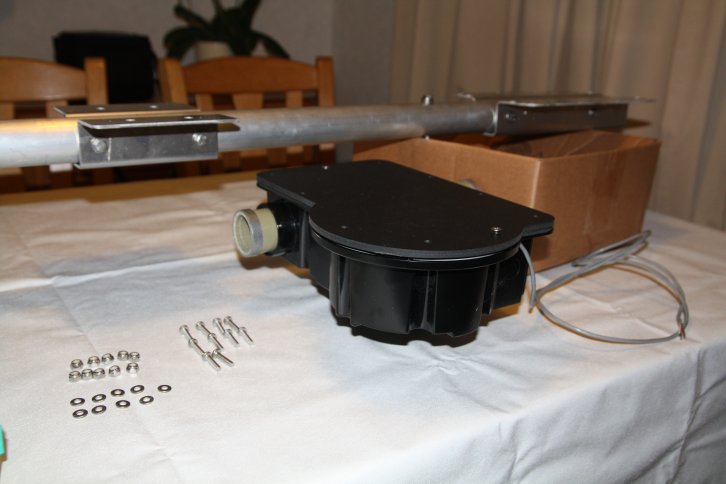
| SteppIr-Antenna ordered in december and arrived 05-02-2011 | Part of the trombone, controlcable , (Q)uick (D)isconnect (Bo)ots & trustkit |
 |
 |
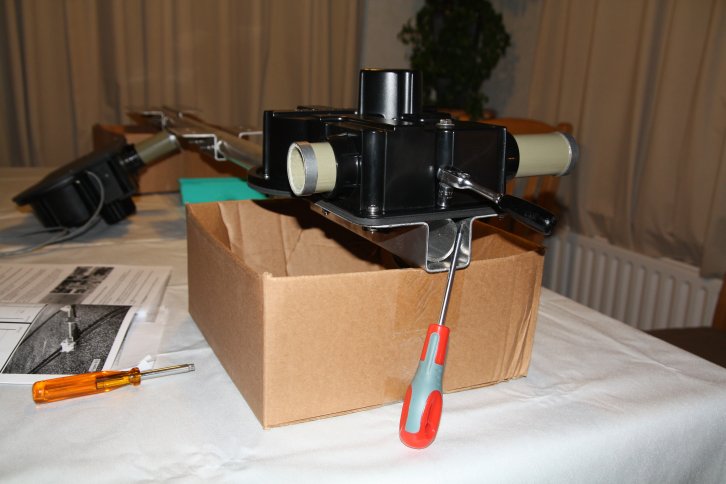
| Trombones, Element Return Tubes, QDB's | Bottomplate of (E)lement (H)ousing (U)nit & EHU-sealing |
 |
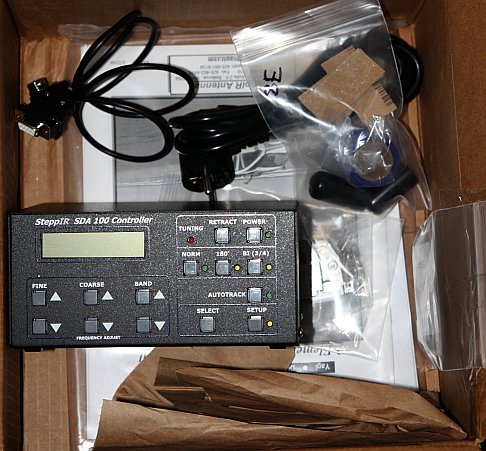 |
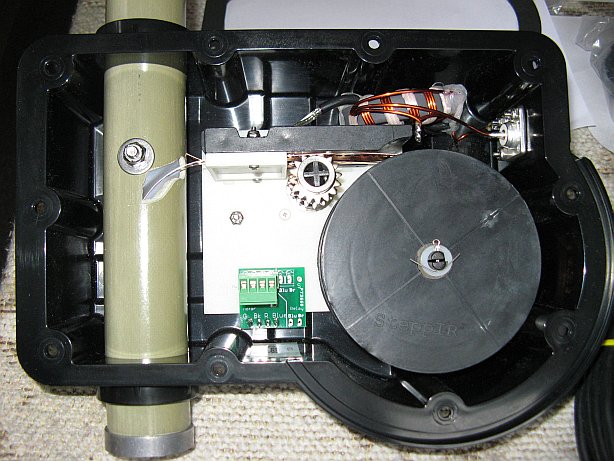
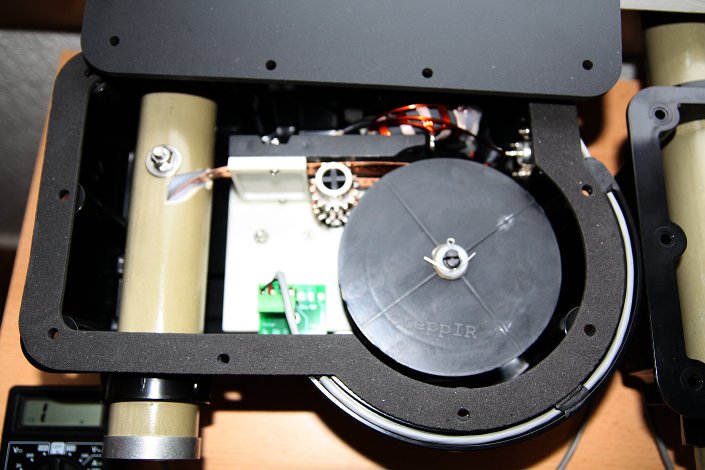
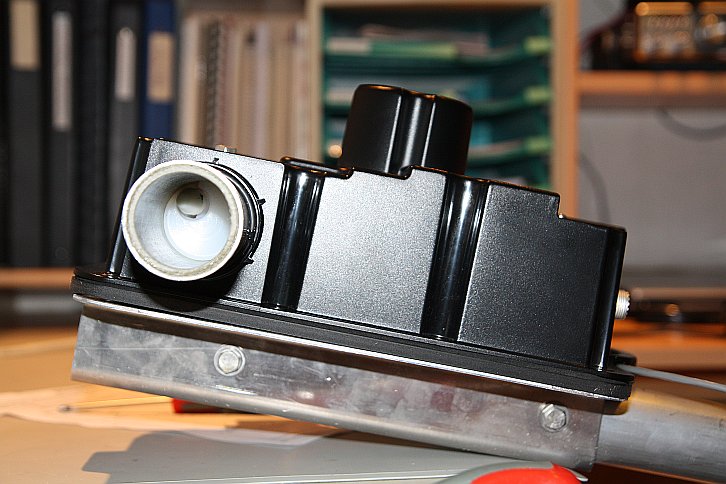
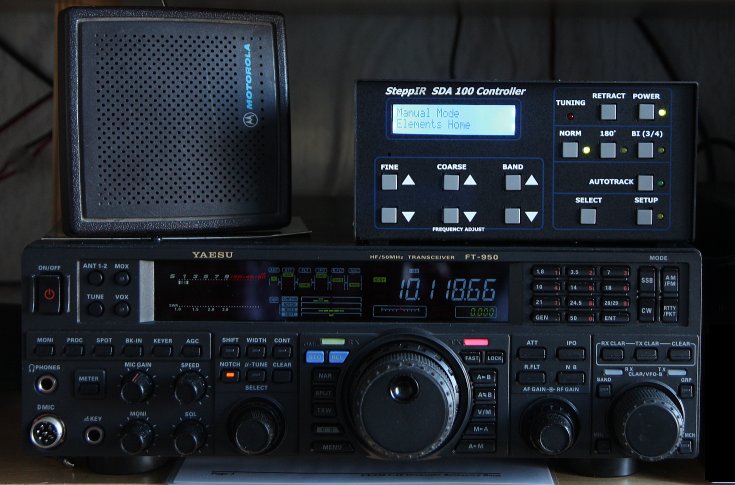
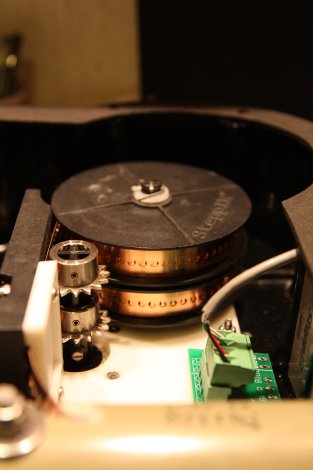
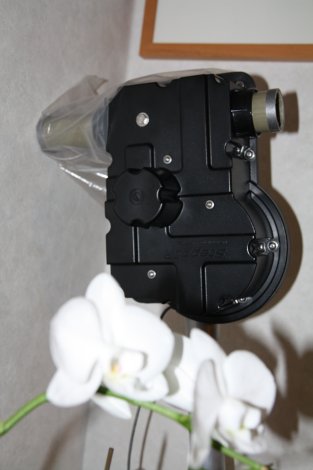
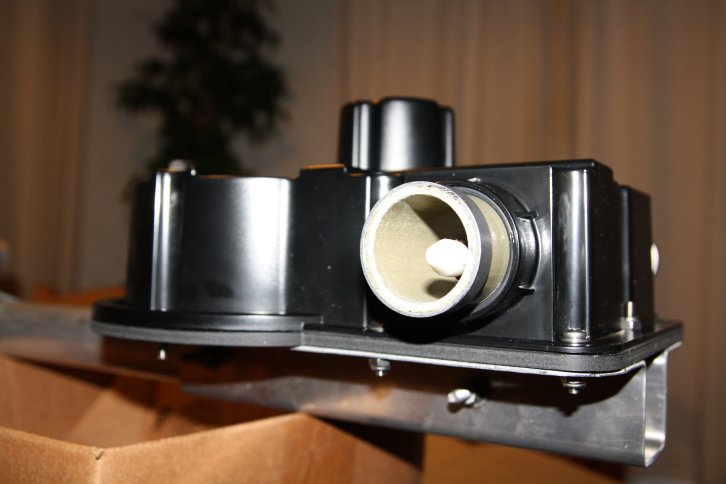
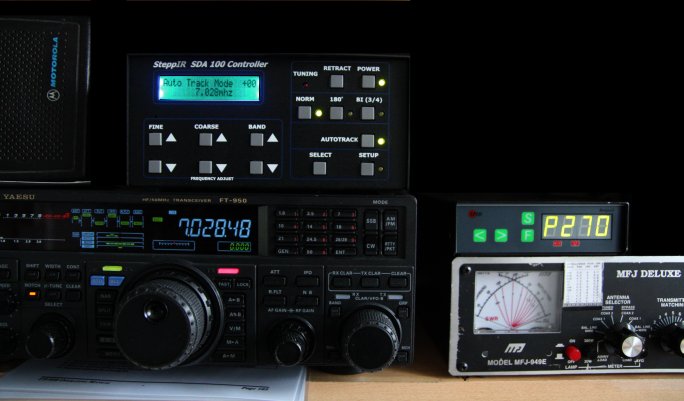
| New EHU: a first look inside | Control Unit SDA 100; comes now with every New SteppIr |
 |
 |
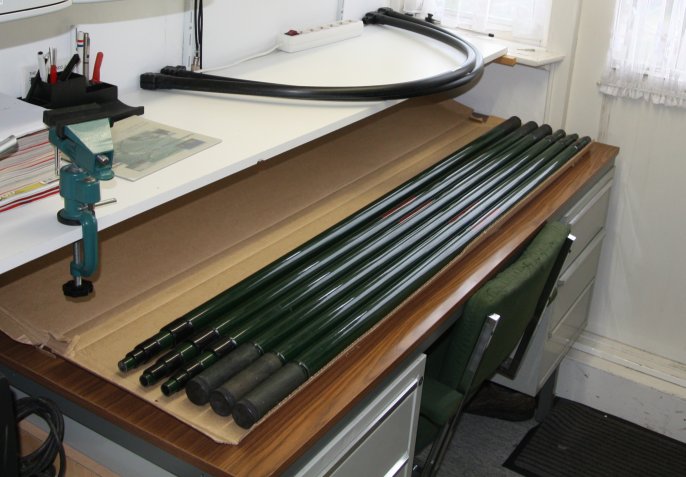
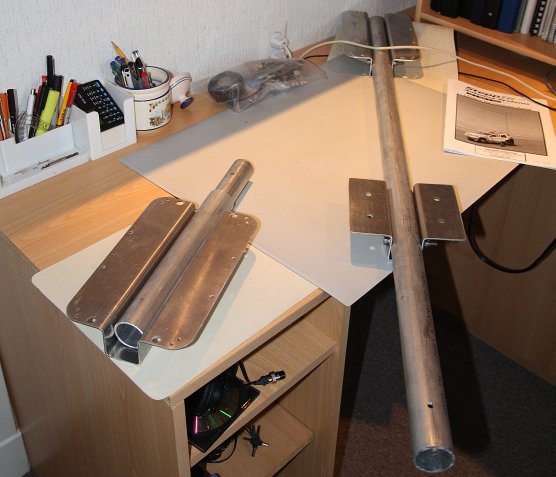
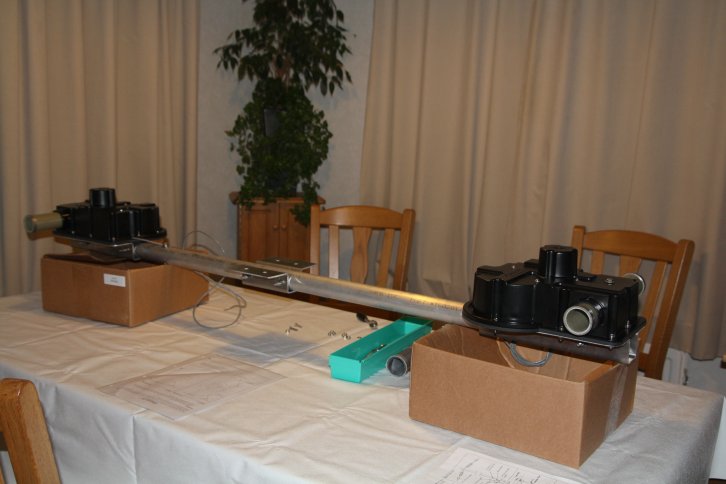
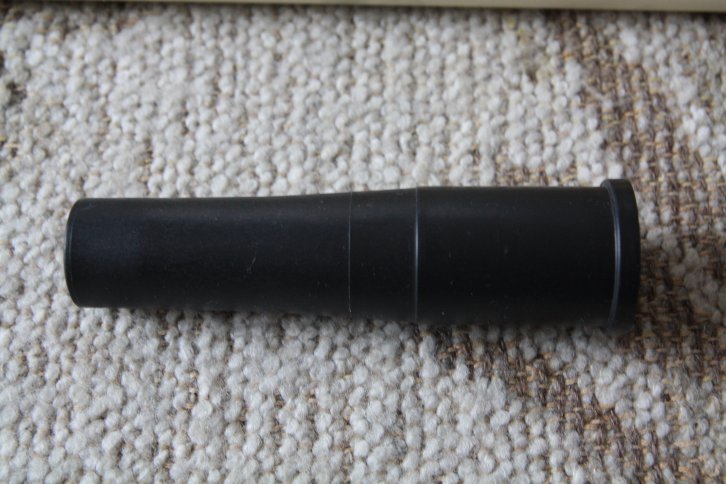
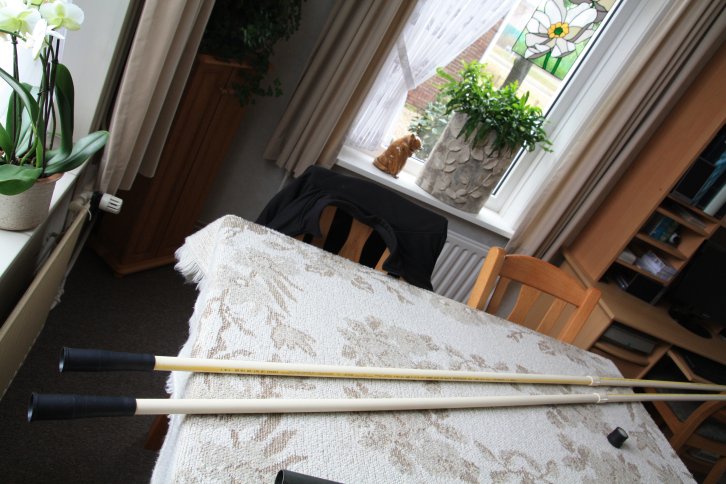
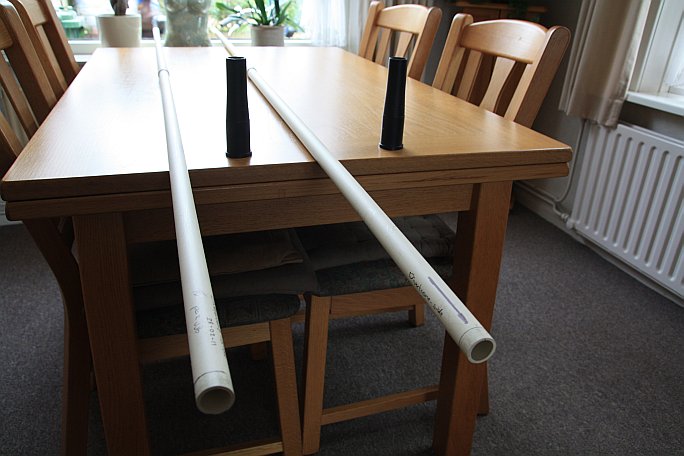
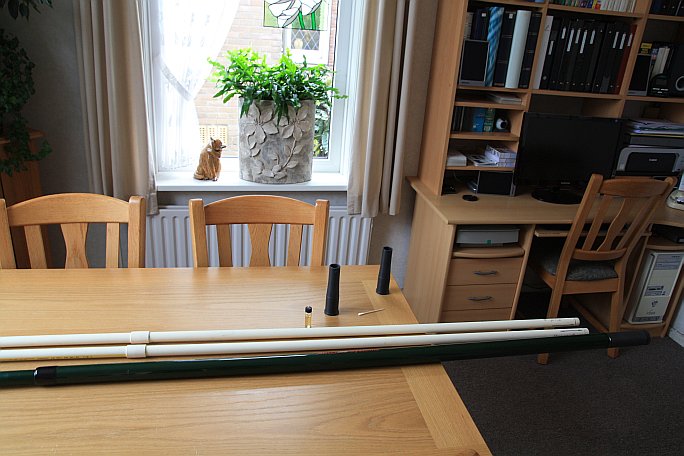
| 6 Element Support Tubes: 4 for the driven and 2 for the director elements | Boom
comes in 2 parts; also the CVPC-tubes |
 |
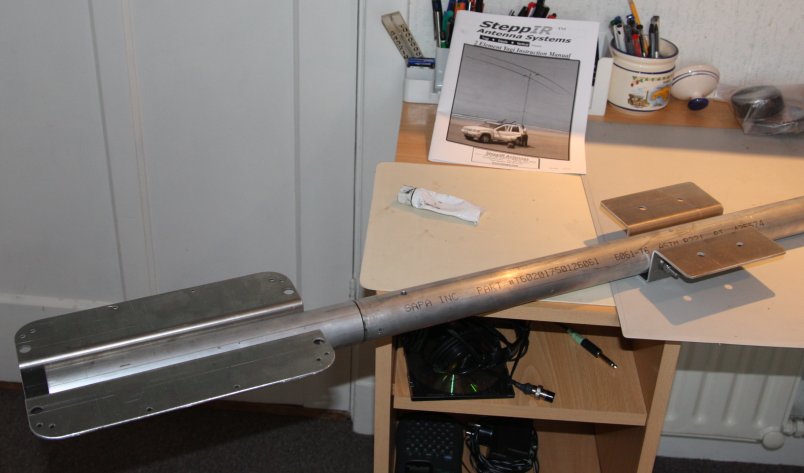 |
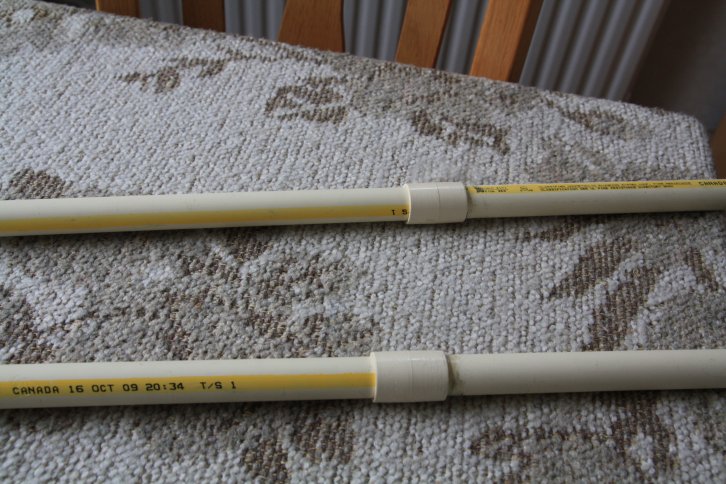
| Assembling the boom | Use some grease for smooth sliding in each other |
 |
 |
|
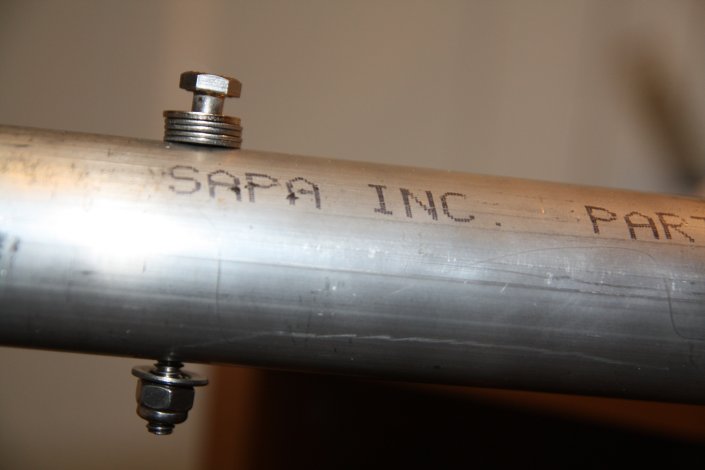
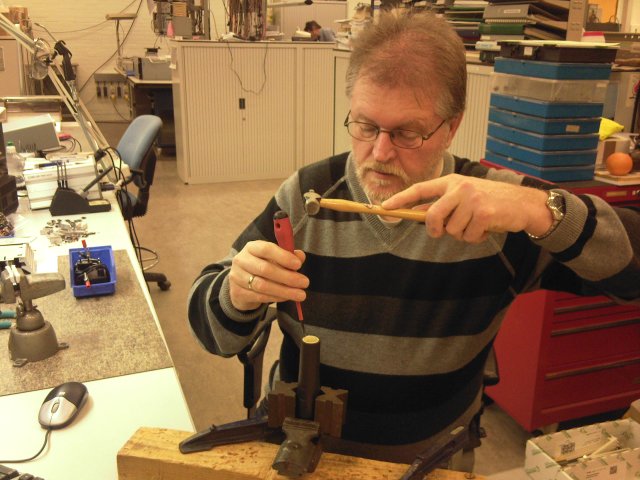
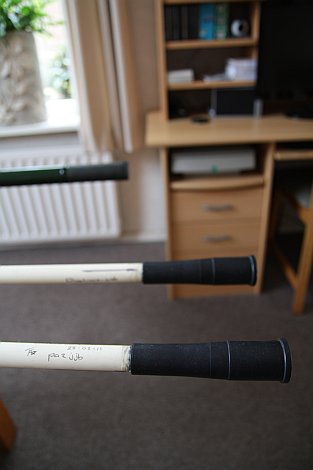
Long
bolt needs 5 washers under the head |
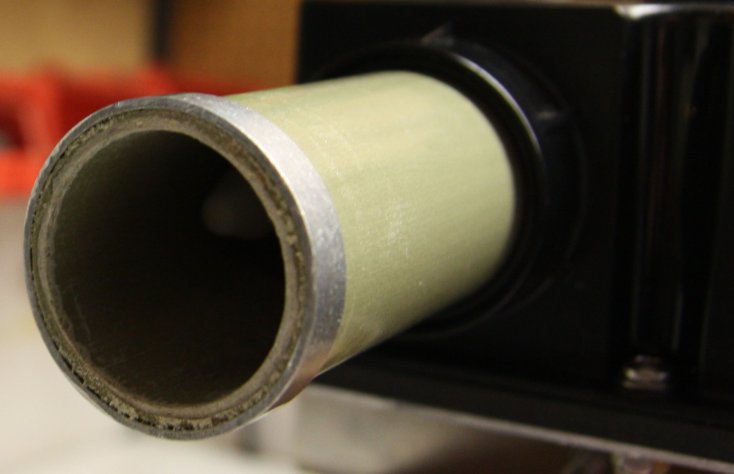
The parts of the (E)lement (R)eturning (T)ube |
 |
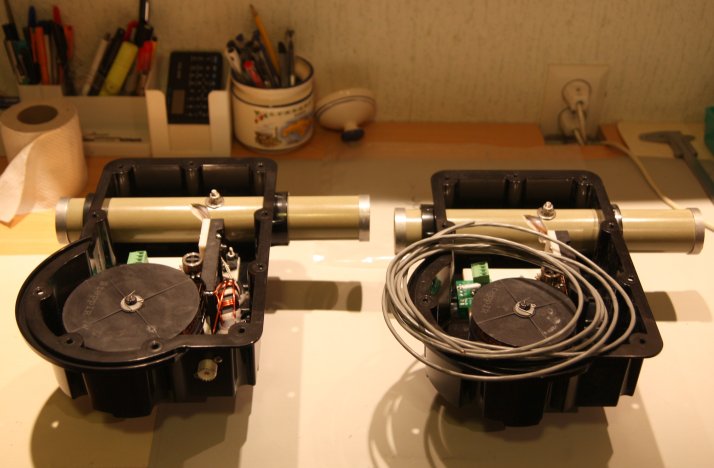 |
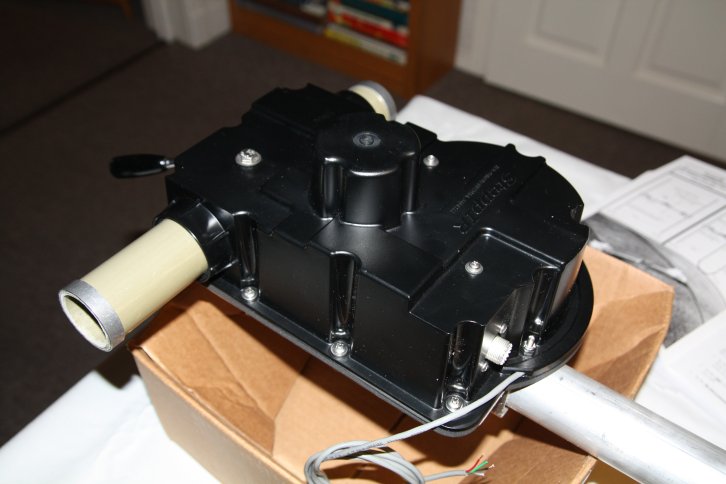
| The new EHu's has a cable-tray and a plug for the controlcable | Both of the EHU's |
 |
|
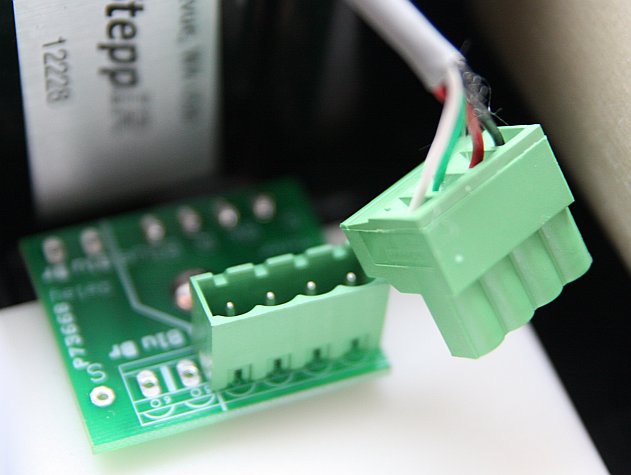
| The controlcable-plug and printconnector | The EHU for the driver-element |
 |
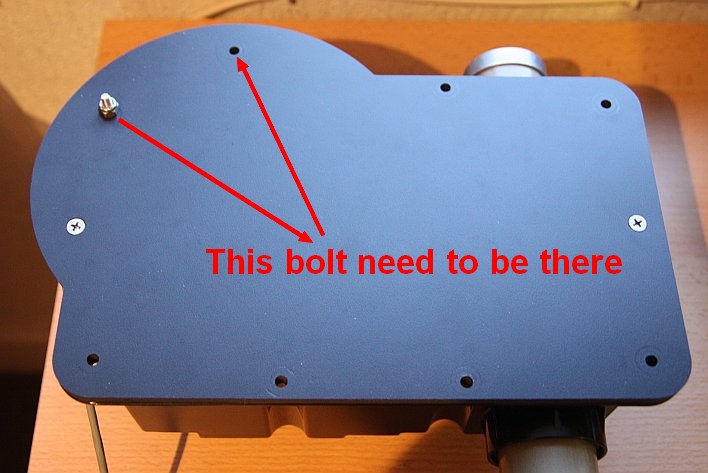 |
| The sealing and controlcable in place with COAX-seal | Bottomplate secured with 2 screws with flat heads, the third need to be on 12 ó clock |
 |
 |
|
EHU
on the boom to see if the holes are matching
|
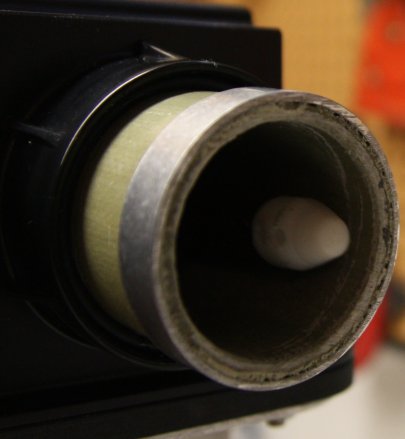
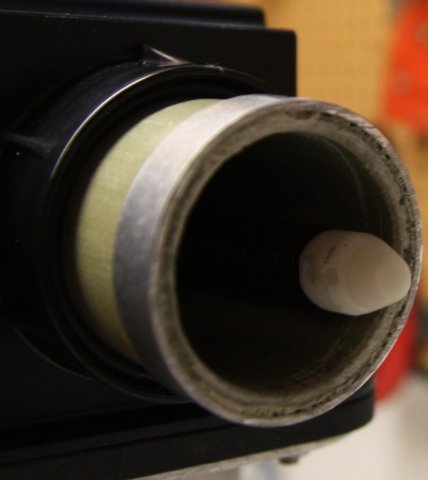
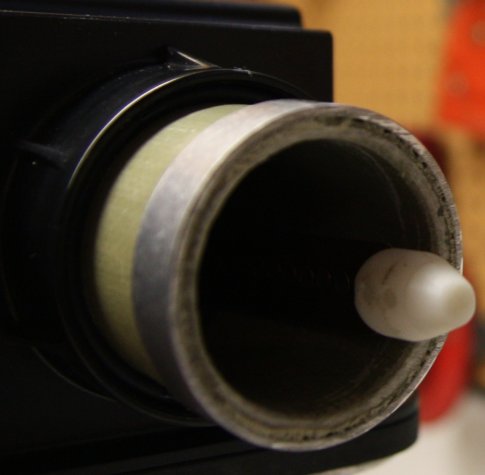
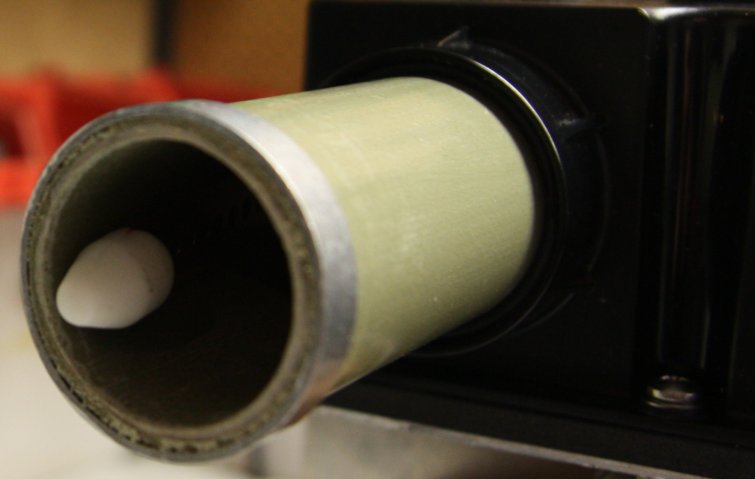
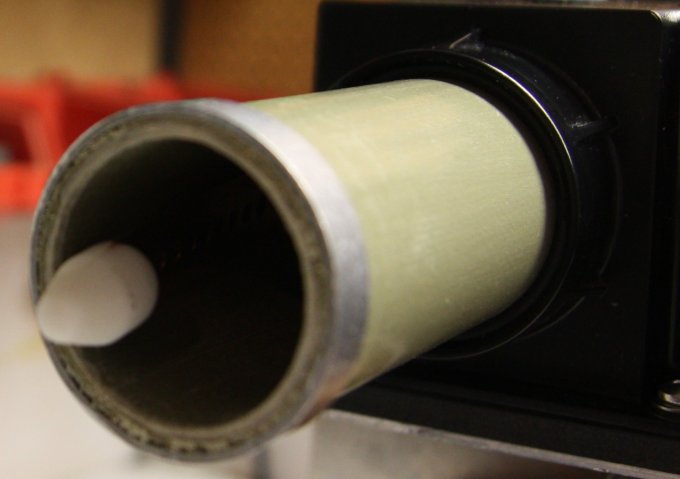
The CPVC-tubes with their diverter-cones |
 |
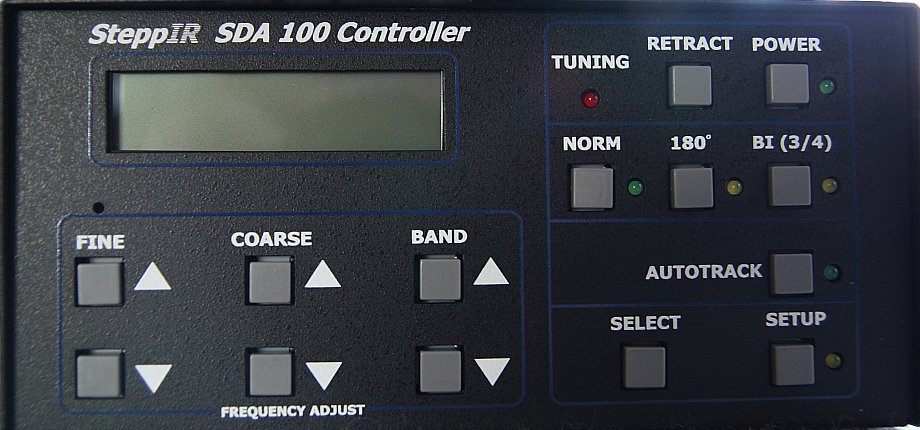 |
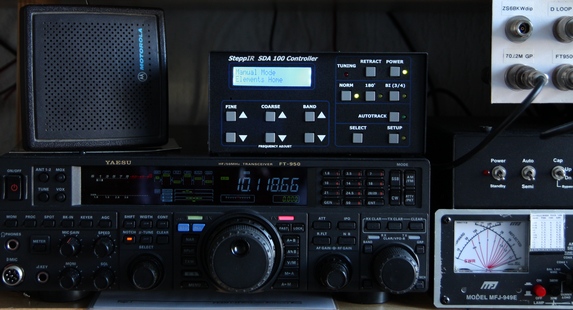
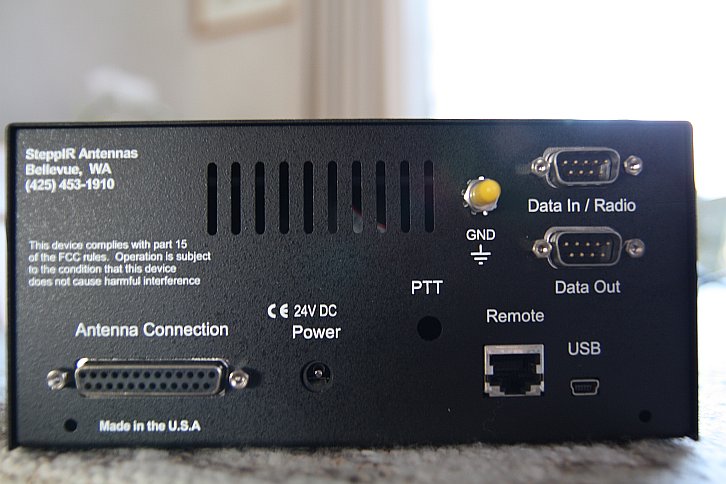
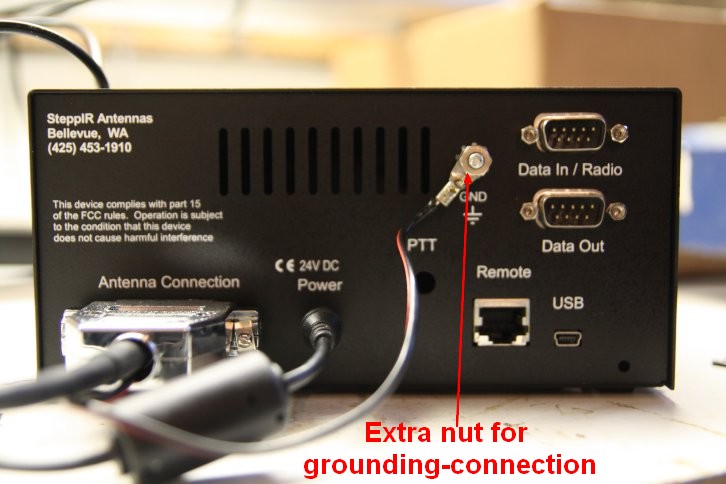
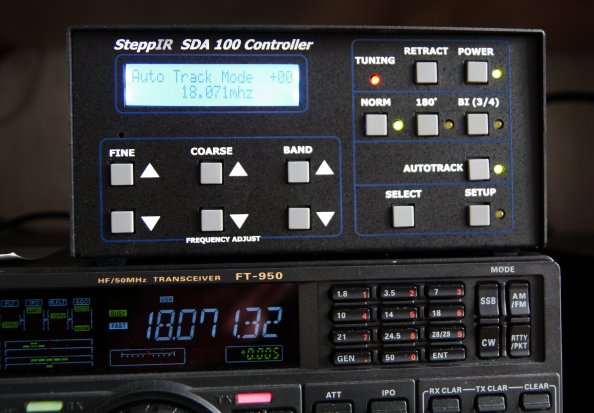
| Backside of the SDA 100: antenna- radiocontrol- remotedriver- USBSofrwareupdate-plug | Frontpanel of the SDA 100 |
 |
 |
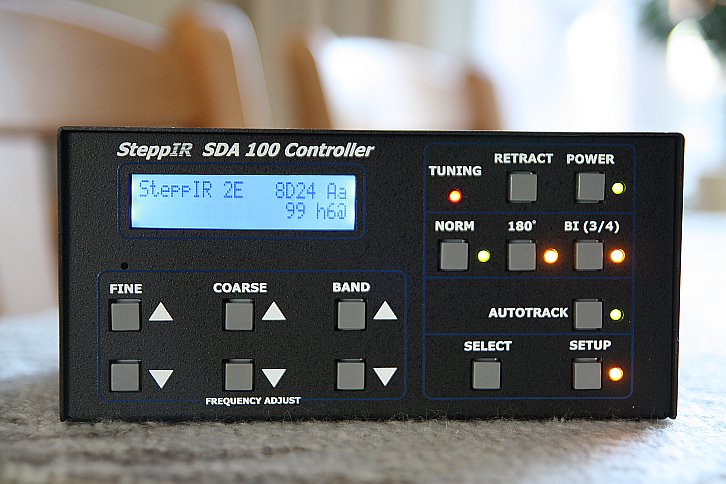
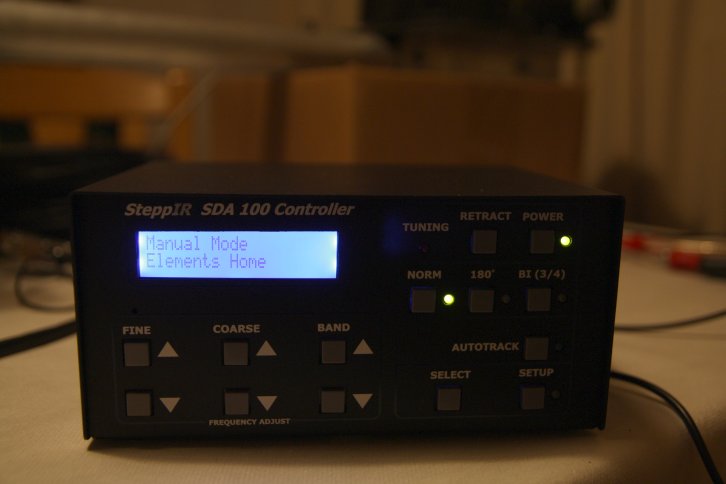
| The very 1st startup of the SDA 100: selftesting the software; antenna not connected | Ready to connect the antenna |
 |
 |
|
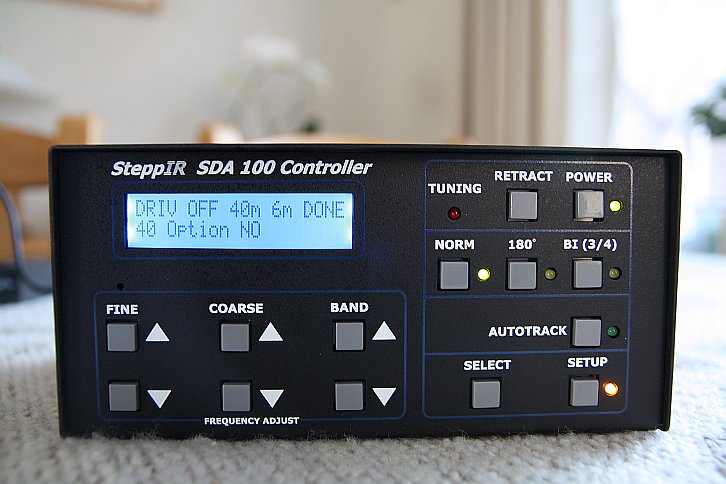
Setup
menu: to choose 40M and 6M-options
|
A nice duo: the FT-950 and SDA 100; Take some more weeks when they will work together |
|
|
|
 |
 |
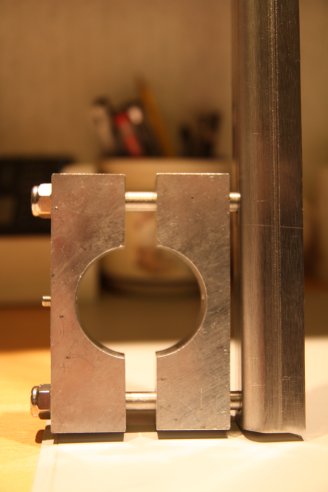
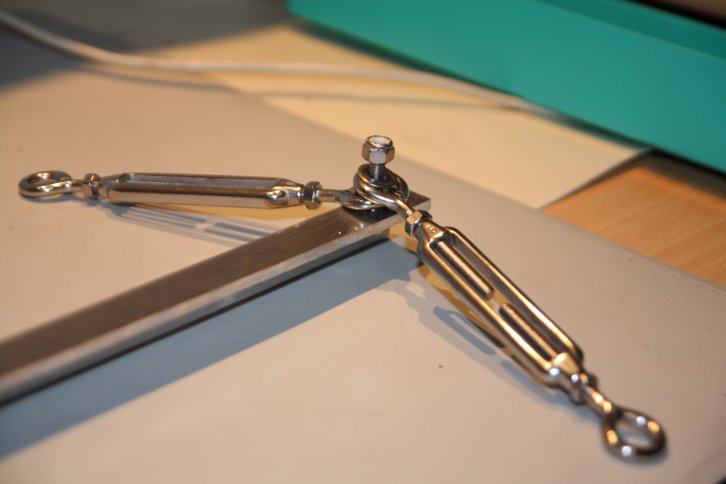
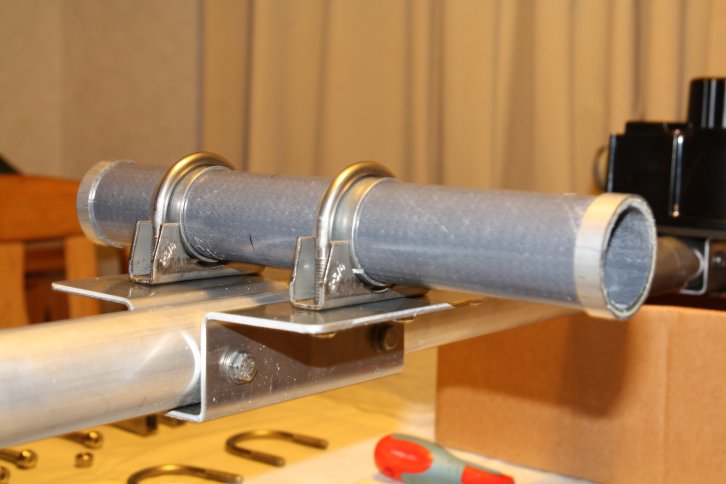
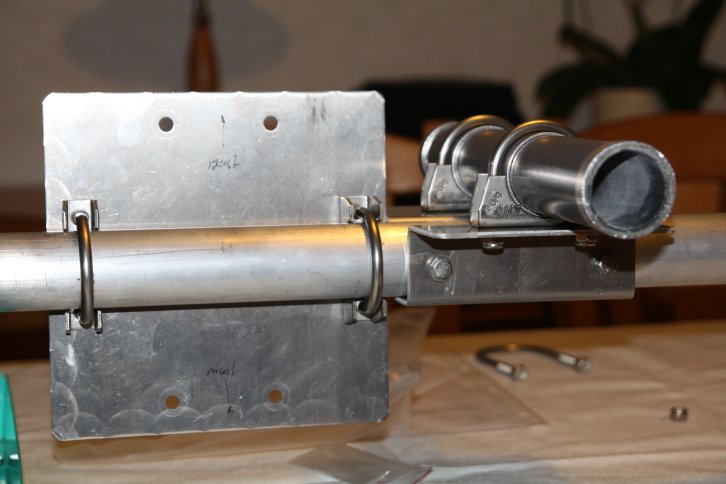
| All the parts of the trust together | Aluminium boomsaddles and turnbuckles |
 |
 |
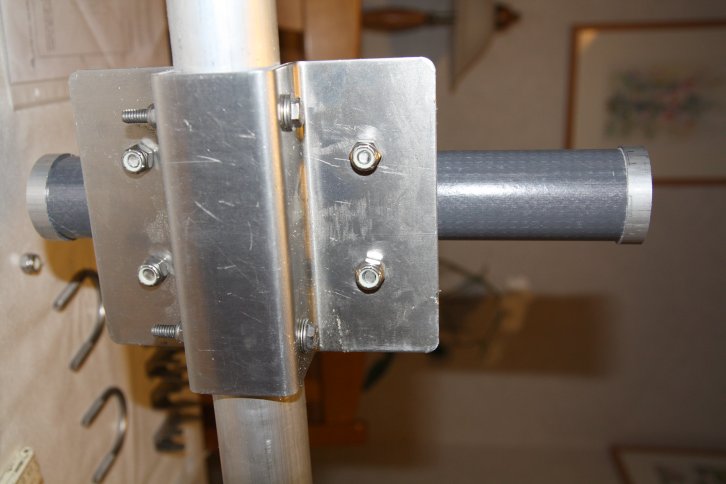
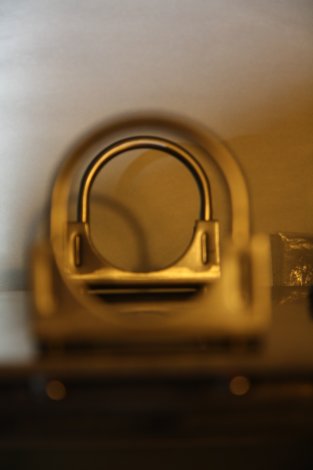
| Closeup of the Boomsaddles |
Closeup
of the turnbuckles
|
 |
 |
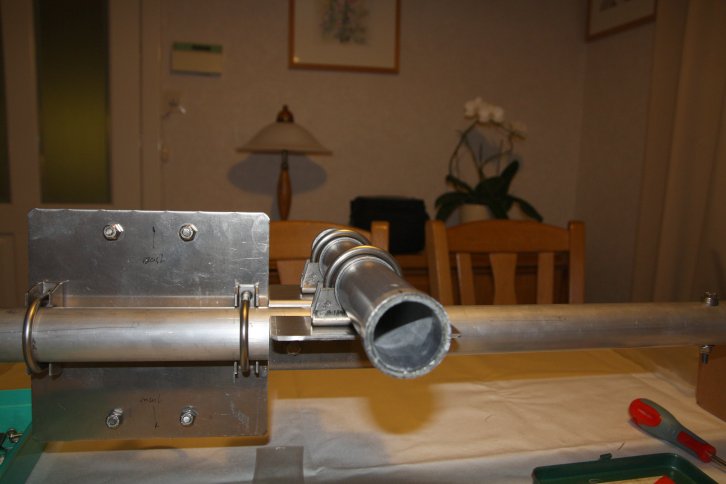
| Is'nt a beauty the EHU inside ? | Putting it all together: the EHU's on the boom |
 |
 |
| Don't overtighten the bolts !!! | The driver-EHU secured on the boom |
 |
 |
| Director-EHU waiting for his place on the boom |
Well
this more like a SteppIr
|
 |
 |
| The place for the ERT | Lining out the ERT precisly with the Driver-EHU |
 |
 |
| The bottomside of the ERT-plate | Mastplate between DrivEHU and ERT; with 6m place on the other side of the ERT |
 |
 |
| Looktrough of the mast U-bolts 2" | Place mastplate at other side of ERT when you place a 6M passive element |
 |
 |
| All EHU's and ERT nice in line on the boom | Another picture of the mastplate |
 |
 |
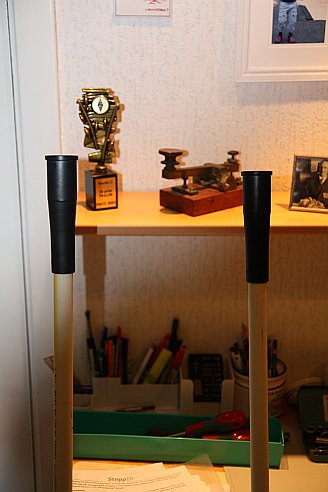
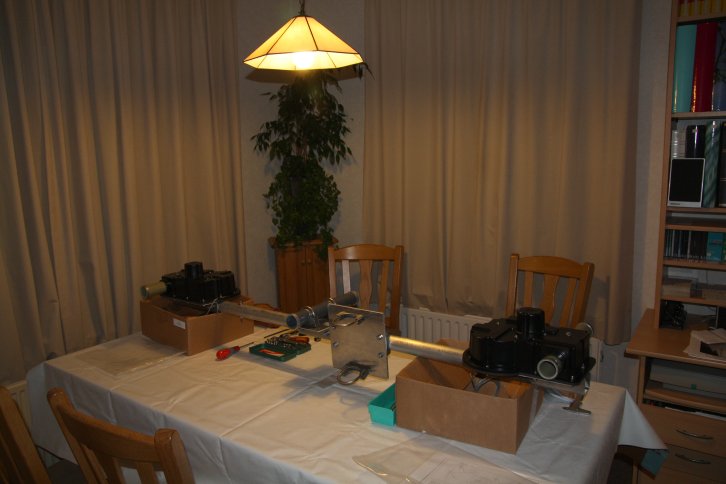
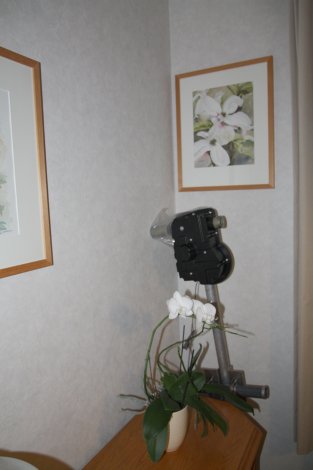
| The XYL's hobby and mine close together |
Waiting
in the corner of my room for the next steps coming week
|
 |
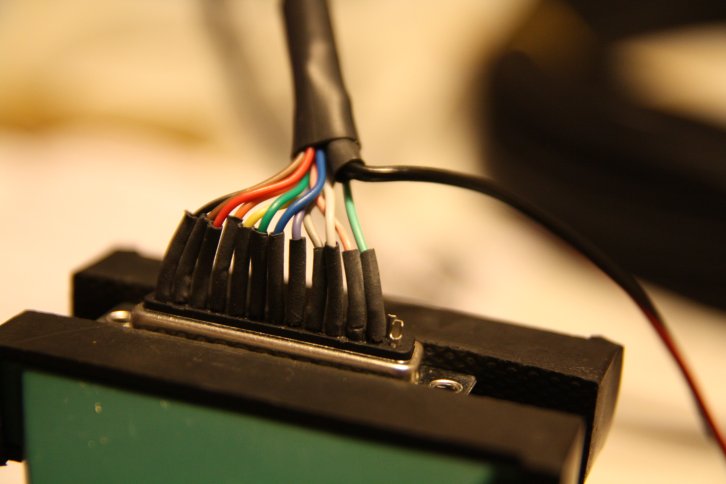 |
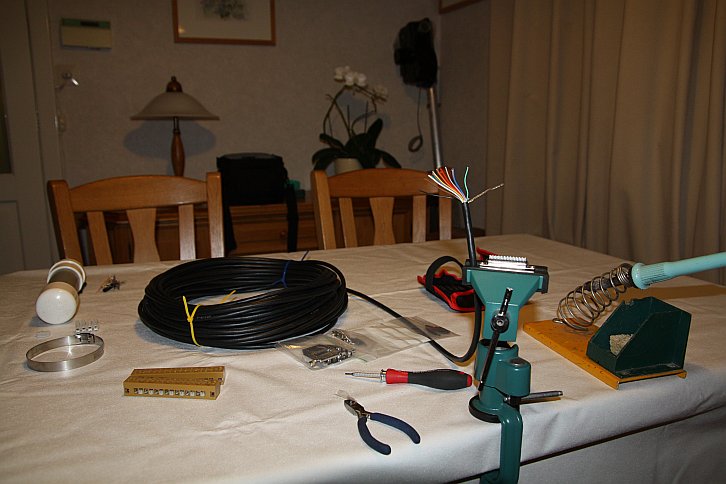
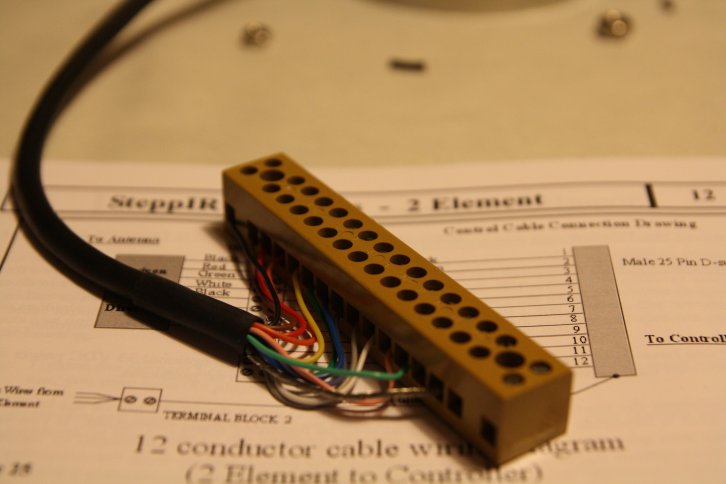
| Assembling the control-cable to the 25P-connector and terminal-block | Connect the 12 wires to the 25P D-connector and the screen to a groundwire |
 |
 |
| Connect the 12 colored wires to the terminal-block using the wiringdiagram |
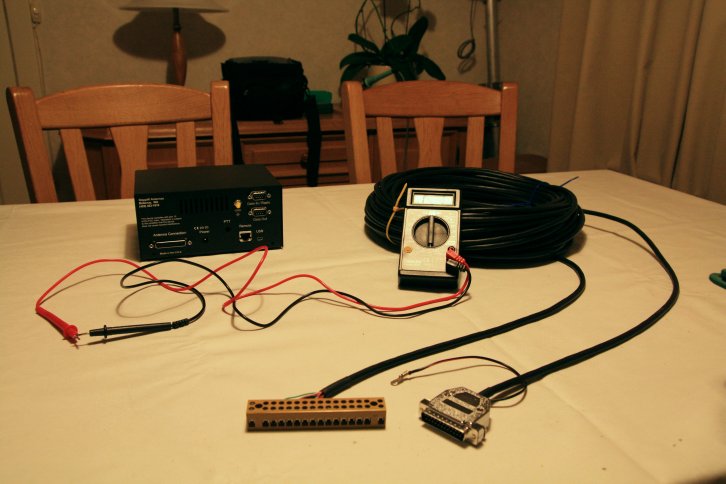
Test
wire by wire for connection and shortout with a Ohm-meter
|
 |
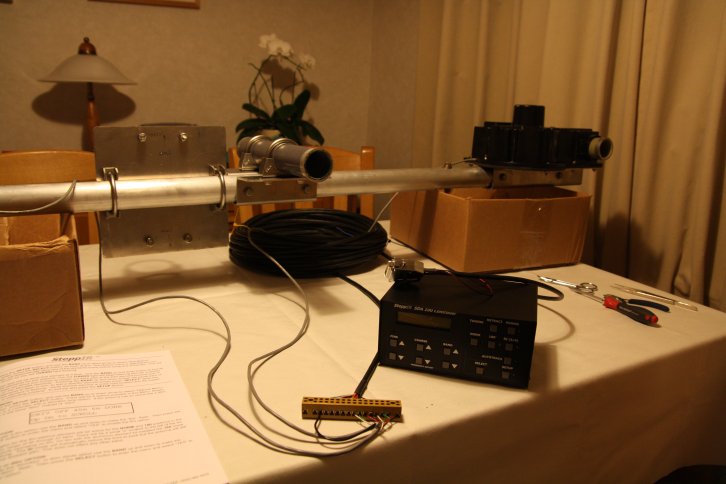 |
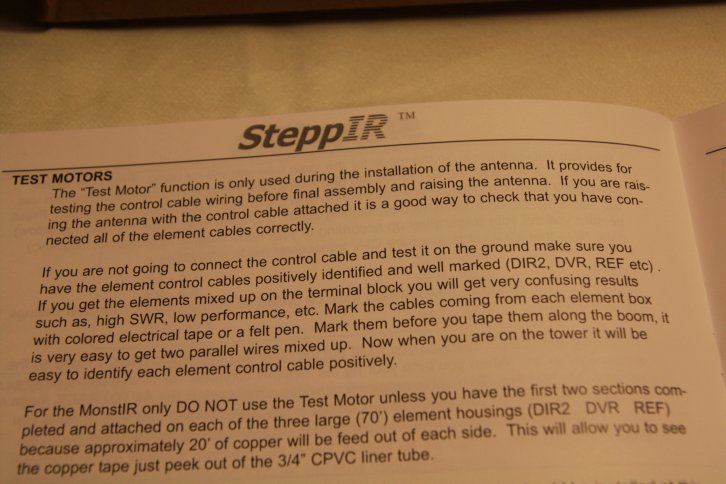
| Read the manual good, before using the "TEST MOTOR" option of the SDA100 | All ready for the Motor-test: 25P D-connector not connected |
 |
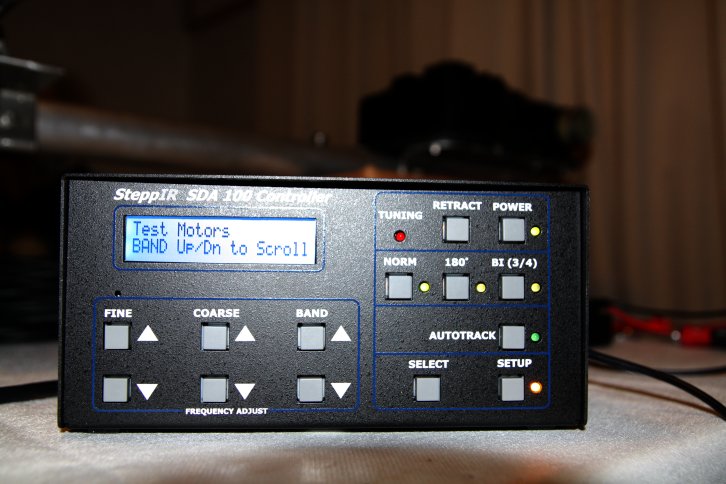 |
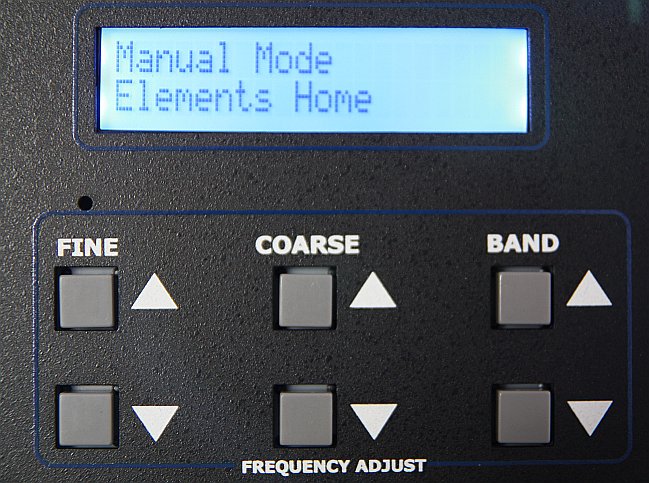
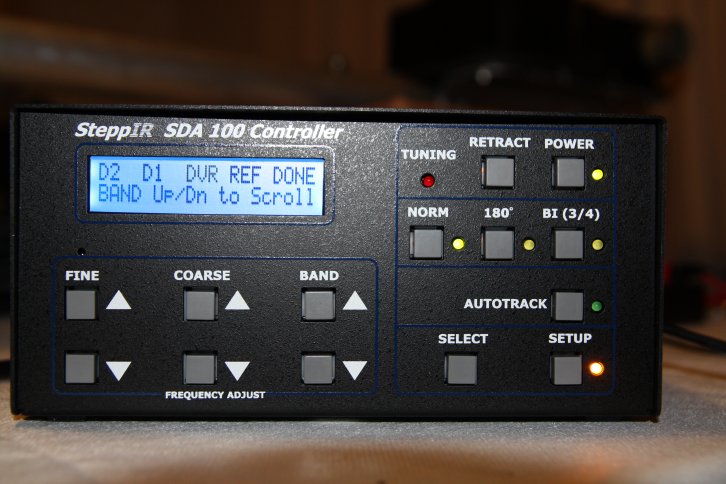
| Be sure the SDA 100-display shows this before connecting the 25P D-connector; switch off | Connect the 25P D-coonector . switch on and push "Setup" and scroll to "Test Motors" |
 |
 |
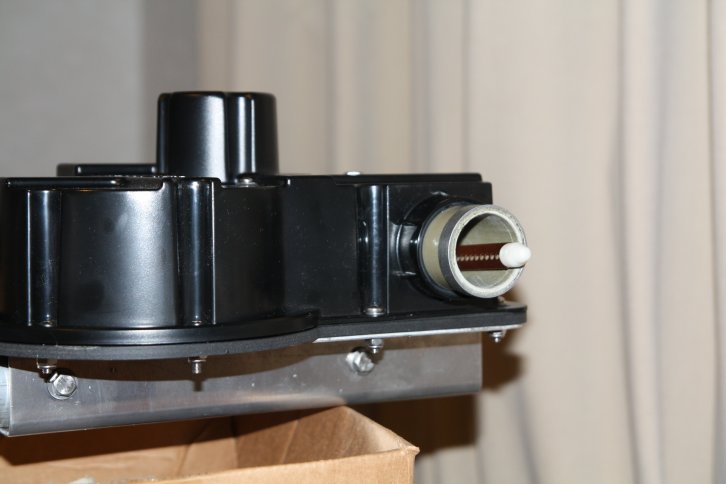
| Choose "D1"or "DVR" wich motor you will be testing | Driver-copper is extending out for almost 10cm |
 |
 |
|
Director-copper
is extending out for almost 10cm
|
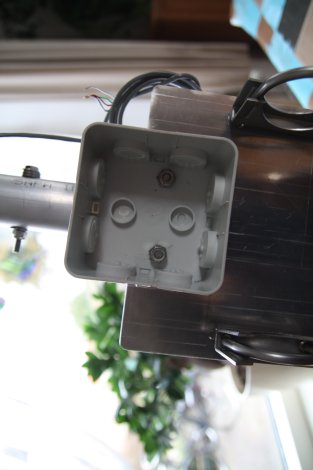
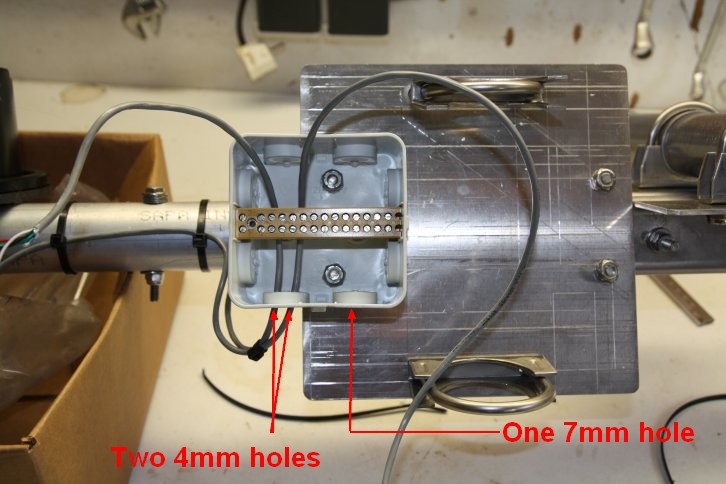
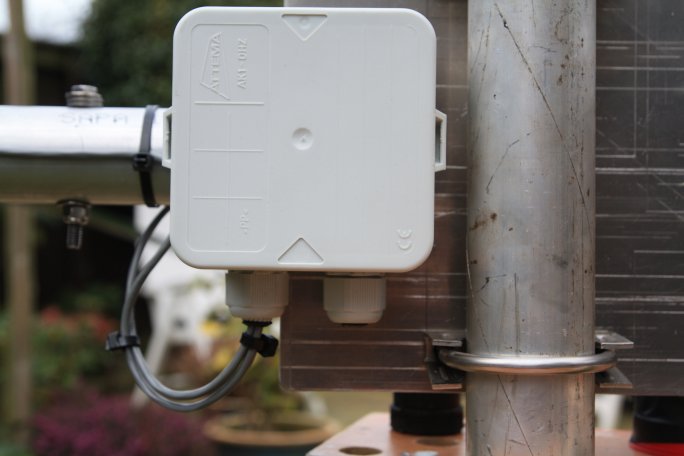
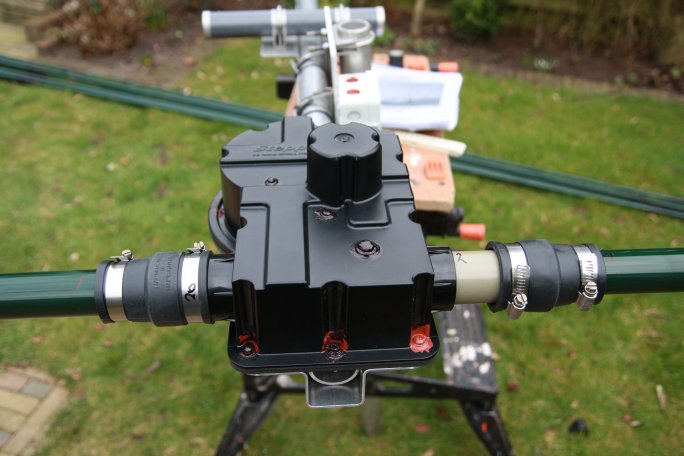
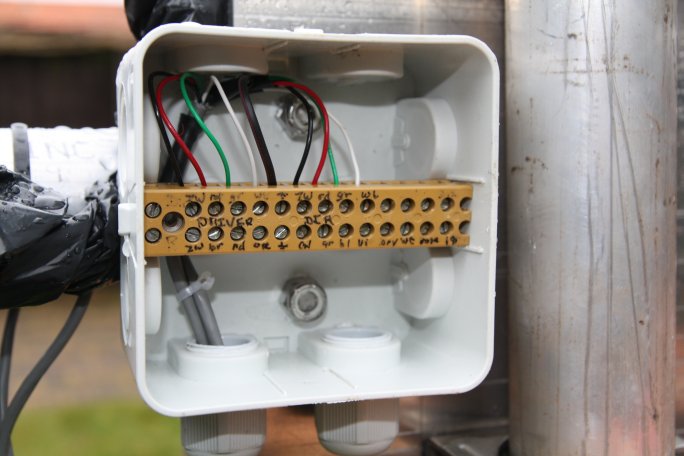
My replacement of the terminalblock-box |
 |
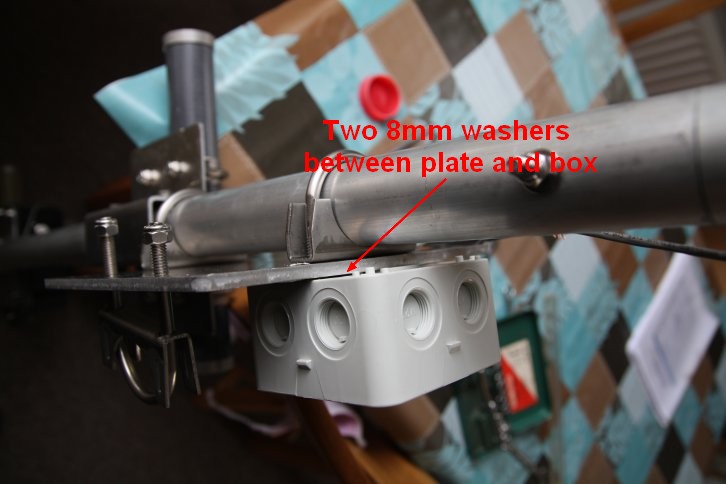 |
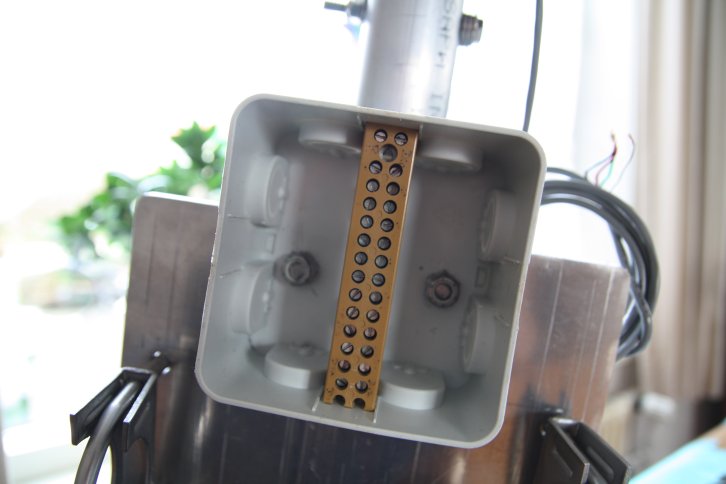
| I modified a 16P terminal-block to fit precisly in the watertight box | You need to place a 8mm flat washer on the U-bolts between the mastplate and box |
 |
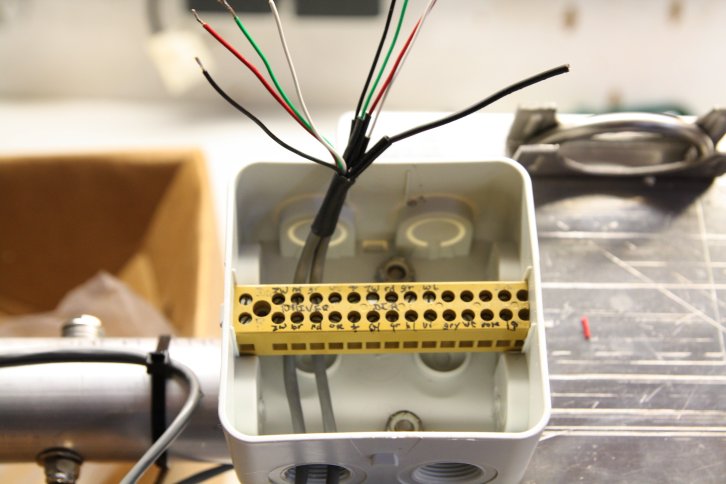 |
| Two 4mm holes at the left for the EHUcontrol cables,7mm hole at the right for controlcable | Preparing the wires with soldering at the tips and crimping sleeves |
 |
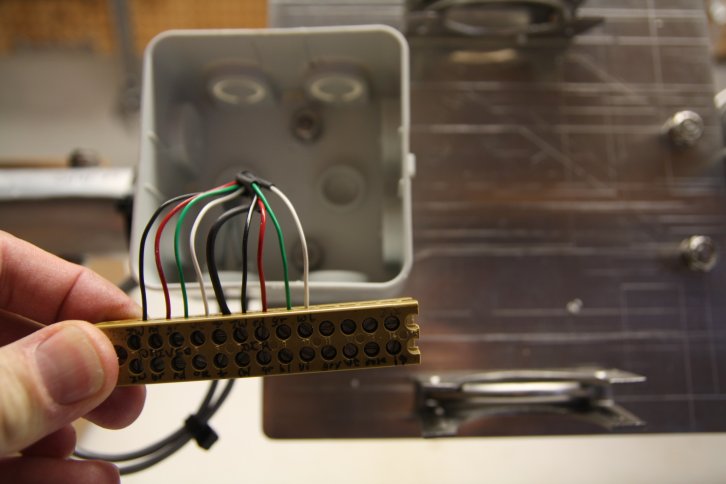 |
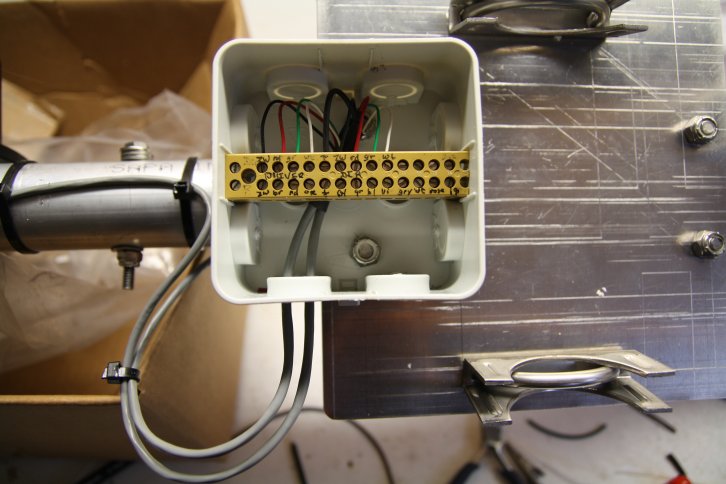
| EHU-controlcables connected; (screen in the middle) and with tieribs secured to the boom | It can be easily removed, to loosen or tighten the nuts of the U-bolts for the mastplate |
 |
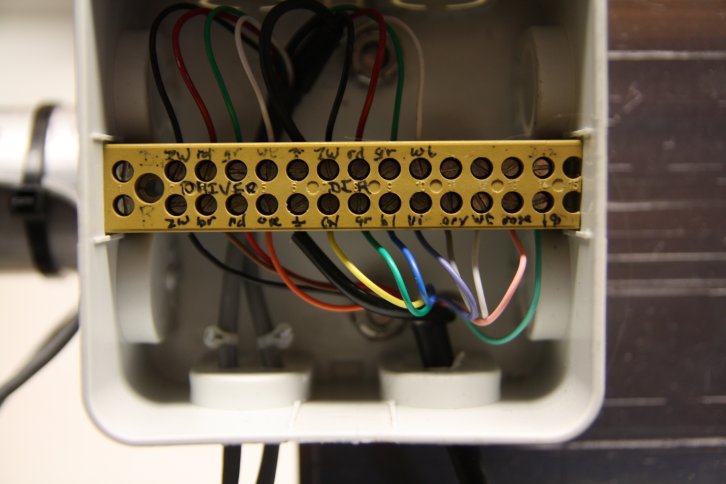 |
| Connection-box closed and watertight | 12P Controlcable connected; groundingwire at pin 6 |
 |
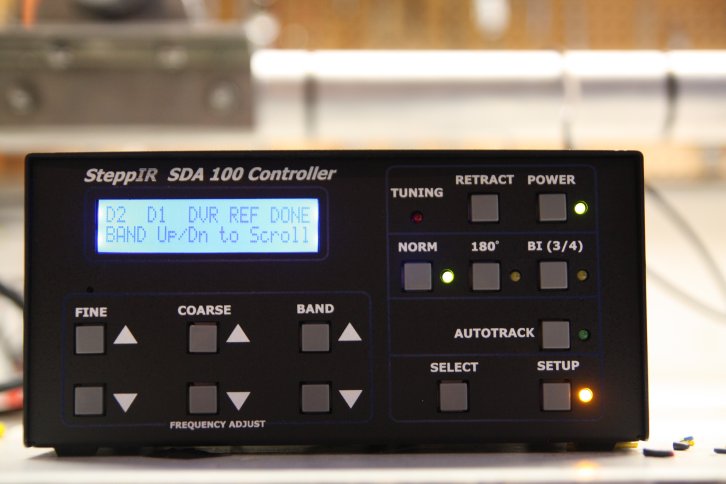 |
| 25P D-Connector and groundwire connected under a extra nut | SDA 100 in "Test Motor" menu |
   |
   |
| Driver coppertape extending from the EHU-tube |
Director
coppertape extending from the EHU-tube
|
 |
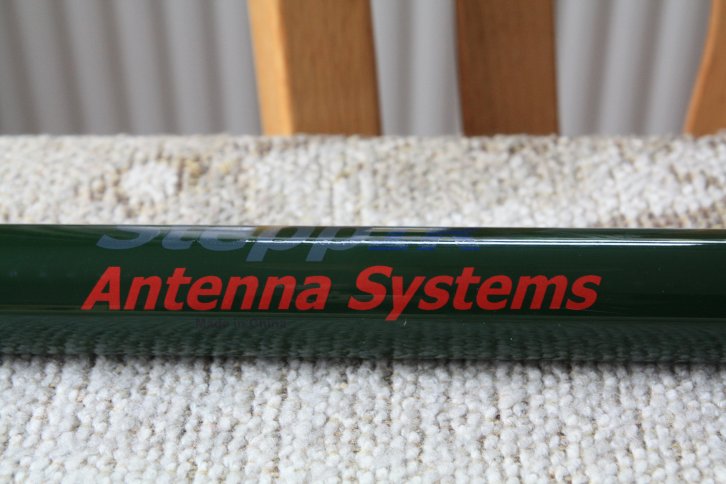 |
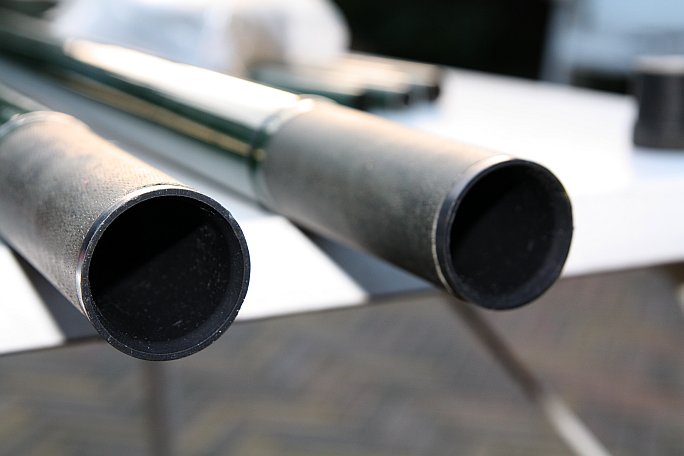
| CPVC-tubes ready to be glued in the couplers and divertercones | SteppIr Antenna Systems The Best |
 |
 |
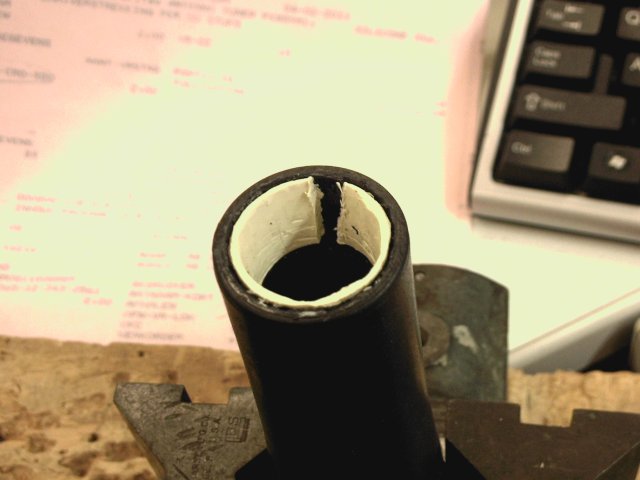
| Divertercone | Glued the wrong (longest) into the divertercones |
 |
 |
| CPVC glued into the coupler | I must cut-off the CPVC with a saw (how to get out that piece of CPVC ??) HELP ME !!!! |
| Thanks so much for all your help in the Yahoo-Group for the SteppIr | |
 |
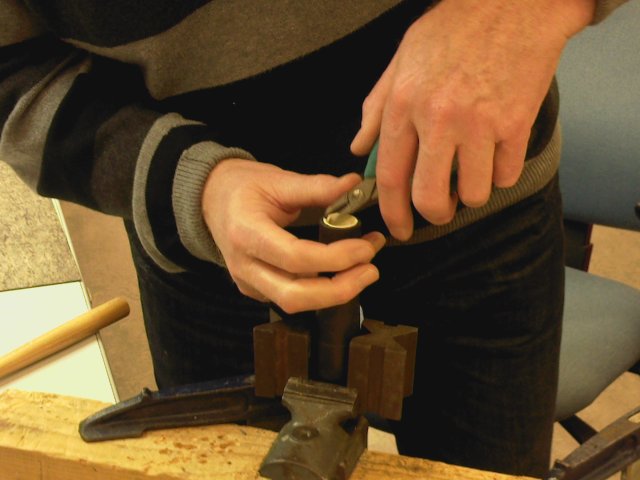 |
| Collega Karel knows how to handle this problem | With lots of patience and good tools it can be done |
 |
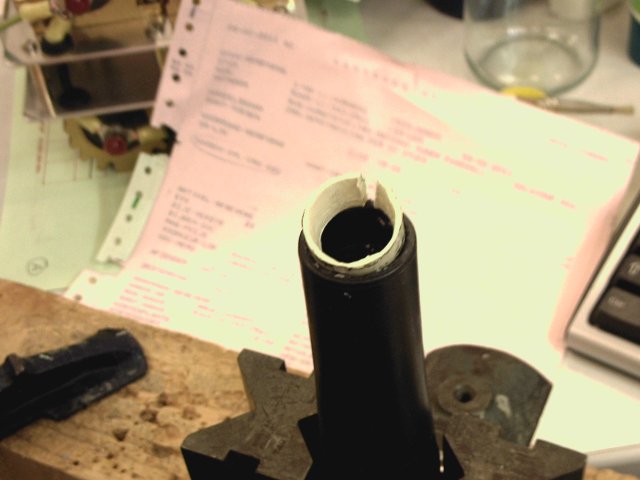 |
| Almost finished to separate the CPVC from the divertercone | There it is; a finishing touch and I can start it all over again, hi !!! |
 |
 |
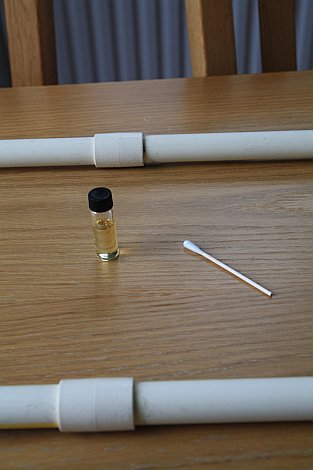
| Always glue CPVC-connector first | Please mark the shortest CPVC for divertercones |
 |
 |
| You can see the CPVC will fit in the GFP |
Divertercones
now glued on the right CPVC hi hi
|
 |
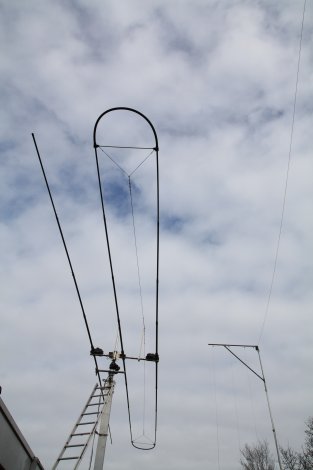
 |
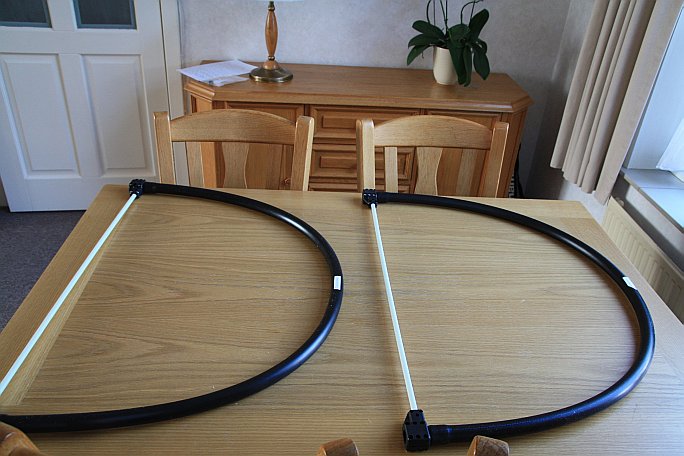
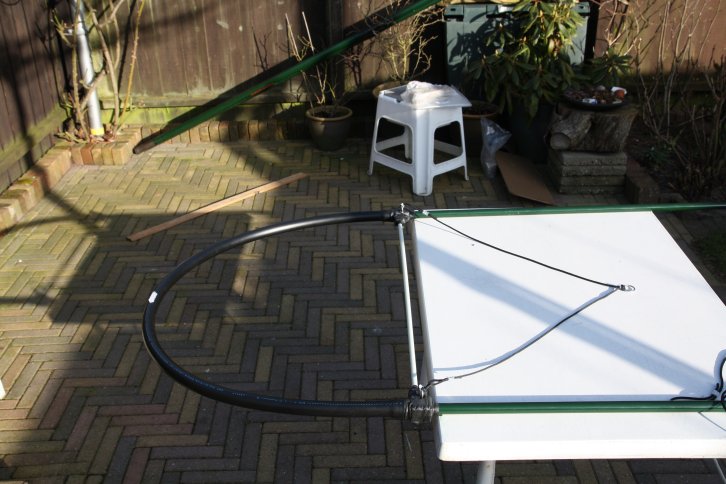
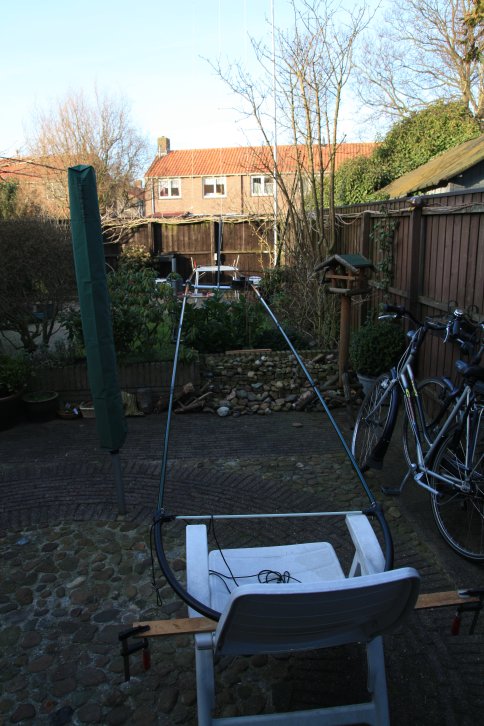
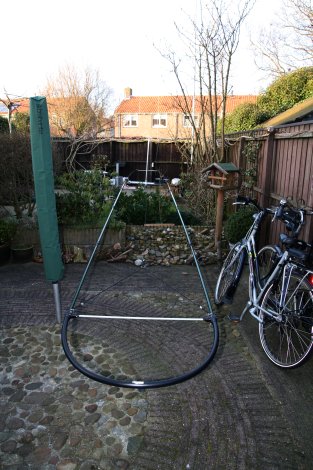
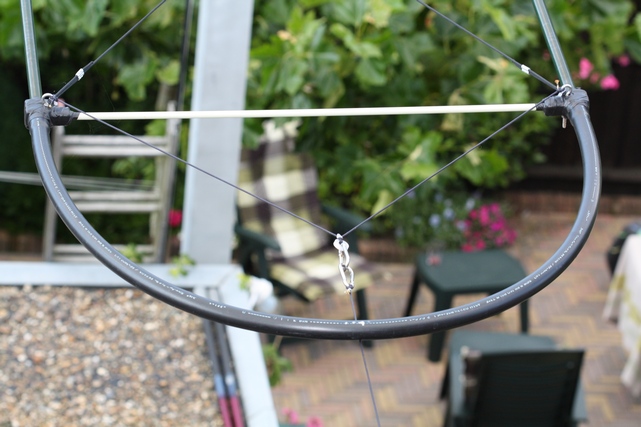
| The two loops tested for this moment | Measureribbon and the GFP's |
 |
 |
| Aligned GFP's B4 assemblage | Finally nice weather to go further with the SteppIr |
 |
 |
| All GFP extracted as long as possible | First connection of all GFP |
 |
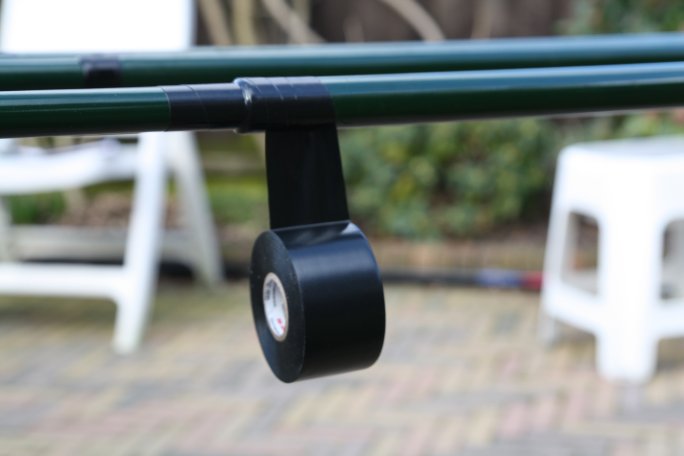 |
| GFP's not all of the same lenght | Taping the GFP instead of glueing, Thats The Big Quistion !!!! |
 |
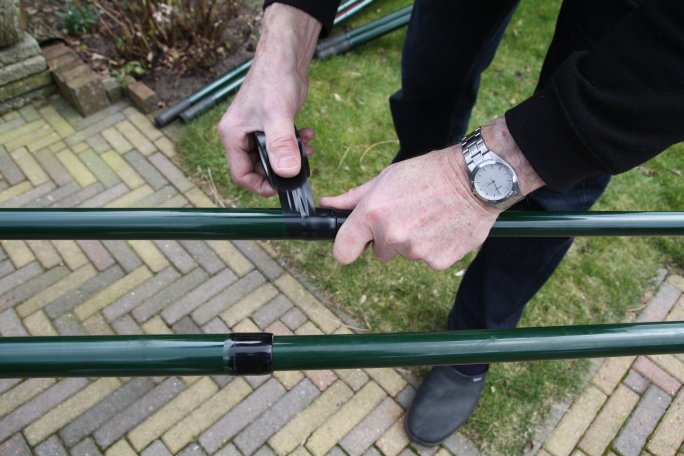 |
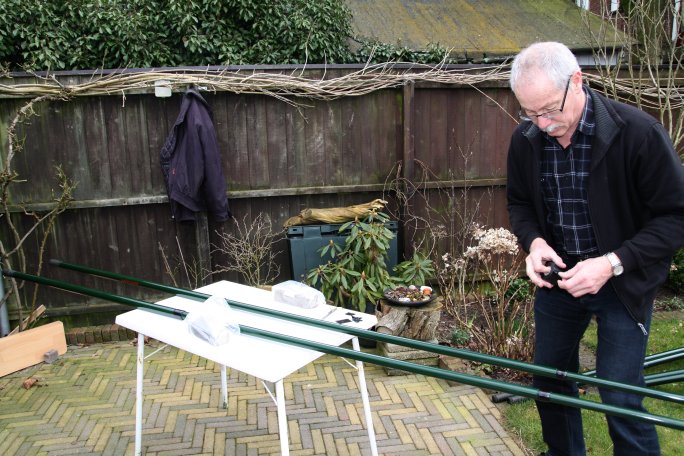
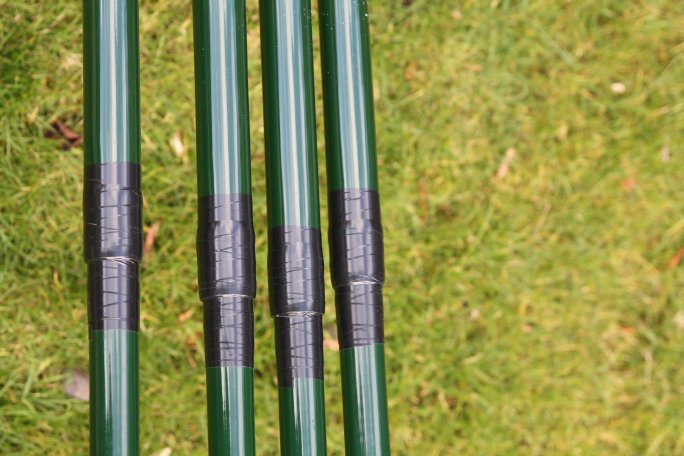
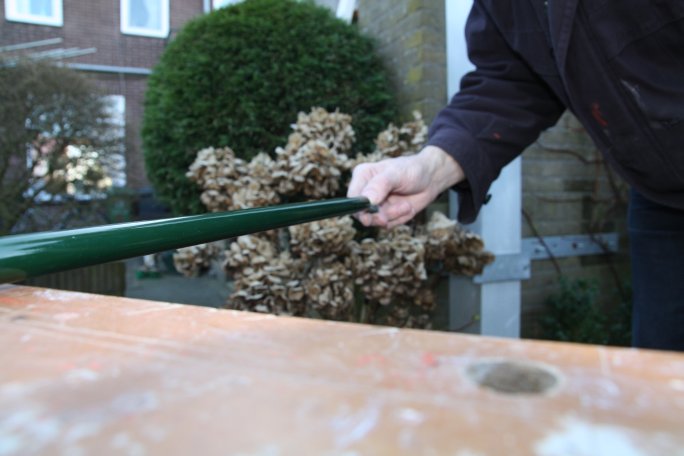
| PA2JJB taping the GFP's | Stretching the tape to half of the widht |
 |
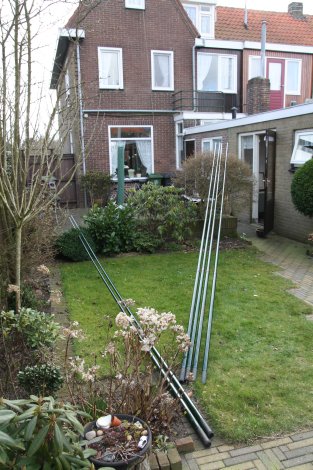 |
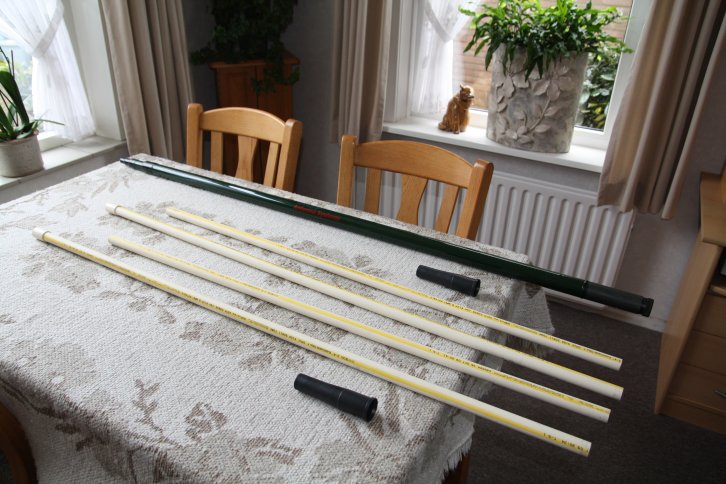
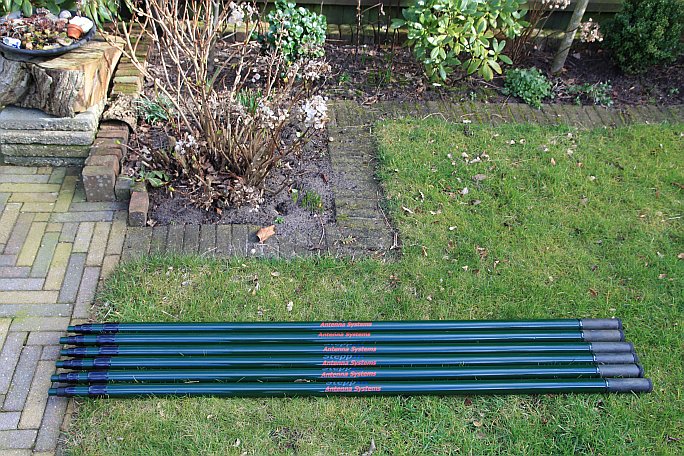
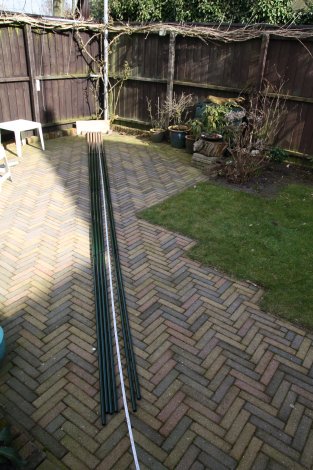
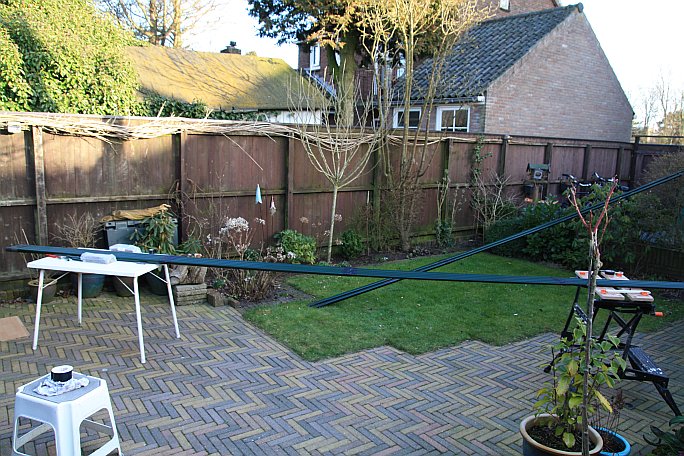
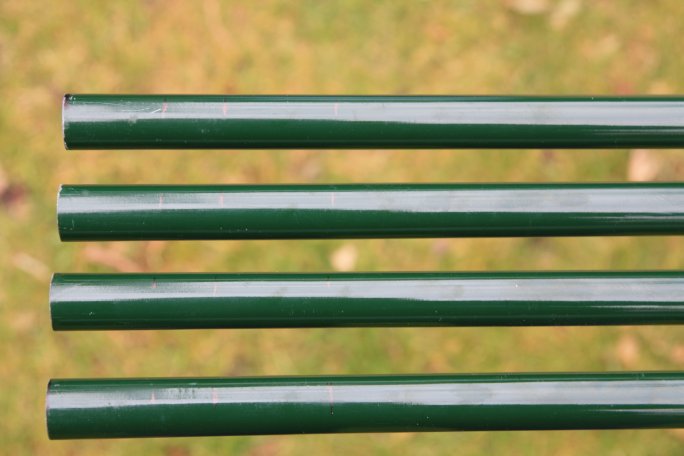
| The four poles for the trombone | All poles taped, garden still in wintersleep |
 |
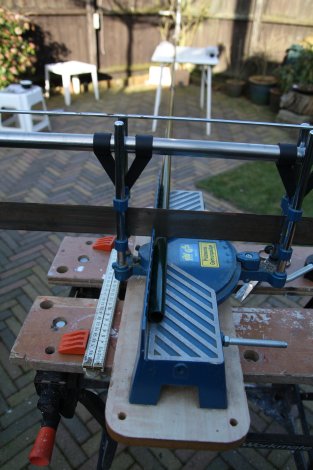 |
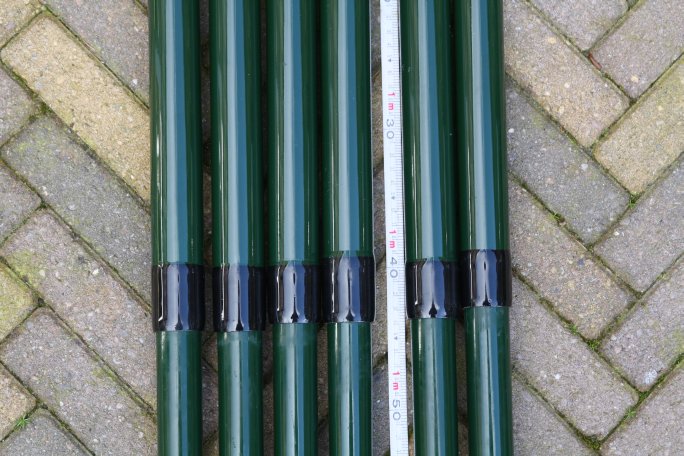
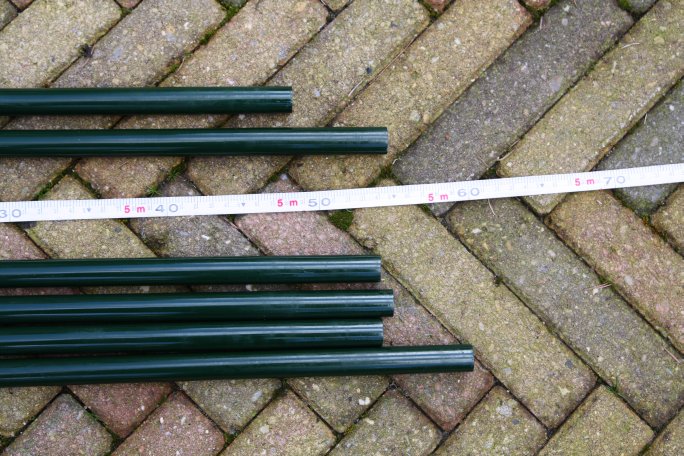
| GFP's need to be cut to 213"or 541cm; Tape it first B4 cut it with the saw !!! | Right tools for the right cut |
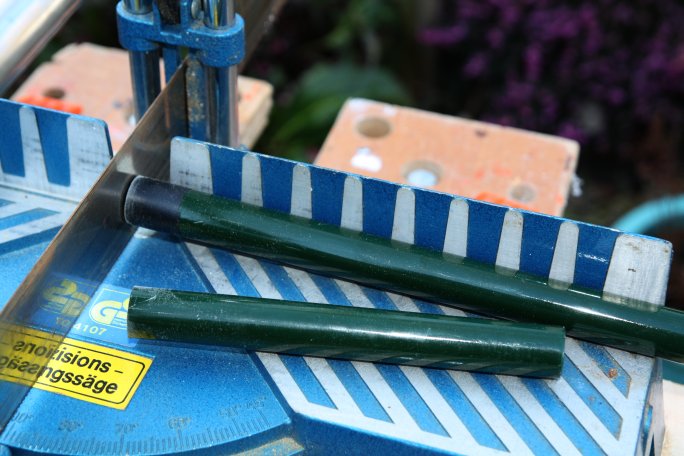 |
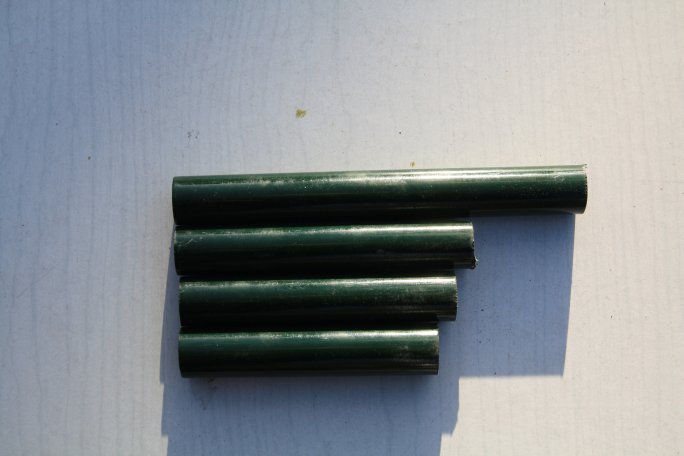 |
| The first cutoff | 4 Different lenghts |
 |
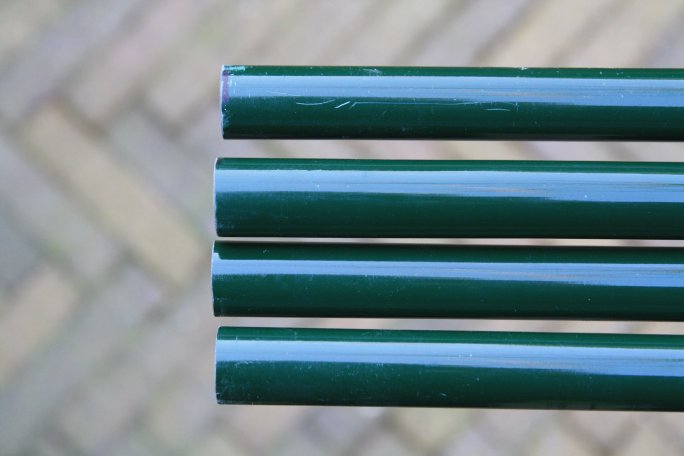 |
| Finishing touch with very fine sandpaper | All GFP's 213" or 541cm |
 |
 |
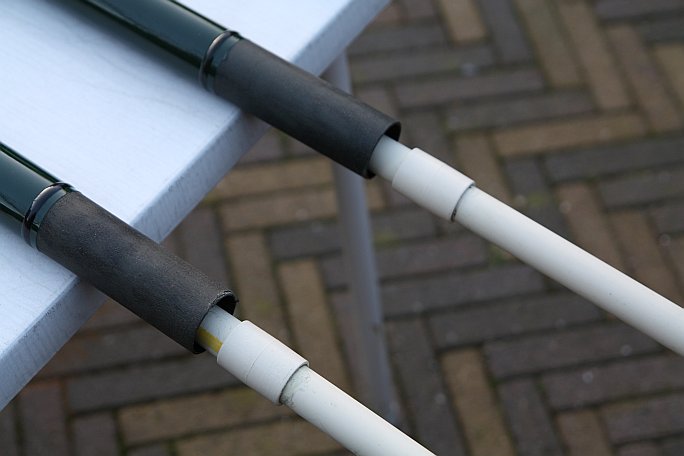
| Need these more tape or shrinking sleeves??? | It was a very nice day tot assemble the SteppIr (05-03-11) |
 |
 |
| Testing if the CPVC's fit well in the GFP's | Fits both very nice !! |
 |
 |
| As you can see: the divertcone fits perfect in the GFP | Attaching the loop for testing: looks OK though |
 |
 |
| Closer view of the loop | The
boom and steppermotors readuy for the GFK's. XYL testing the length hi
hi |
 |
 |
| GFP's of the director in the EHU | QDB's installed for testing |
 |
 |
| Two waterproof inlets for my connectionbox | I kit all the bolts for security |
 |
 |
|
Mark
the QDB's for easyer assembling in the mast
|
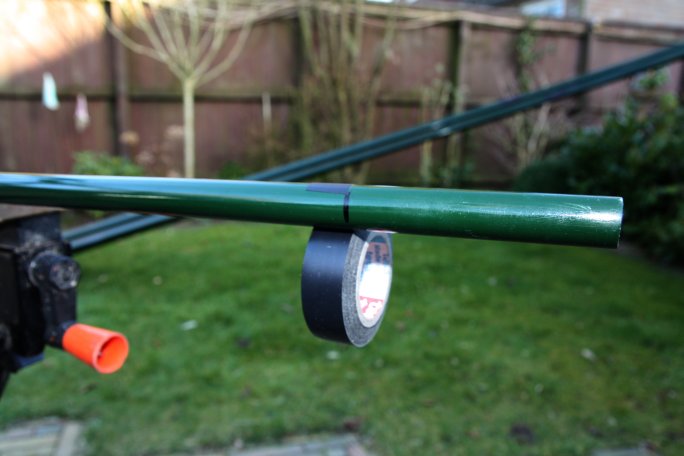
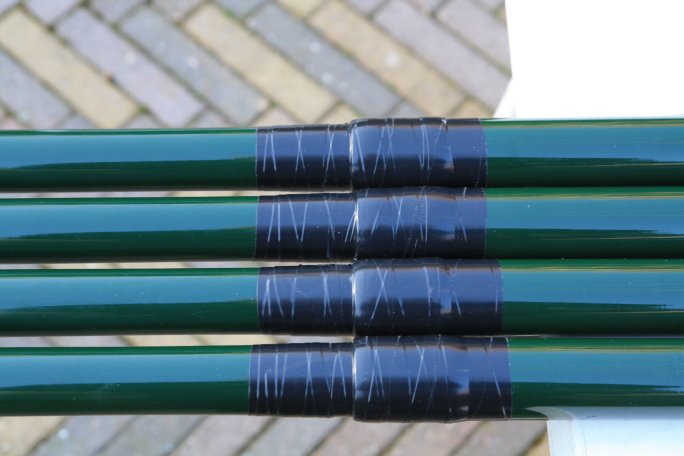
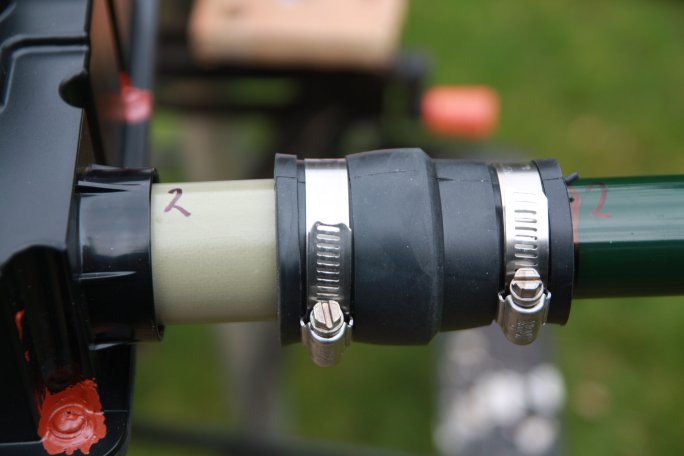
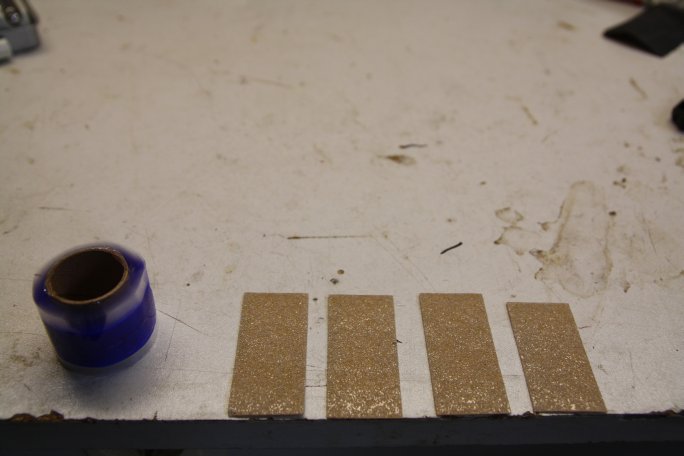
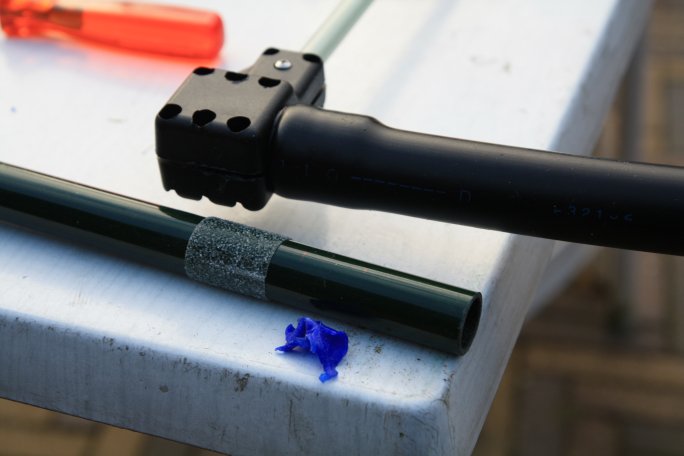
The blue PVC-tape and adhesive griptape |
 |
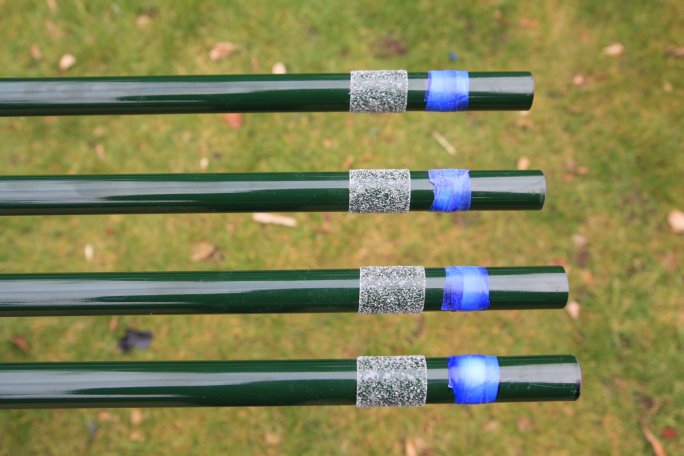 |
| Mark the poles for the blue and griptape | griptape and PVC-tape in place |
 |
 |
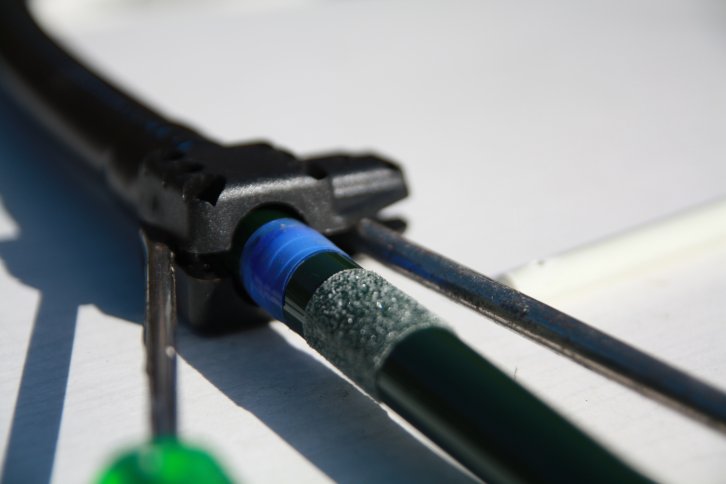
| Just trying out | Aligning up the GFP's |
 |
 |
| Its very difficult to push it in the loop (take care) | 213" or 541cm are very long poles hi |
 |
 |
| Thought this was wrong but a second time was also very difficult tp press it together | Can't press enough with the bolts (need some new ones with normal heads) |
 |
 |
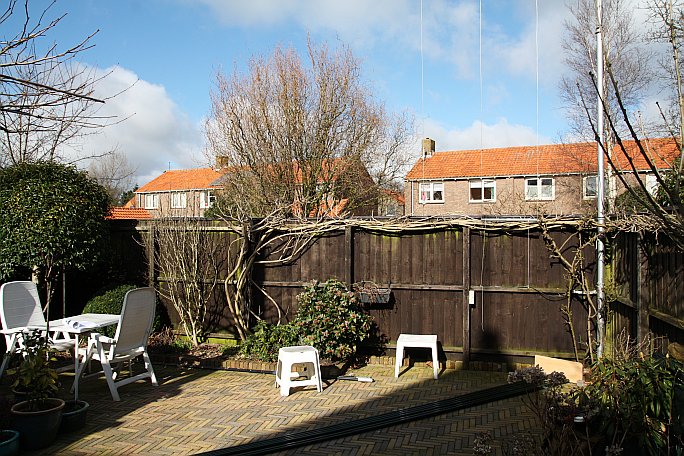
| We'll enough for today; tomorrow is another day | Making place in my garden for the second one ; is this a BigSteppIr hi hi ??? |
 |
 |
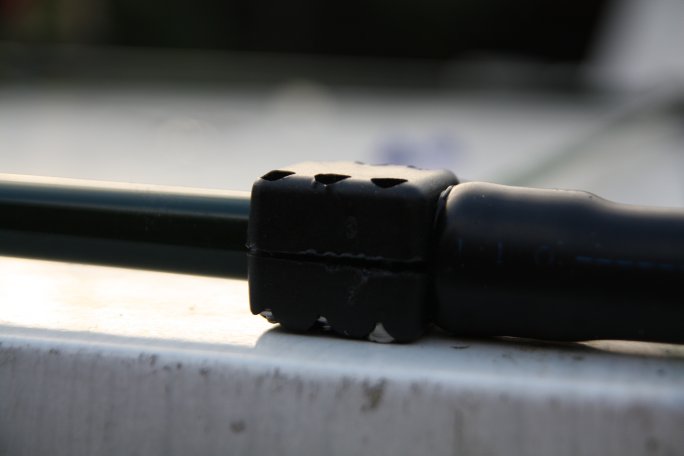
| Using two srewdrivers to open it enough | This must do it |
 |
 |
| The XYL and I must push very hard to get it in | Both couplers did well, but very open !!! |
 |
 |
| Save your fingertips, use a small blade of a screwdriver | Put in the eyebolts, but for the draconrope it must not already be installed |
 |
 |
| Thigten the screws, bit by bit, and the coupler will be neat closing |
My
XYL her passion and hobby: painting and ceramic
|
 |
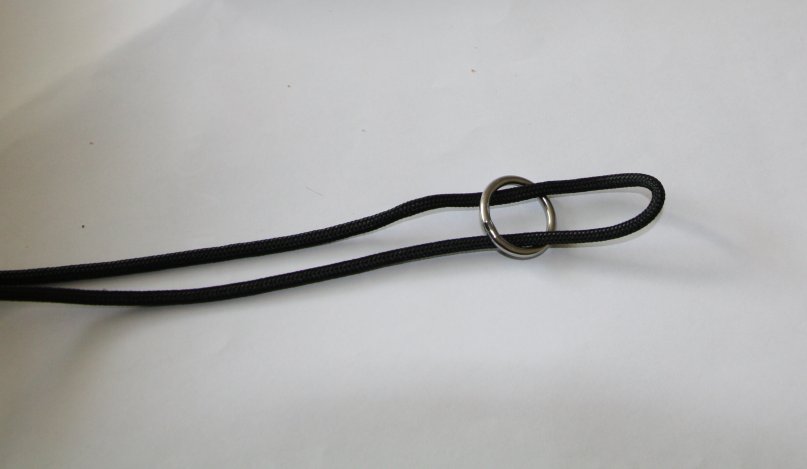 |
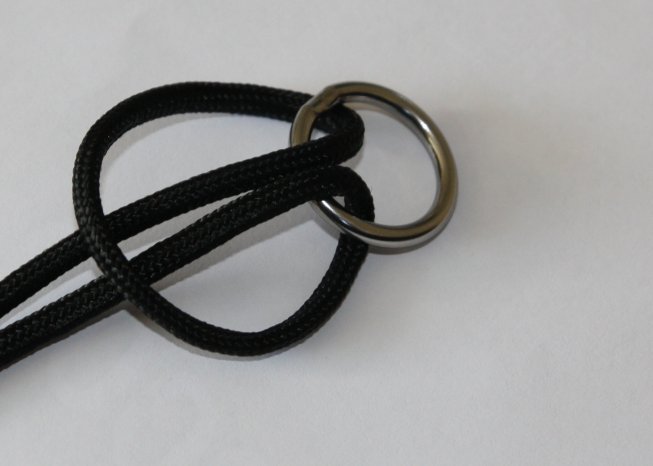
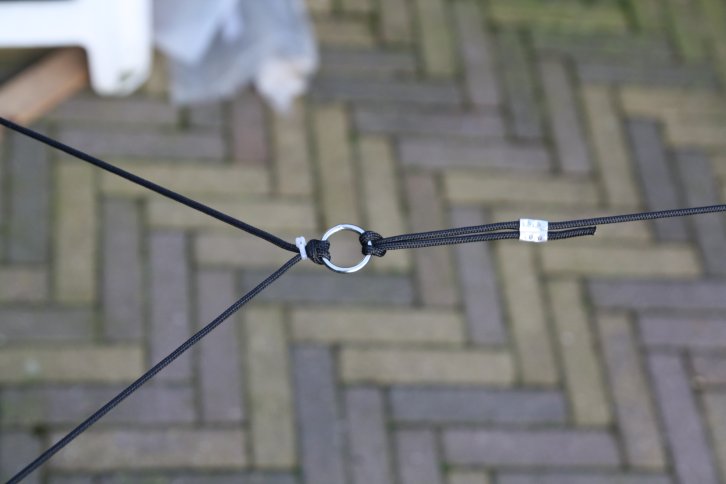
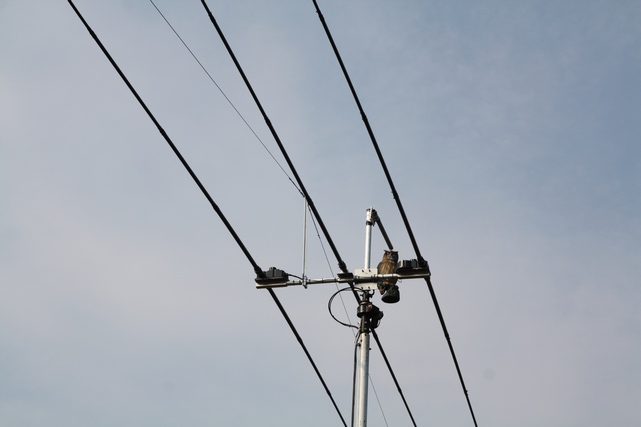
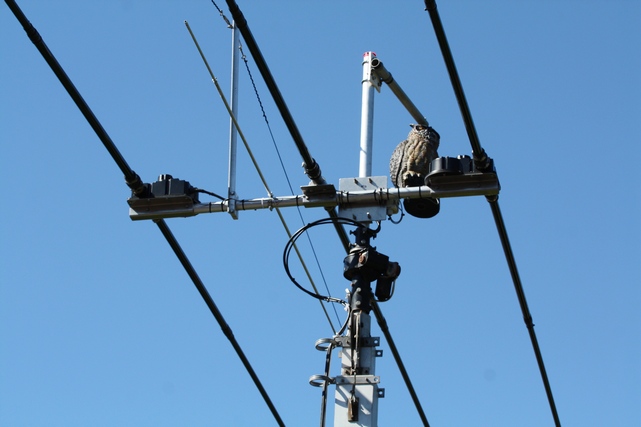
| Seems the birds find my SteppIr already hi hi | How to loop the dracon-rope trough the SSring |
 |
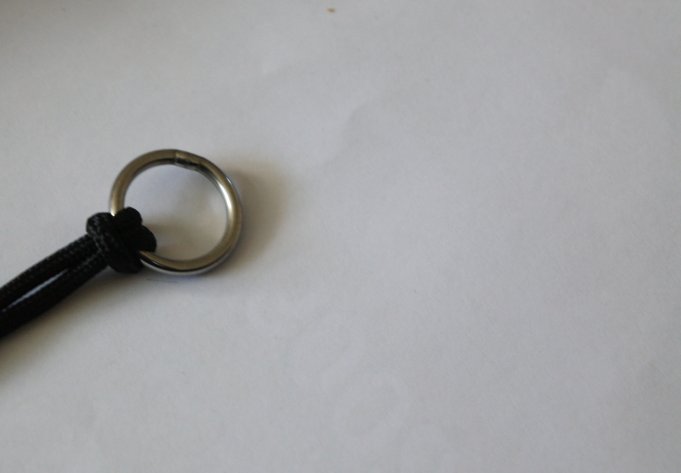 |
| Each end at his side | Pull it very hard to make a tight knot |
 |
 |
| How to connect the dracon-rope to the 4 eyebolts | Taped the coupler to prevent any moisture |
 |
 |
| The wires ready to be connected | This must give the trombone his strenght |
 |
 |
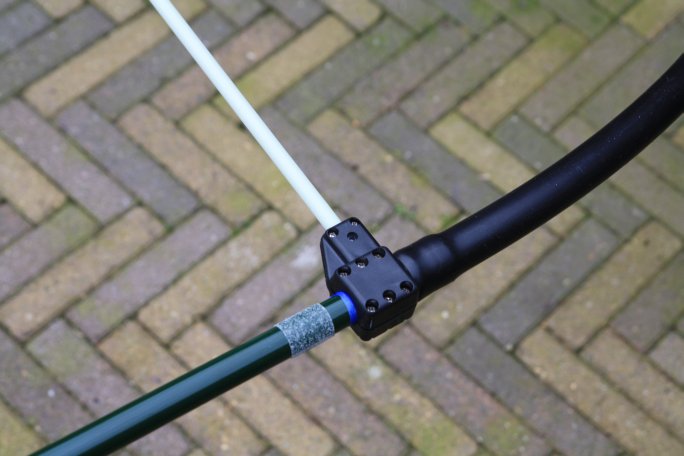
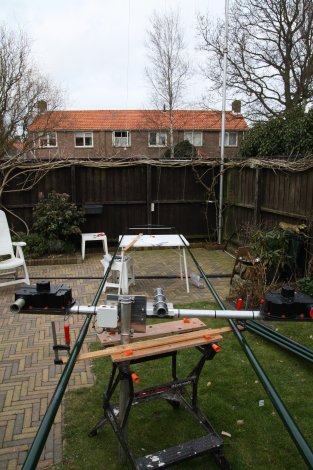
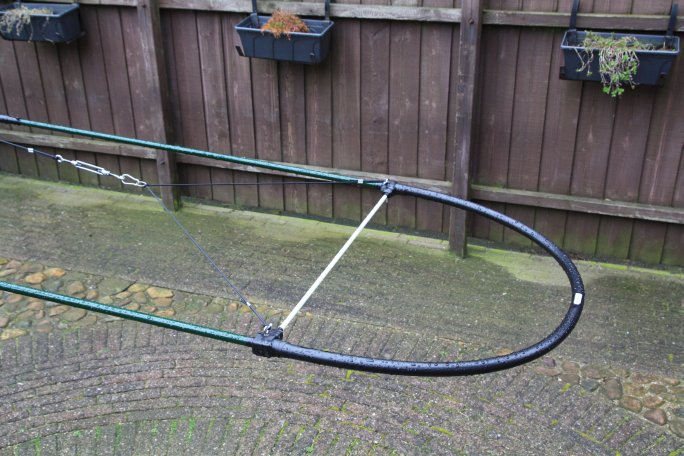
| The truss support placed on the boom | It's a long way to the end off the trombone hi hi |
 |
 |
| Really nice antenna-weather today 110311 | The end still supported by the table |
 |
 |
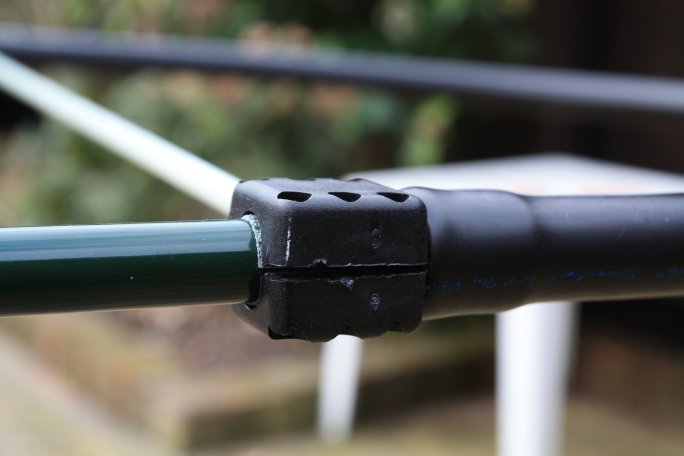
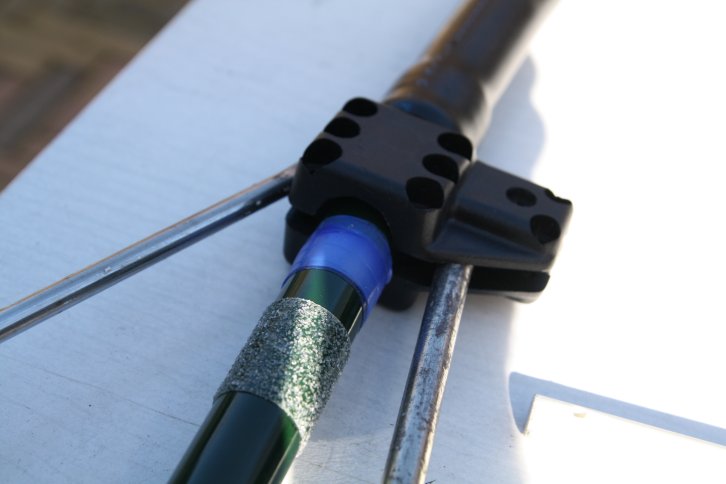
| Turnout the turnbuckle to his full length as possible | Trust-saddles in the middle between EHU and ERT; I marked it |
 |
 |
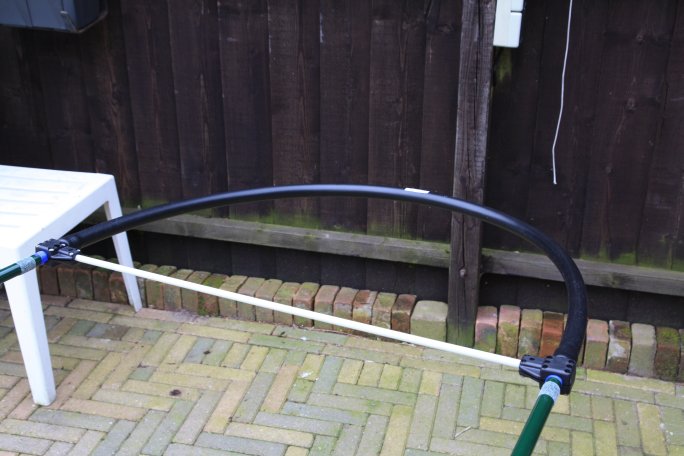
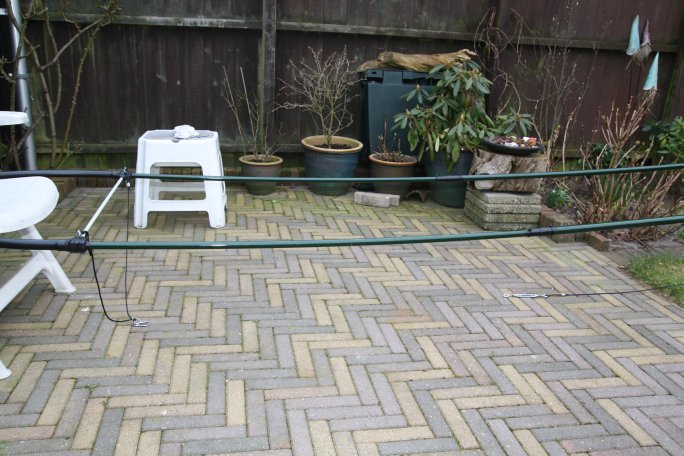
| 11,88M Lenght of the trombone | One half off the dipole connected to the trust |
 |
 |
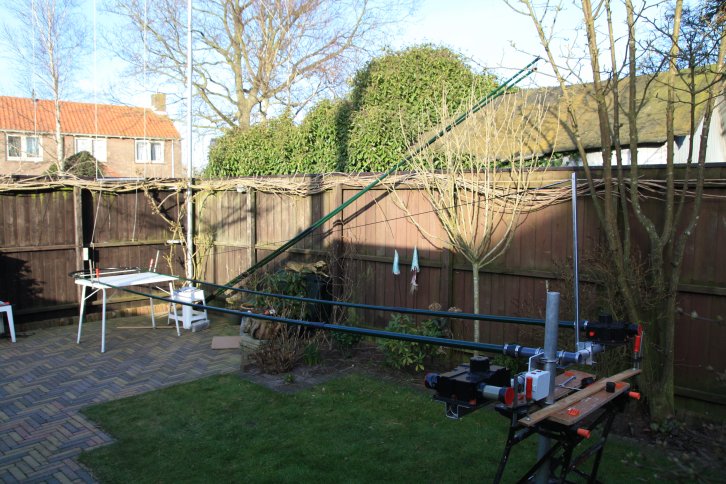
| Another view | The
other side of the trombone |
 |
 |
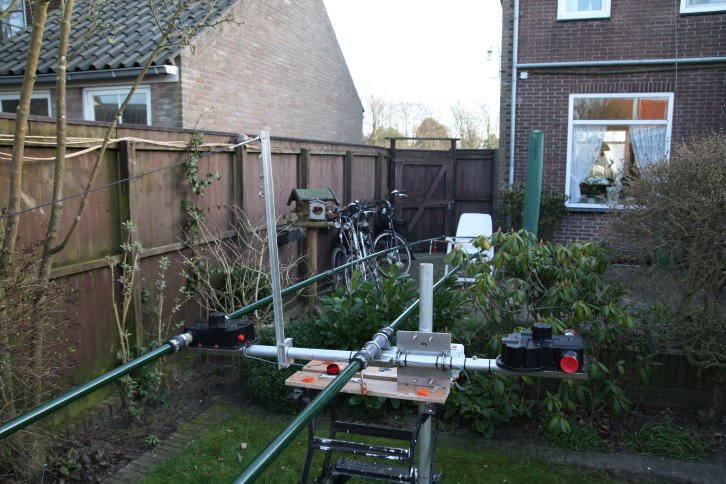
| Rotor waiting for his SteppIr | The trombone in perfect balance |
 |
 |
| Enough for today | Make at both sides a extra turnbucle |
 |
 |
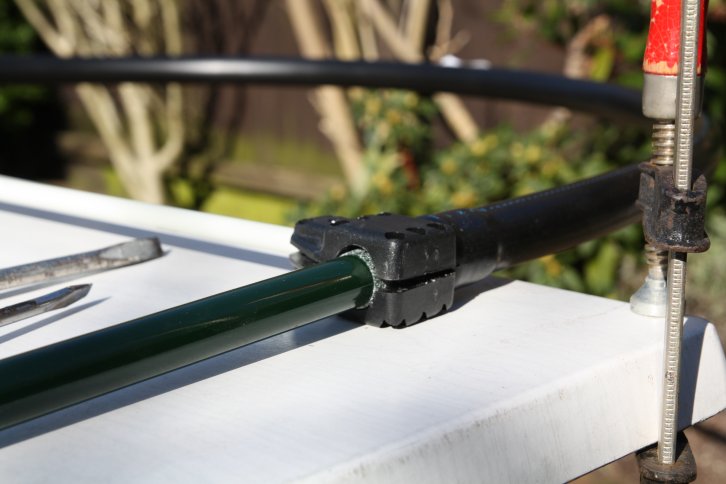
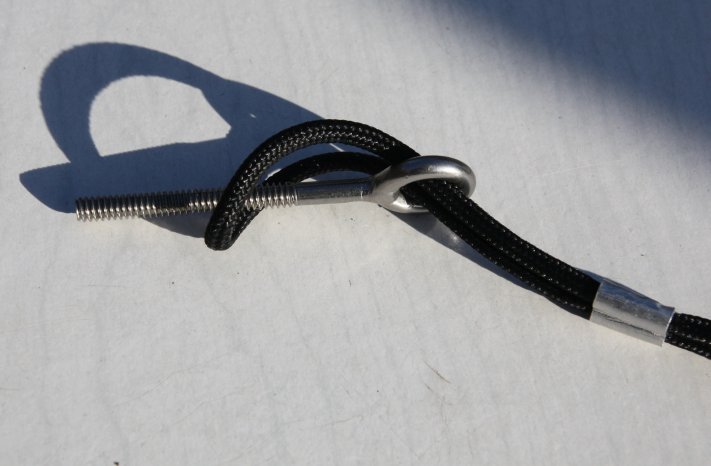
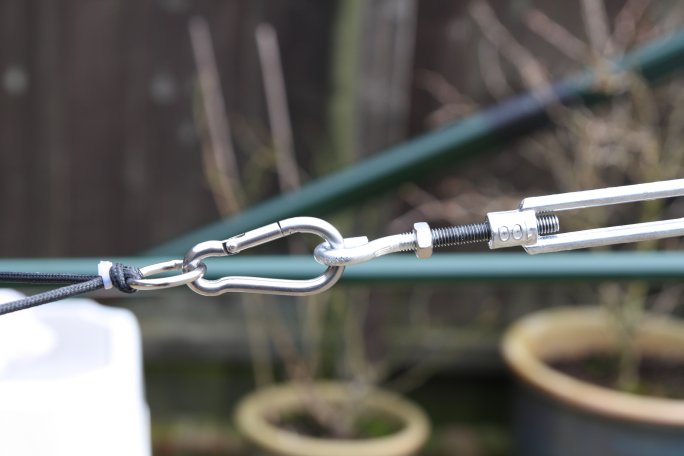
| With this system I can easily disconnect the dracon-rope and disconnect the EHT's | Perfect inline both dracon-ropes |
 |
 |
| Crimp
the eye off the turnbuckle in a vice, so that it can't come out
|
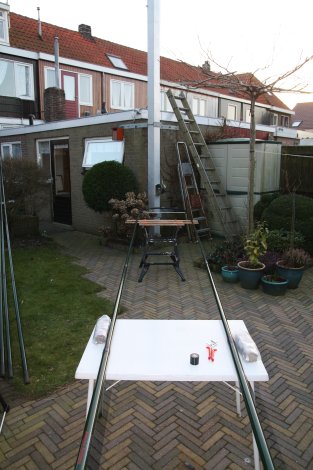
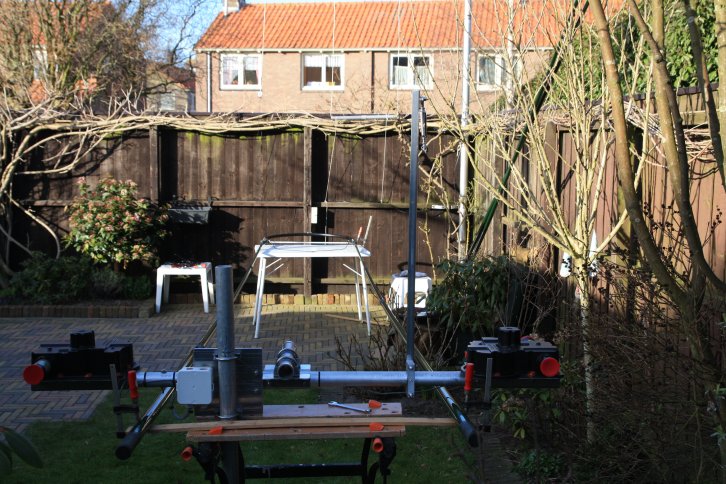
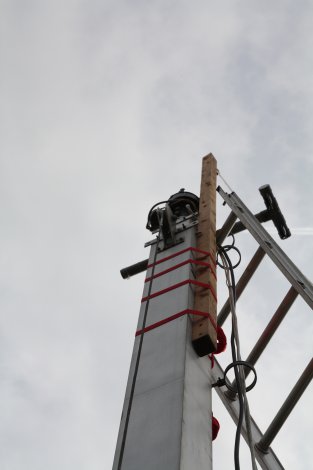
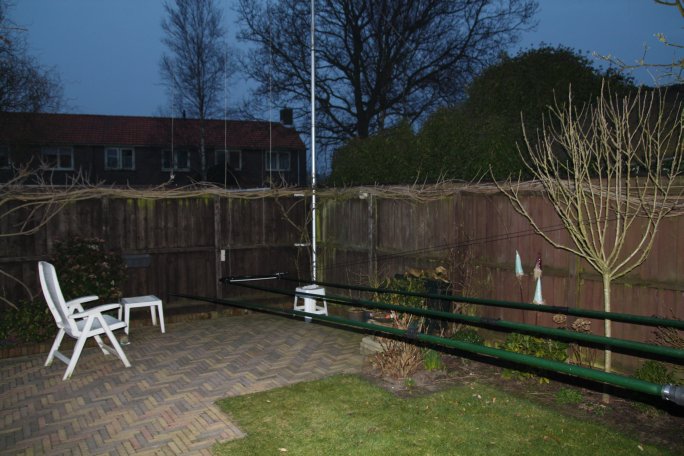
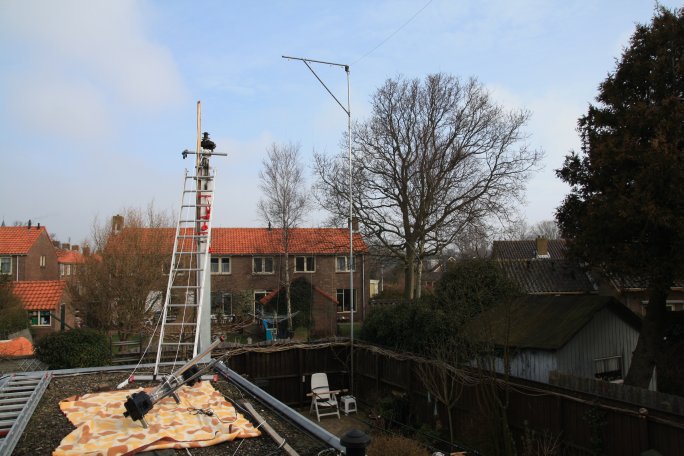
Wooden mast with pulley to lift the SteppIr "easily" |
 |
 |
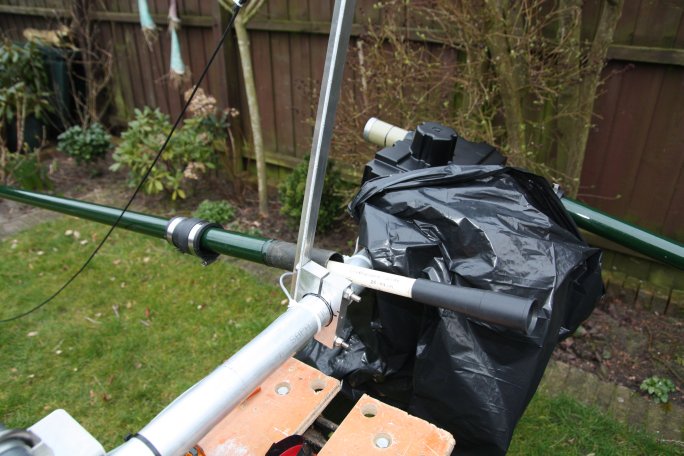
| Wooden mast connected to my cranck-up mast with 4 ties | Rainy sundaymorning; will it be dry inside the SteppIr |
 |
 |
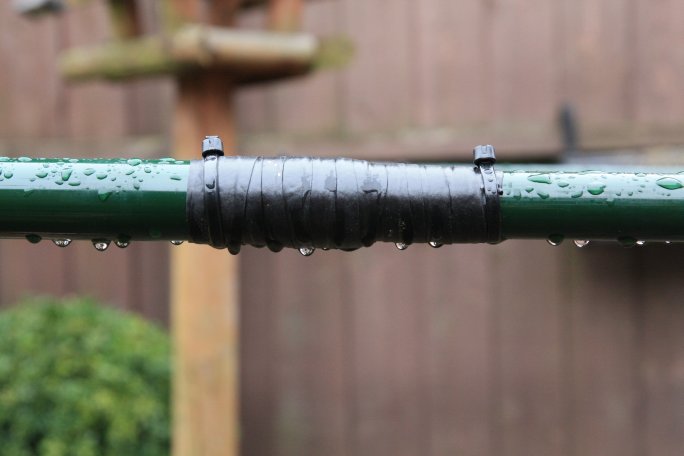
| Raindrops outside; dry inside by the tapes and tyribs |
Checking
the connectionbox for moisture; but its dry !!
|
 |
 |
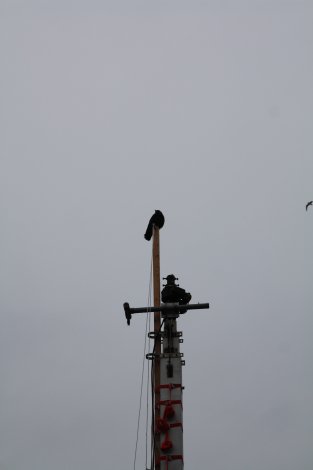
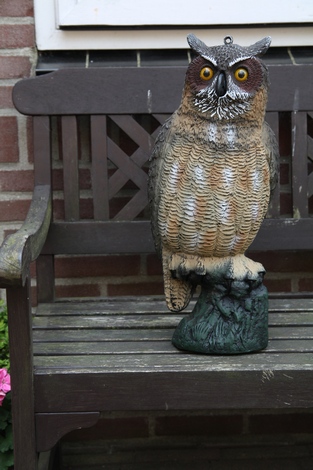
| Is he also waiting for the SteppIr; need a owl on the top to keep them off | CVPC ready to go in the EHT |
 |
 |
| Easily disconnecting the trombone | Alle EHT connected for the first time |
 |
 |
| All in balance by the trust | Controlcable and coaxcable temporily connected for the analyser-test |
 |
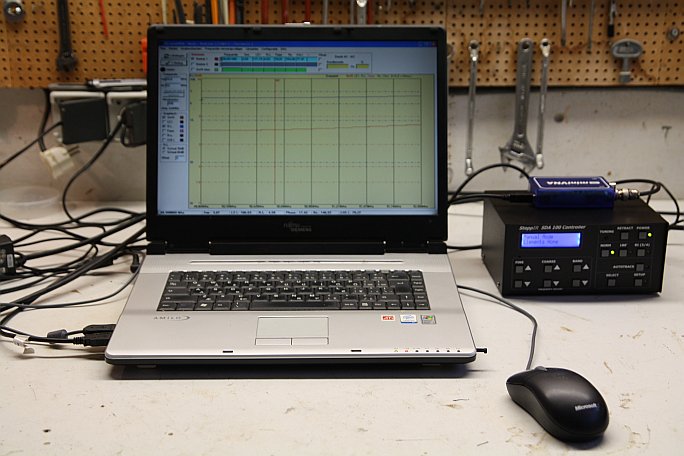 |
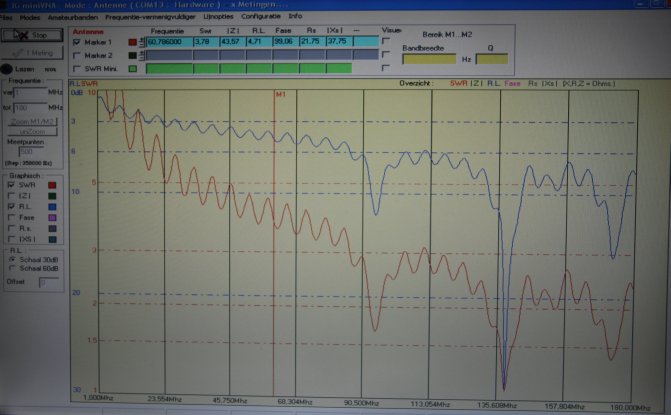
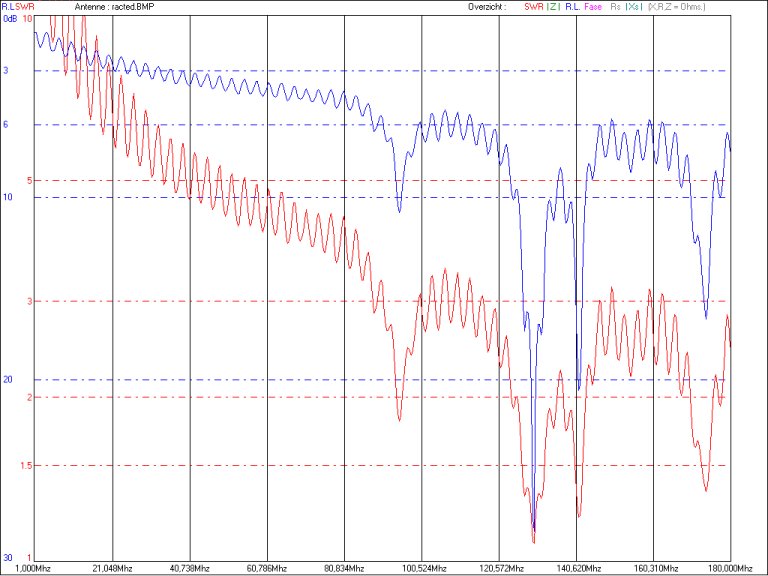
| Analyser-picture from 1 - 180 MHz with elements complete retracted | Analyser-setup with the miniVNA |
 |
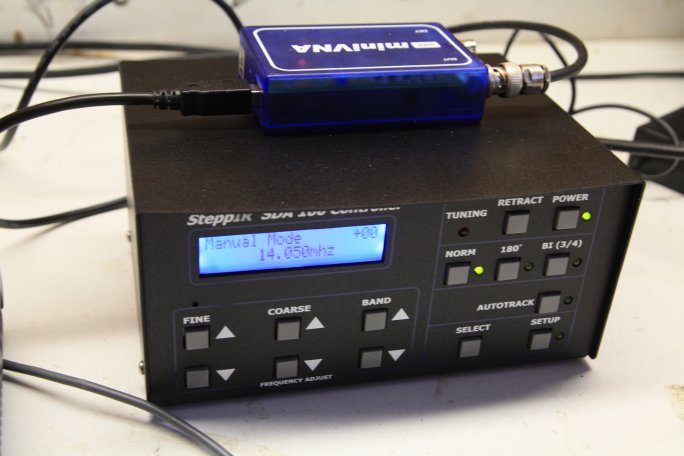 |
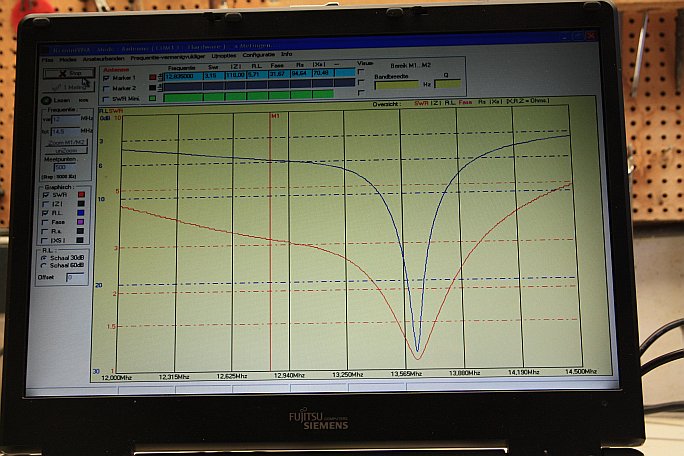
| First test on 20M | A analyser is a MUST for every serious antenna-experimenter |
 |
 |
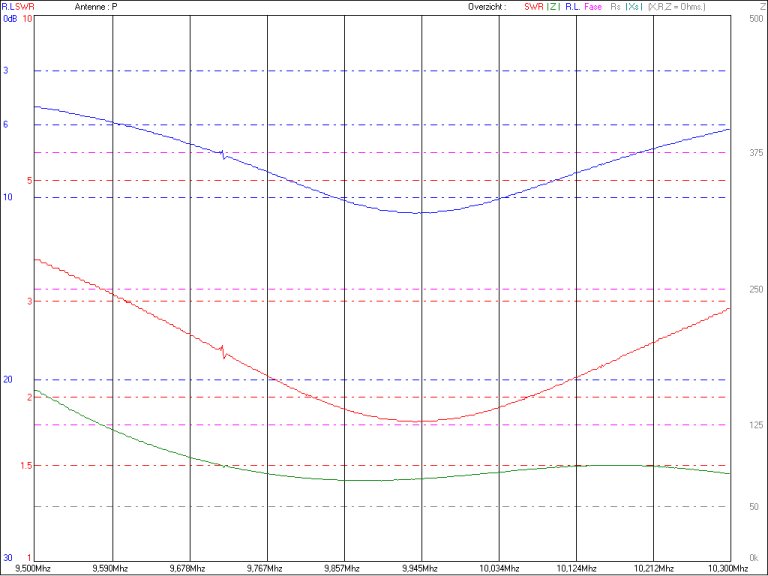
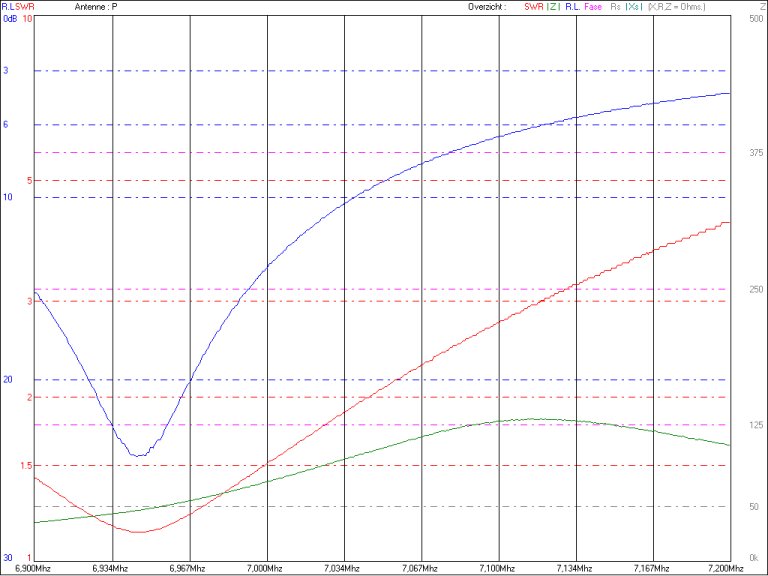
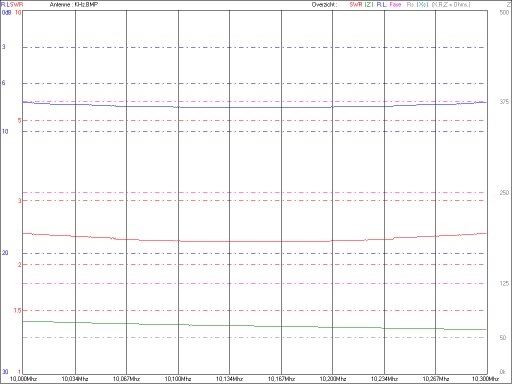
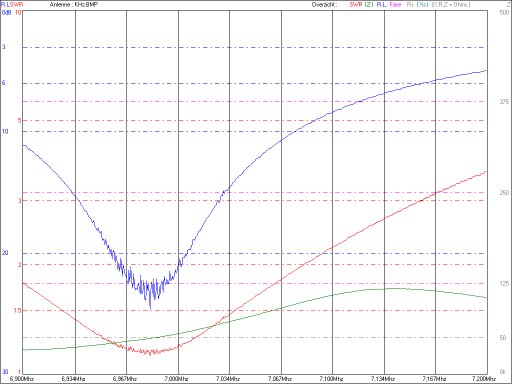
| SteppIR 40M SWR-Curve at groundlevel | SteppIR 30M SWR-Curve at groundlevel |
 |
 |
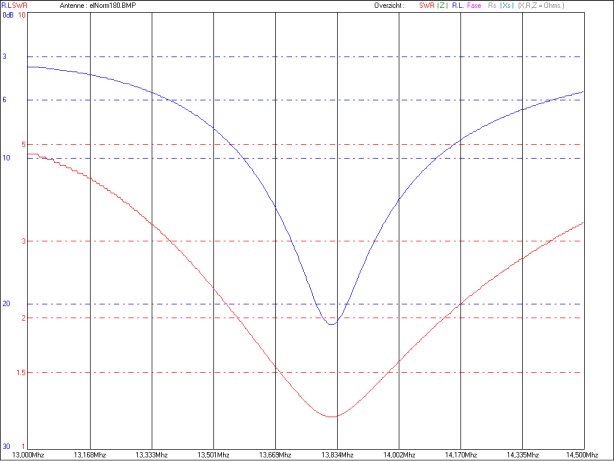
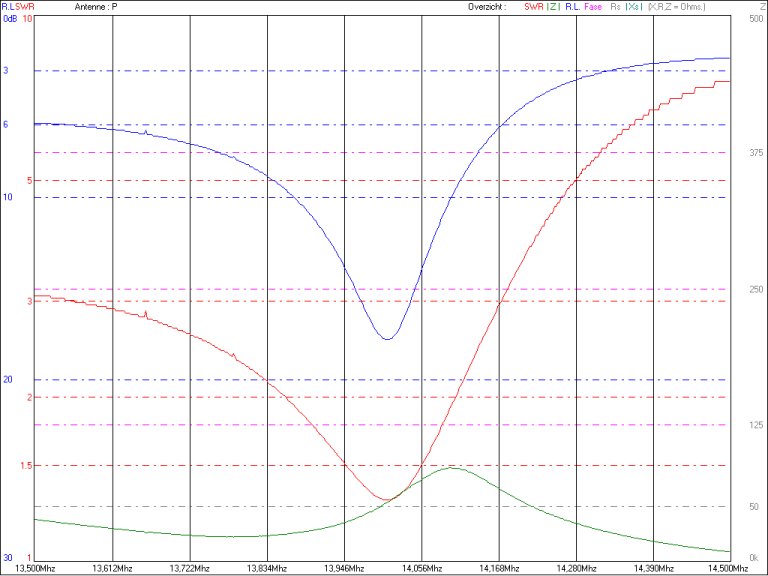
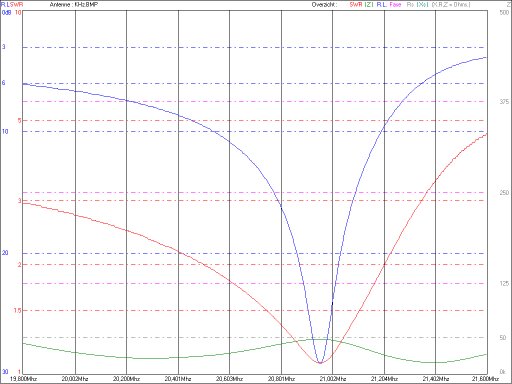
| SteppIR 20M SWR-Curve at groundlevel | SteppIR 20M 180dg SWR-Curve at groundlevel |
 |
 |
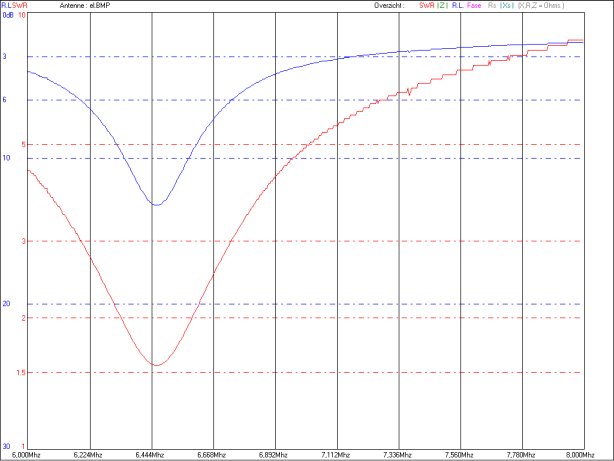
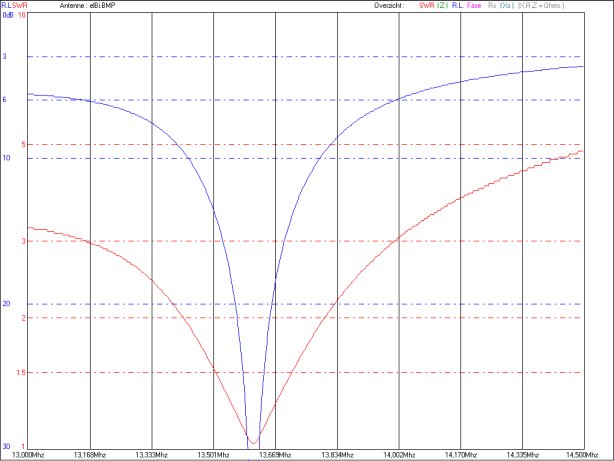
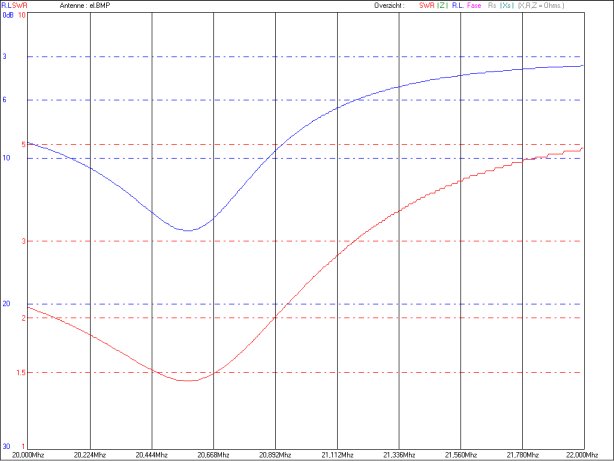
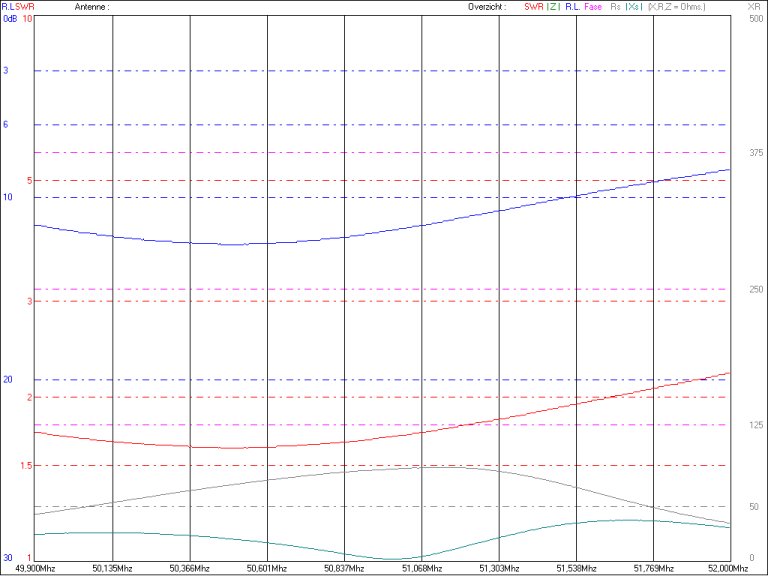
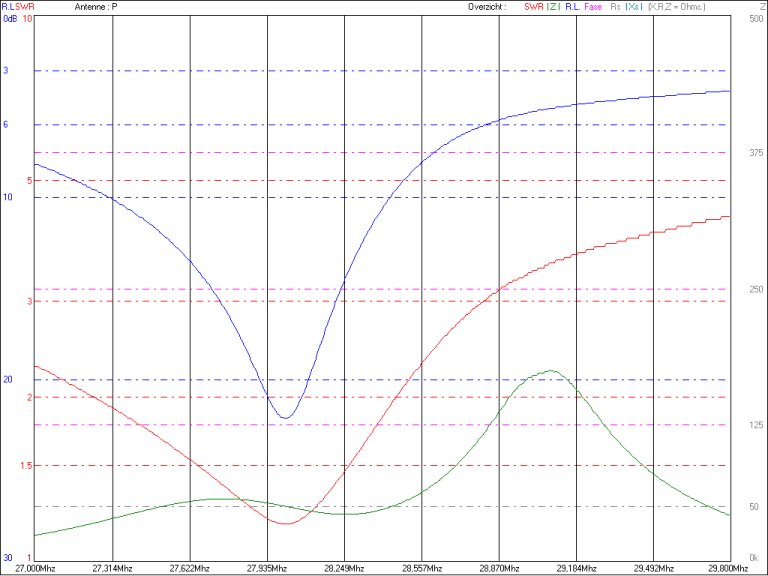
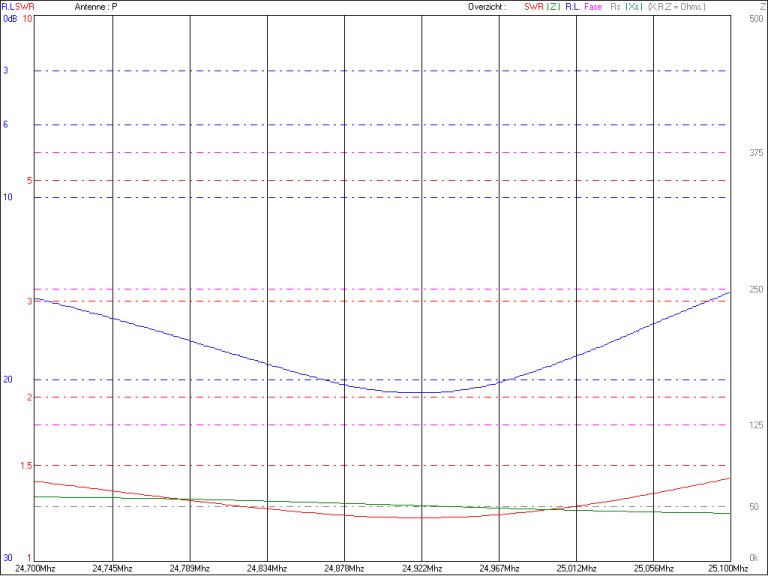
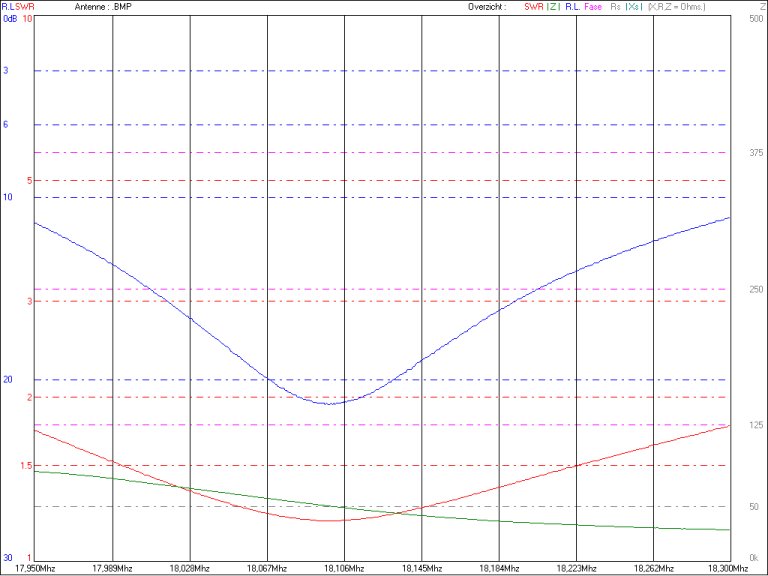
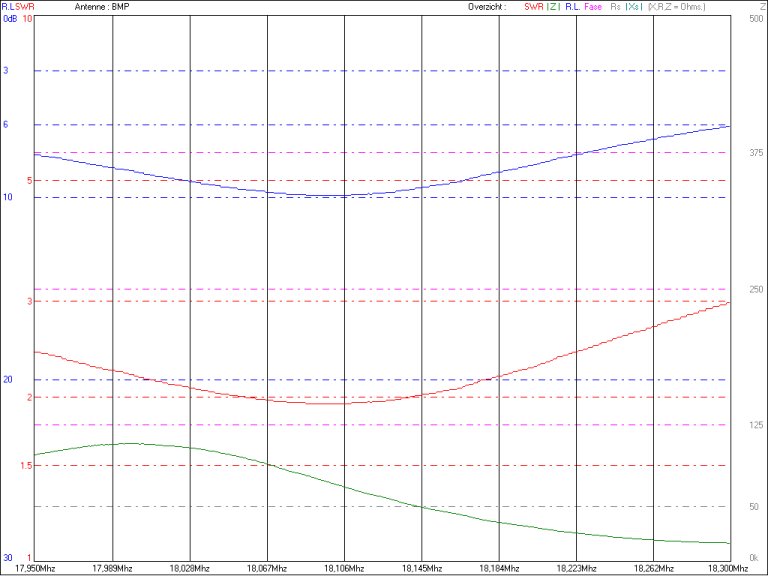
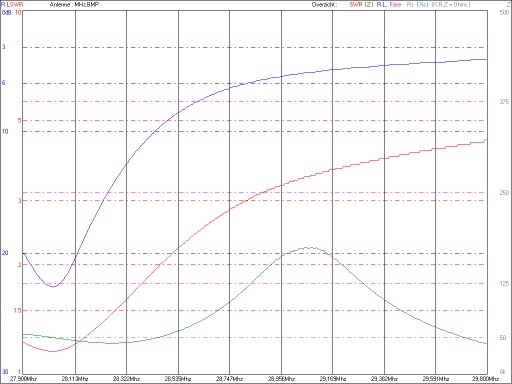
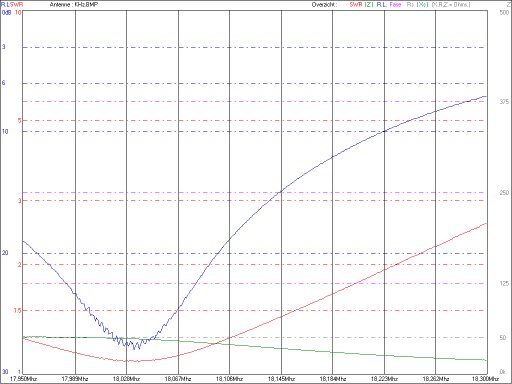
| SteppIR 20MBi SWR-Curve at groundlevel | SteppIR 17M SWR-Curve at groundlevel |
 |
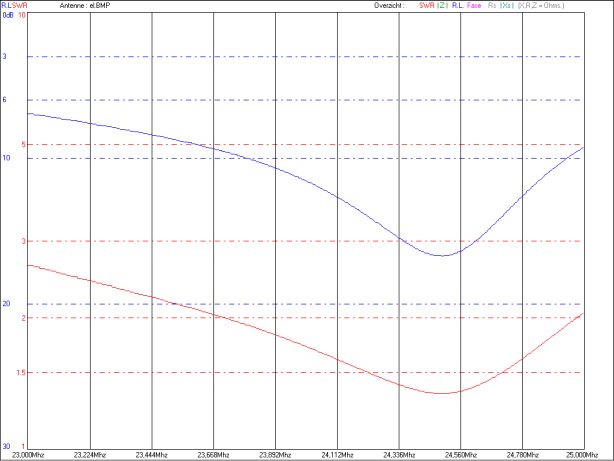 |
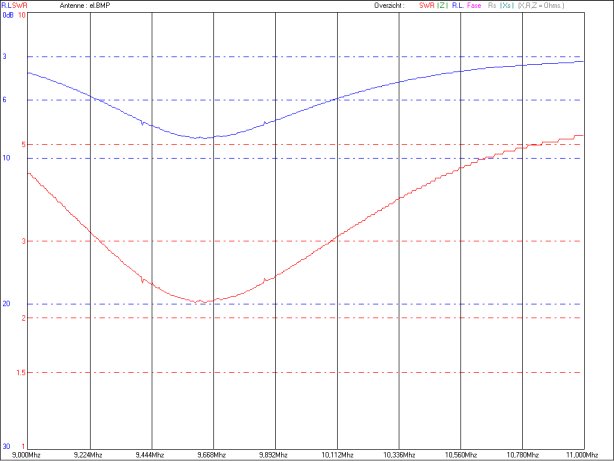
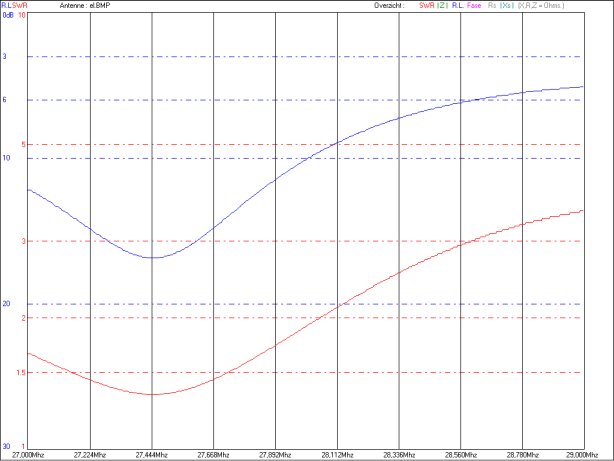
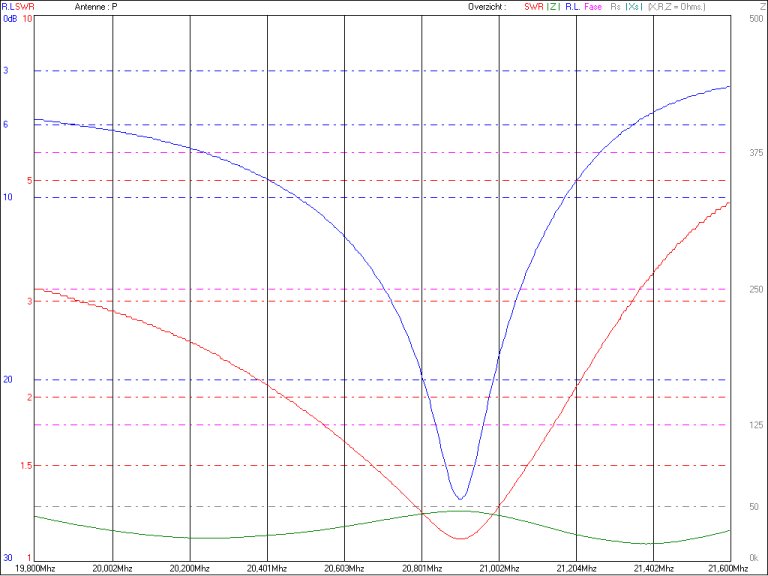
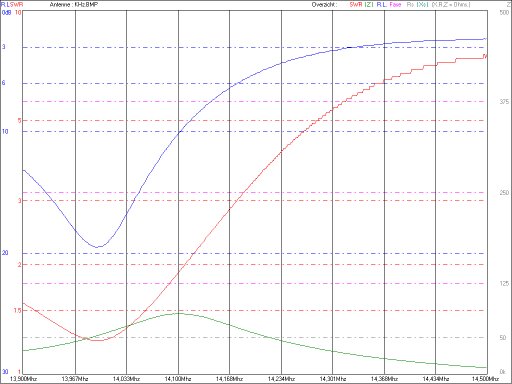
| SteppIR 15M SWR-Curve at groundlevel | SteppIR 12M SWR-Curve at groundlevel |
 |
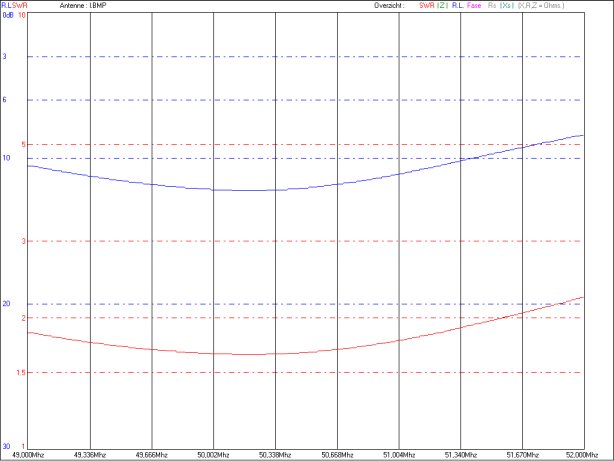 |
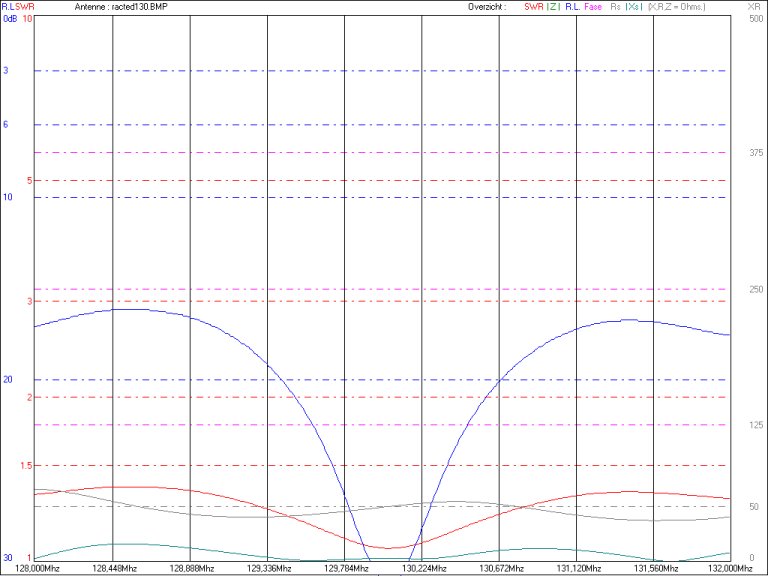
| SteppIR 10M SWR-Curve at groundlevel |
SteppIR
6M SWR-Curve at groundlevel
|
 |
 |
| A nice fridaymorning 110318: disconnected the EHT's | Both trust-cords also disconnected |
 |
 |
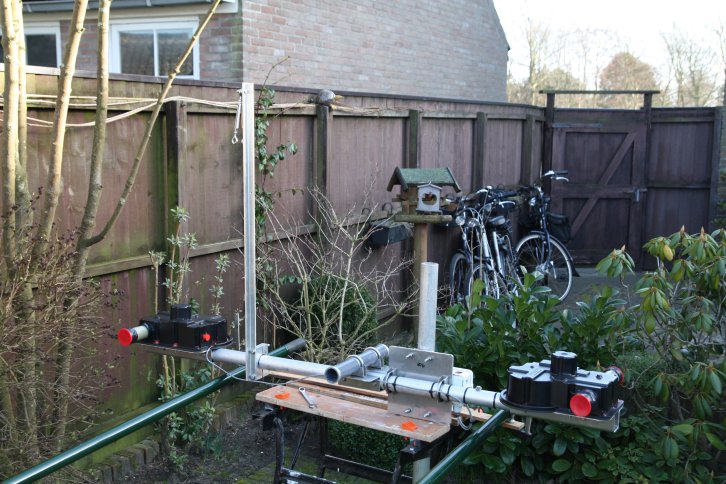
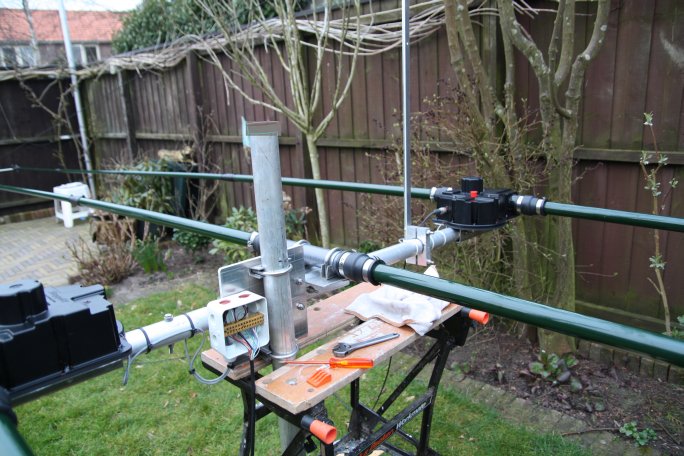
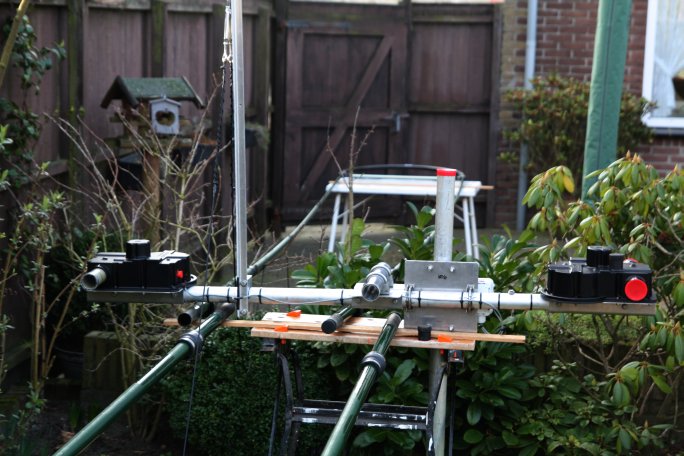
| Boom with steppermotors ready to place on the mast | It was easy to put it in my rotator; 1st director-EHT placed |
 |
 |
| This was the most difficult part; turning the boom and locking the nuts !!! | 2nd director-EHT placed: peace of cake |
 |
 |
| Trombones and directors placed and now in perfect balance | Is'nt a beauty ? |
 |
 |
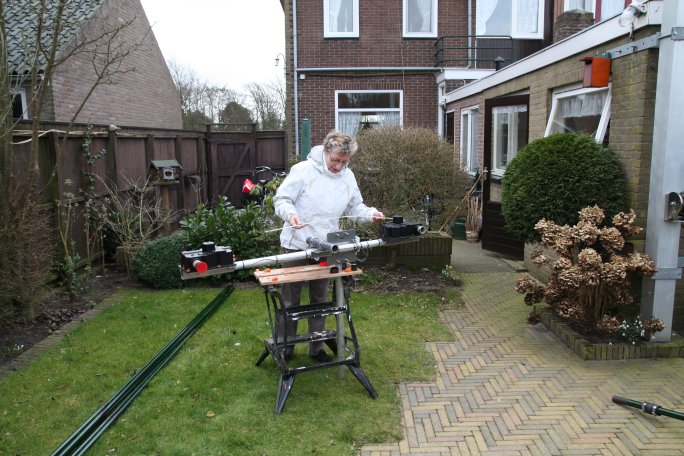
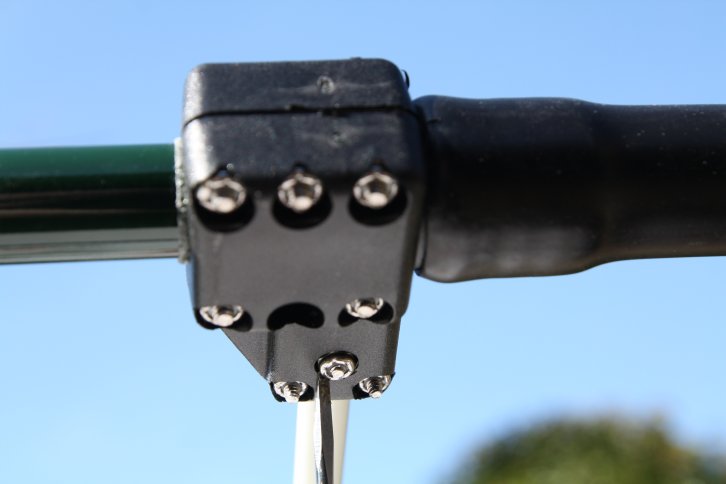
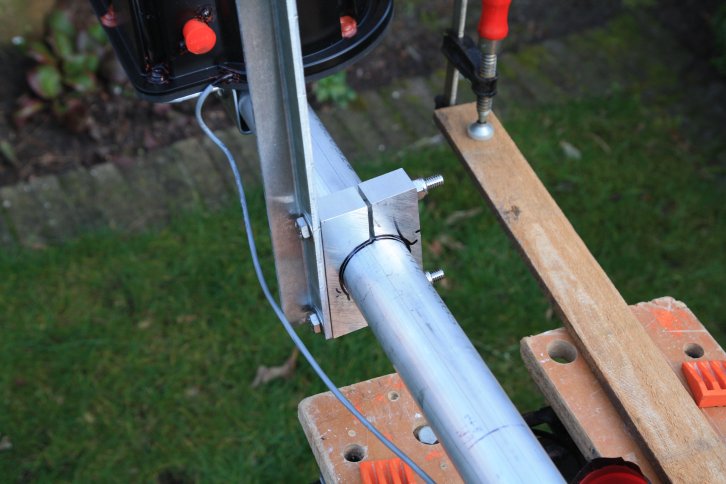
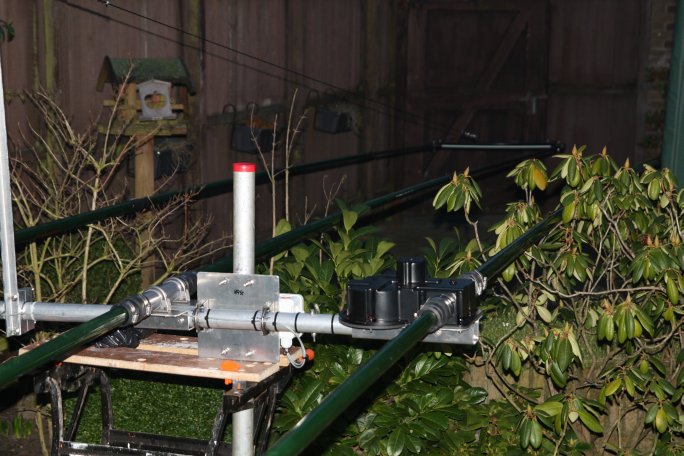
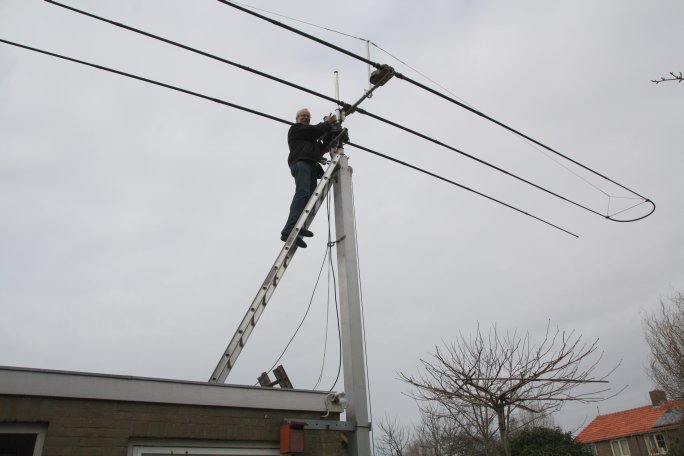
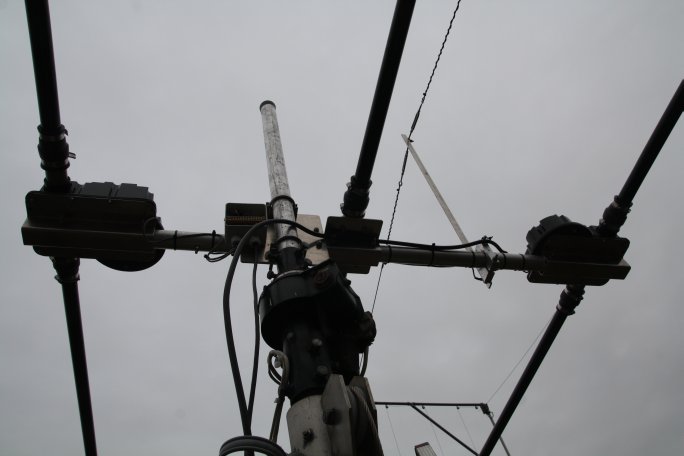
| PA2JJB connecting the control-cable for the steppers |
Use
some siliconengrease for making the connectionbox watertight
|
 |
 |
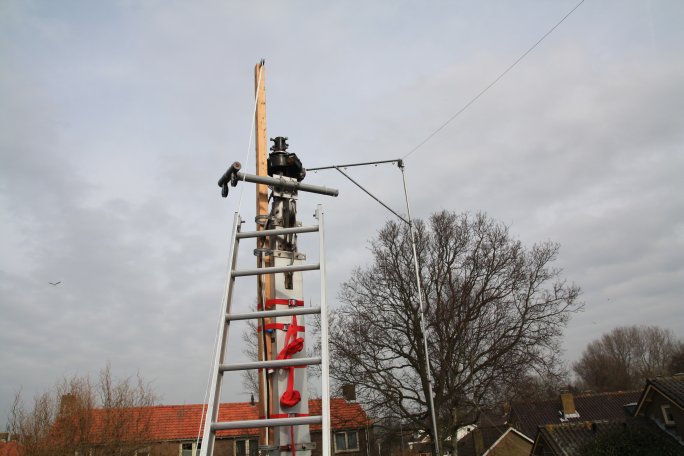
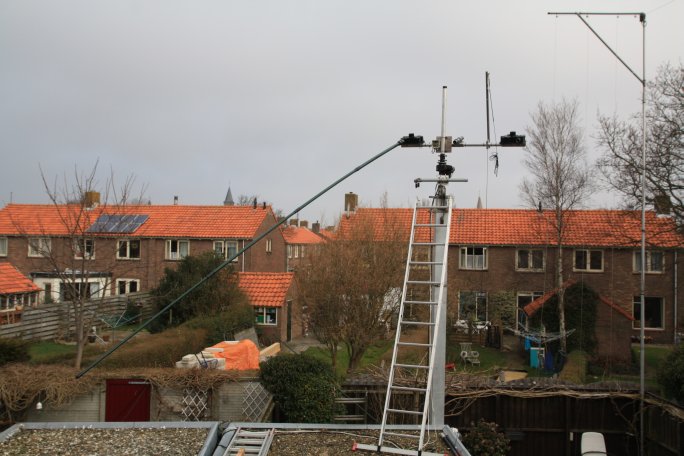
| All elements retracted on a height of 6M | This picture you must see when all the elements are fully retracted |
 |
 |
| SteppIR 6M SWR-Curve at 6M | SteppIR 10M SWR-Curve at 6M |
 |
 |
| SteppIR 12M SWR-Curve at 6M | SteppIR 15M SWR-Curve at 6M |
 |
 |
| SteppIR 17M Normal SWR-Curve at 6M | SteppIR 17M 180 degrees SWR-Curve at 6M |
 |
 |
| SteppIR 17M BIDir SWR-Curve at 6M | SteppIR 20M SWR-Curve at 6M |
 |
 |
| SteppIR 30M SWR-Curve at 6M |
SteppIR
40M SWR-Curve at 6M
|
 |
 |
| Another nice painting of my XYL: "The Slufter" on Texel-Island | Coax and control-cable connected |
 |
 |
|
The "Autotrack"works marvelous !! |
|
|
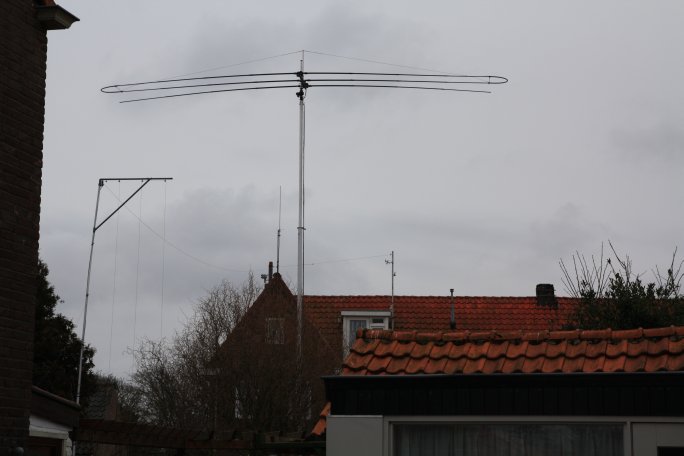 |
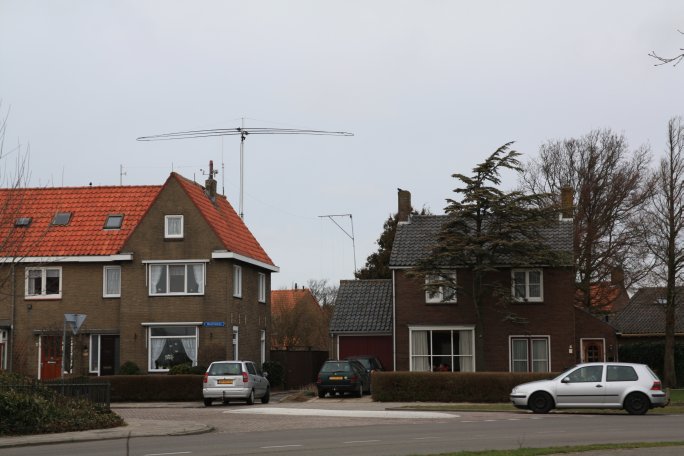
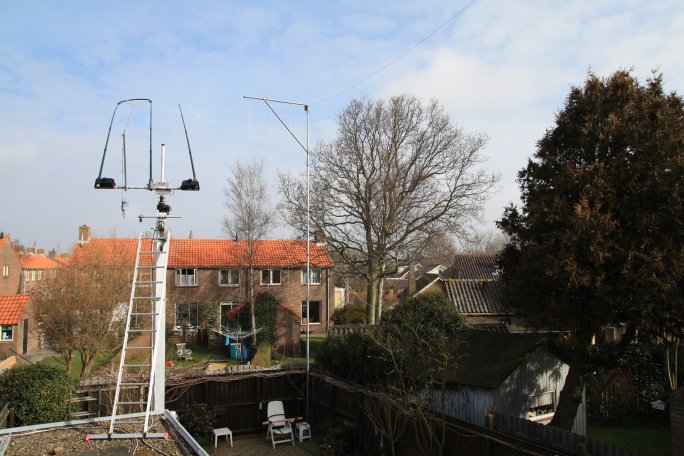
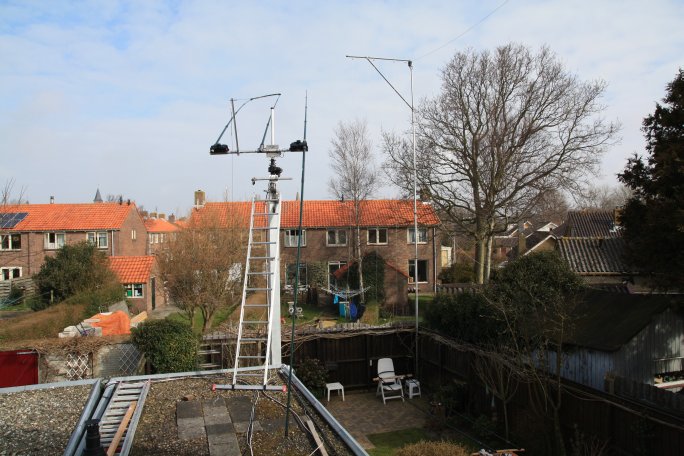
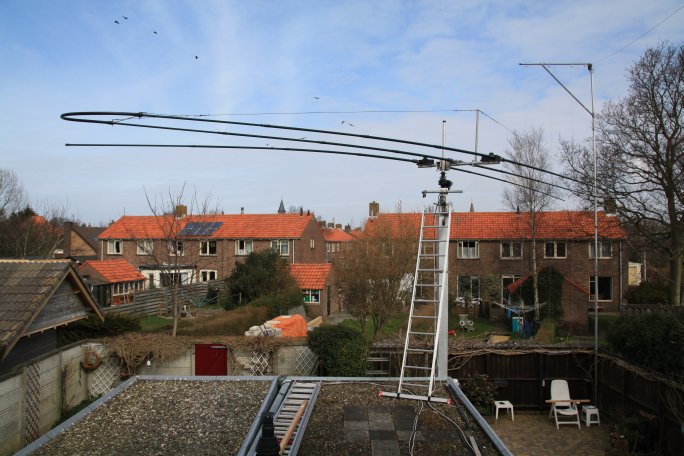
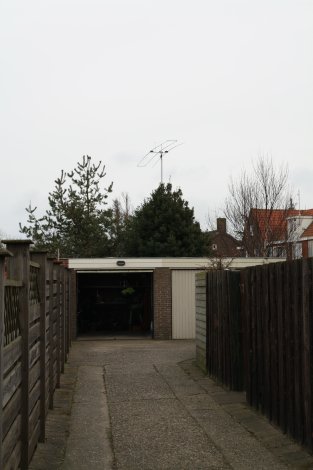
| It is a hugh antenna, also from a distance | The vieuw of the neighbours behind us |
 |
 |
| A look from the side in another street |
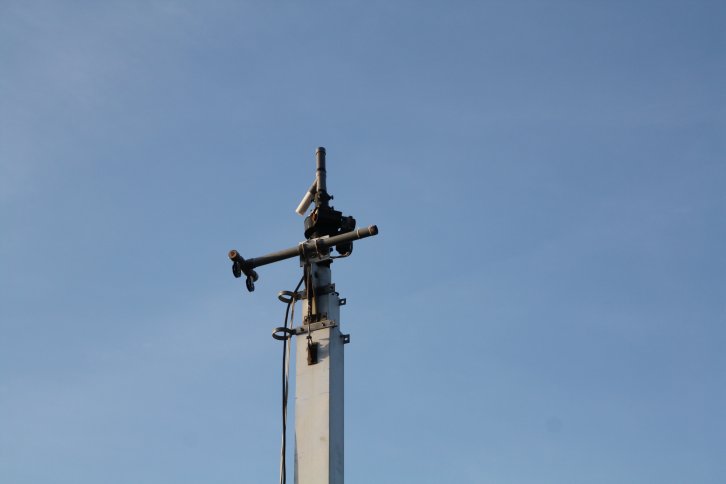
AlphaSpid-rotor-control
and SD 100 controlled by the FT-950
|
 |
 |
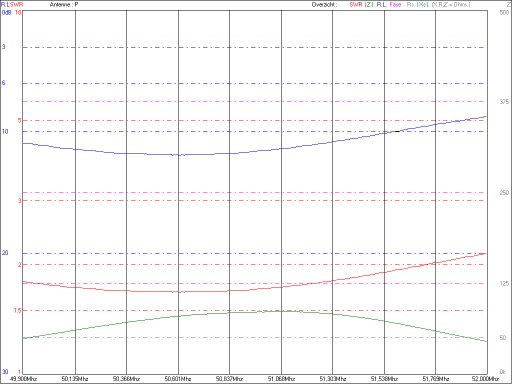
| SteppIR 6M SWR-Curve at 12.5M | SteppIR 10M SWR-Curve at 12.5M |
 |
 |
| SteppIR 12M SWR-Curve at 12.5M | SteppIR 15M SWR-Curve at 12.5M |
 |
 |
| SteppIR 17M SWR-Curve at 12.5M | SteppIR 20M SWR-Curve at 12.5M |
 |
 |
| SteppIR 30M SWR-Curve at 12.5M |
SteppIR
40M SWR-Curve at 12.5M |
|
Stations I worked with this antenna the 1st week
What I hear, I can work !!! |
|
|
Date |
UTC | Freq | Mode | Call | TXRST | RXRST | Power | Remarks |
| 18-3-11 | 15:10 | 20 | CW | II6ICA | 599 | 599 | 5 | Dom nr Acona |
| 19-3-11 | 07:42 | 17 | CW | SV1HAG | 599 | 589 | 20 | Giannis Athens |
| 12:24 | 15 | SSB | PS2T | 59 | 59 | 50 | Contest | |
| 13:38 | 40 | SSB | G0UZL | 59 | 59 | 50 | Chris - Dorset | |
| 21-3-11 | 18:21 | 20 | CW | W2BXA | 599 | 579 | 20 | |
| 18:42 | 20 | CW | WA2QQF | 579 | 579 | 20 | John - NY | |
| 20:24 | 40 | CW | RD4AAA | 539 | 559 | 40 | Alex | |
| 23-3-11 | 17:50 | 10 | SSB | LU8EEA | 59 | 59 | 60 | Rubert |
| 17:52 | 10 | SSB | LU9FFZ | 57 | 59 | 60 | George - Roasario | |
| 18:31 | 12 | CW | EA9ARY | 599 | 599 | 20 | Joe | |
| 19:50 | 20 | SSB | K9ARZ | 59 | 56 | 60 | Larry - Chicago | |
| 20:09 | 17 | SSB | FP/N9JZP | 59 | 59 | 80 | St. Pierre & Micheleon | |
| 20:18 | 17 | SSB | KC9KE | 55 | 58 | 80 | Jim - Holland | |
| 20:27 | 17 | SSB | K2DUX | 59 | 59 | 80 | Paul - Long Island NA026 | |
| 24-3-11 | 15:37 | 15 | CW | K8CW | 599 | 599 | 50 | Fred - Ohio |
| 15:50 | 15 | CW | W6LFB | 559 | 569 | 50 | Jim - Denton - TX | |
| 15:59 | 15 | CW | K4DY | 539 | 569 | 50 | Les - NC | |
| 16:29 | 17 | SSB | K8CW | 579 | 579 | 50 | Fred - Ohio | |
| 16:32 | 17 | SSB | K6YRA | 59 | 58 | 75 | Allan Encino - CA | |
| 18:54 | 20 | SSB | W0XG | 59 | 59 | 75 | Eric Minneoapolis - MIN | |
| 25-3-11 | 09:54 | 17 | CW | SV1AOW | 599 | 599 | 60 | Geo - Marathon |
| 12:20 | 17 | CW | K4UX | 569 | 569 | 60 | Al - VA | |
| 14:29 | 17 | SSB | RX6AM | 59 | 59 | 75 | Mike Novo | |
| 14:31 | 15 | SSB | TG9IGI | 59 | 59 | 100 | Guatamala - City | |
| 15:21 | 15 | SSB | 5R8XB | 57 | 57 | 100 | Marco - Madagascar QSL via ON8MB | |
| 16:04 | 15 | SSB | VA3WU | 57 | 57 | 100 | Rick - Niagara Falls | |
| 26-3-11 | 09:44 | 17 | SSB | UR5EEZ | 59 | 59 | 70 | Vitaly |
| 12:14 | 17 | SSB | K1GUN | 59 | 59 | 100 | John | |
| 12:17 | 17 | CW | CO8LY | 599 | 599 | 75 | Cuba | |
| 12:36 | 17 | CW | N5PST | 559 | 559 | 70 | Gary - TX | |
| 12:52 | 17 | CW | K3EL | 599 | 569 | 70 | Dave - NJ | |
| 12:58 | 17 | CW | RD3AV | 599 | 599 | 70 | Vic - Moscow | |
| 13:09 | 17 | CW | W9HA | 579 | 579 | 70 | Steve - Ill. | |
| 20:52 | 20 | CW | HK1X | 59 | 59 | 100 | Contest |
| Back to Menu | |
 |
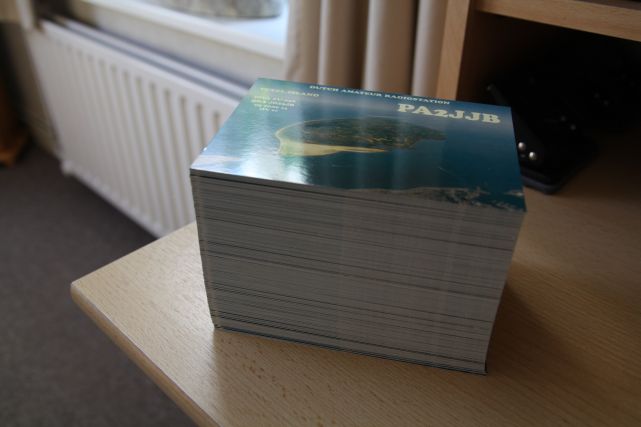 |
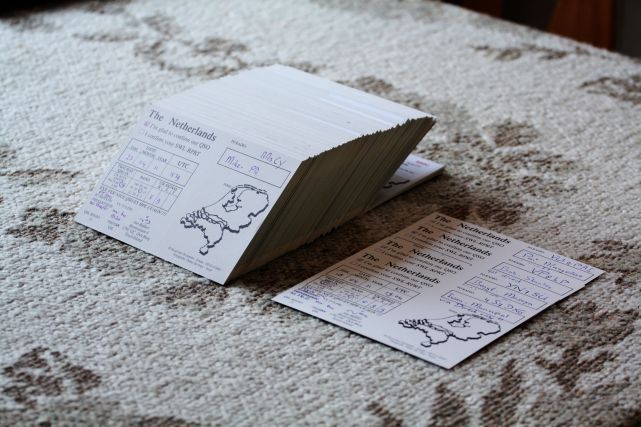
| I warn you: This antenna will cost you lots of QSL-Cards hi hi..... |
After
1,5 months working with the SteppIr
|
 |
 |
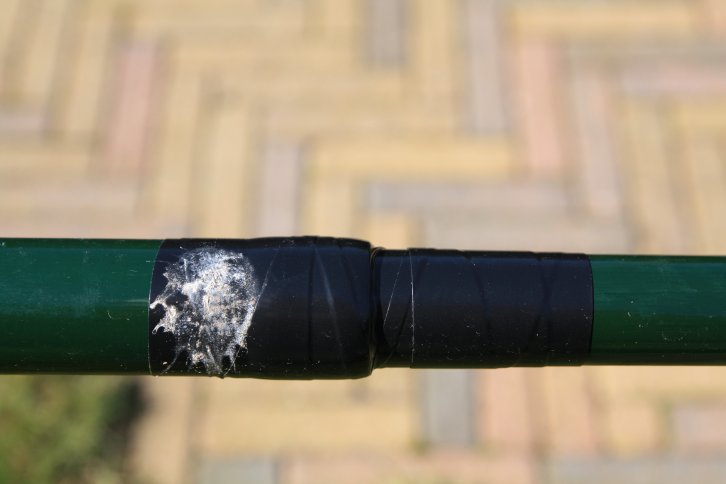
| My friend the owl | My friend the owl protecting the rubber tape off the antenna |
 |
 |
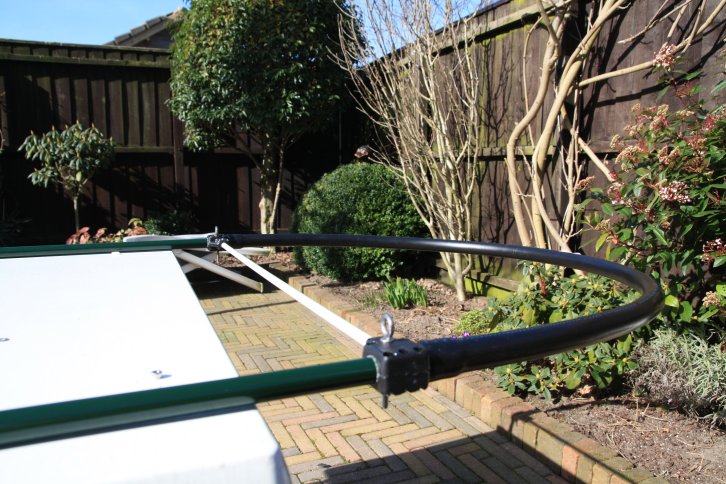
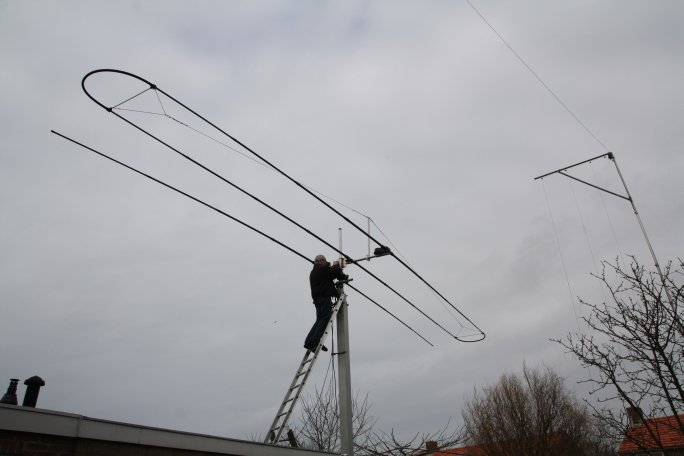
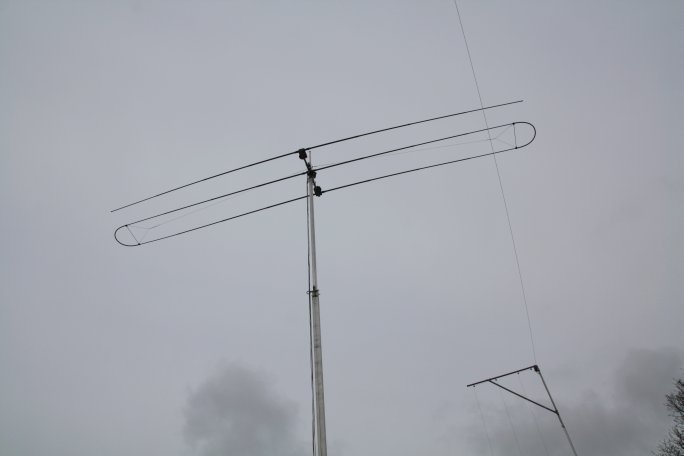
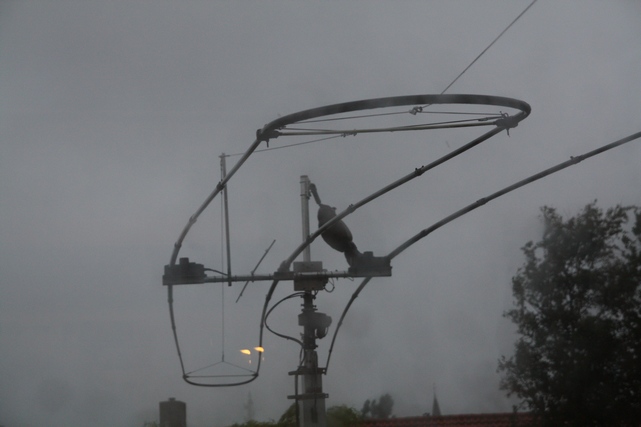
| I added a homemade 6M passive element |
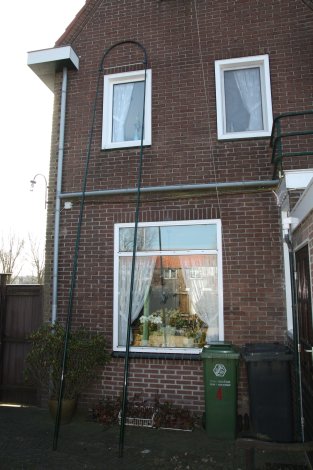
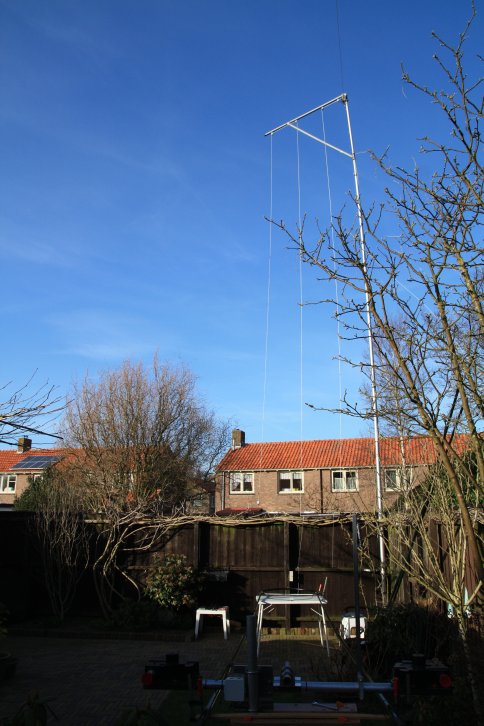
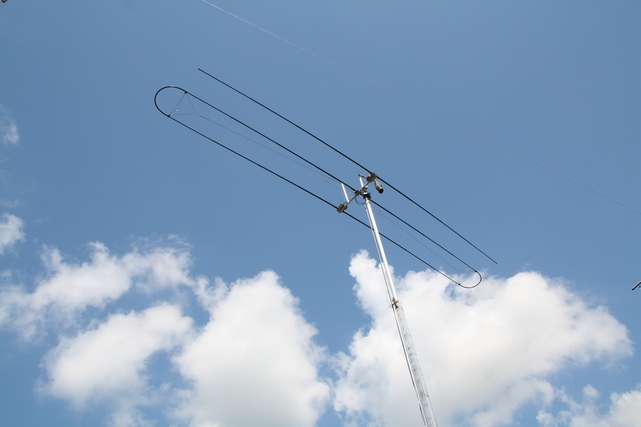
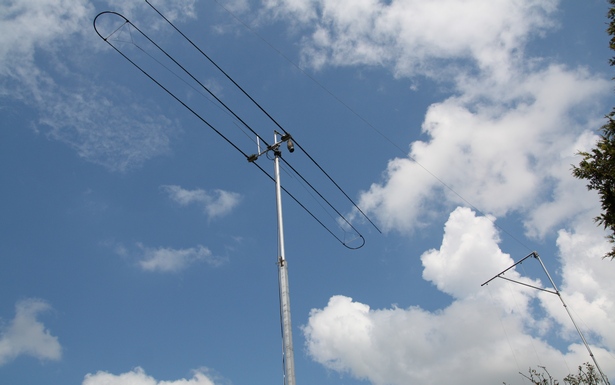
The
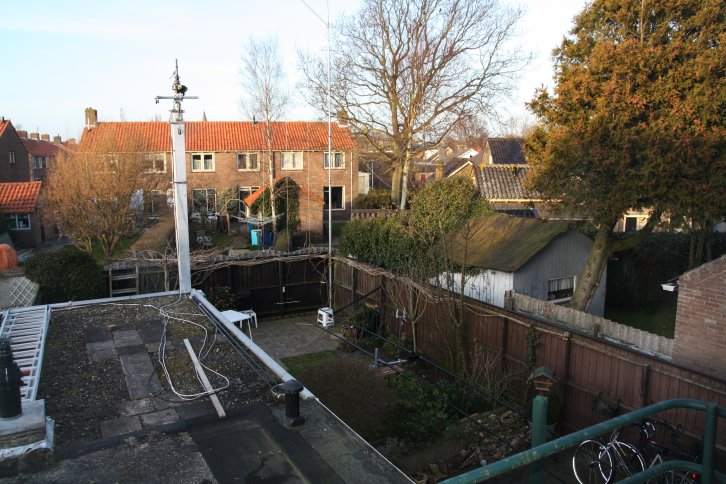
SteppIr on 13,5M |
 |
 |
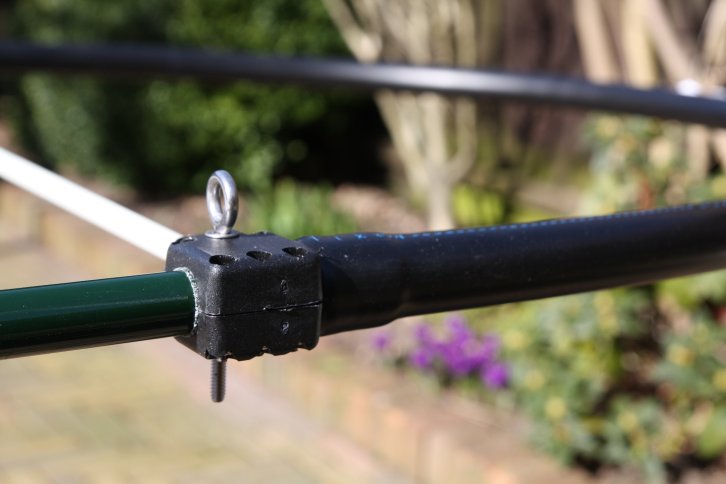
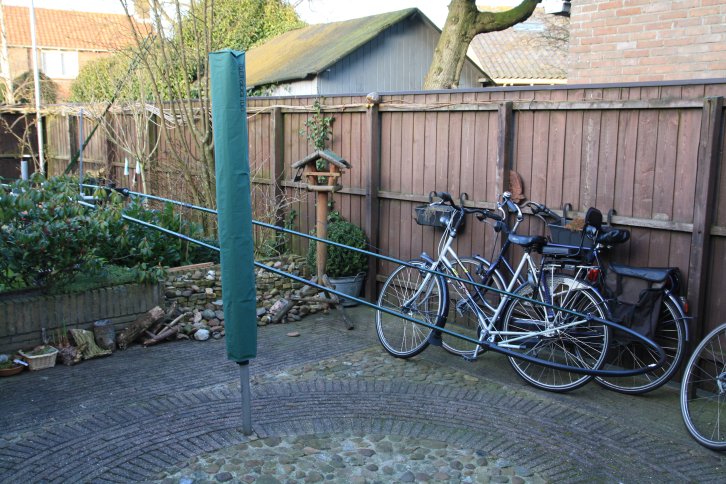
| These are only empty tubes; and survived several of these storms | For a better nightrest I've made a rope to guy the SteppIr to a rainpipe |
 |
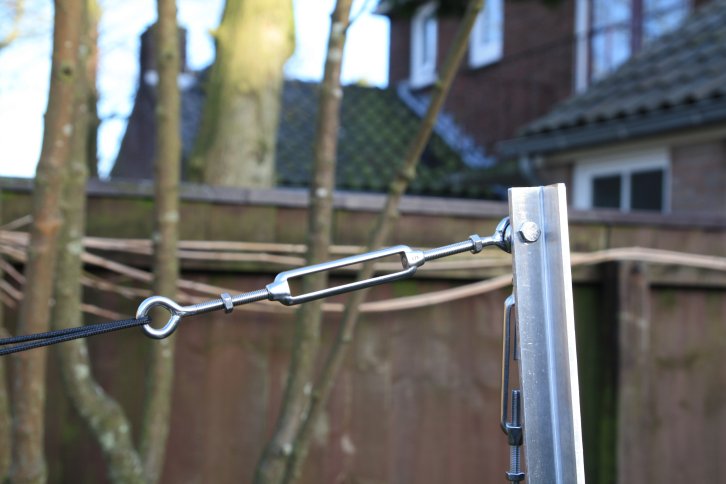
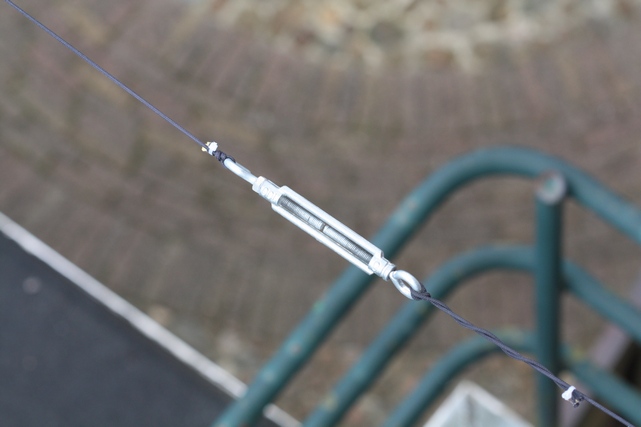 |
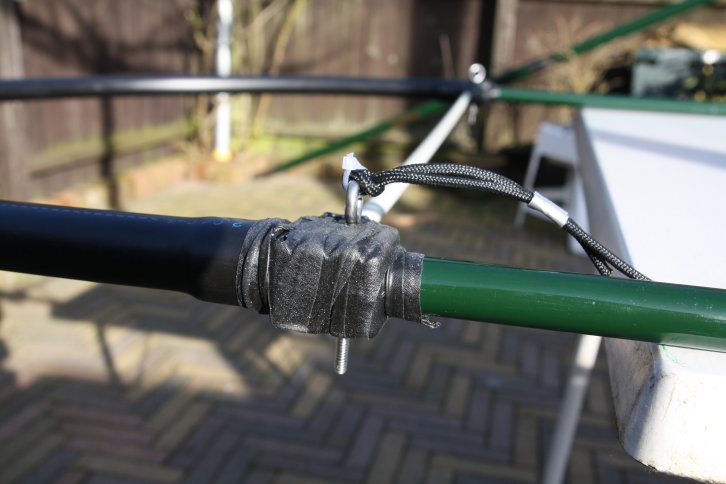
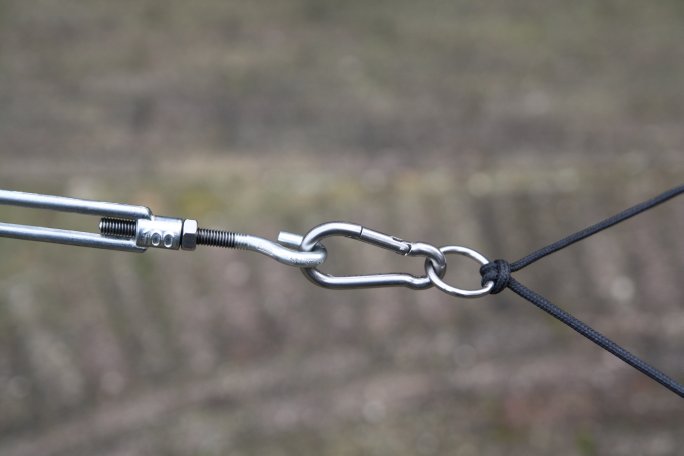
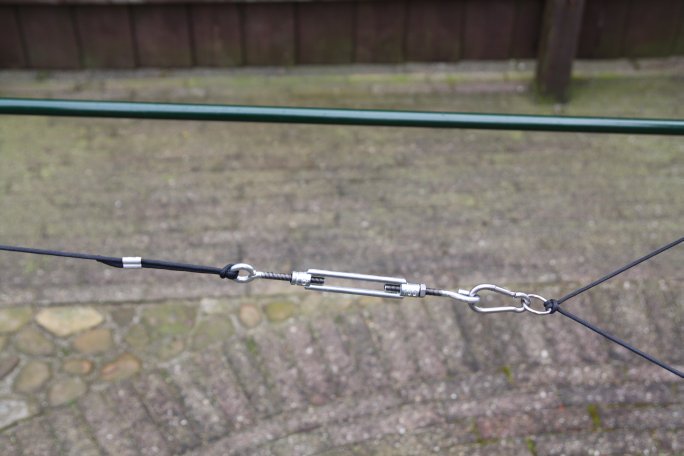
| Closeup-view of my rope-connection | With a turnbuckle I tighten the rope |
 |
 |
|
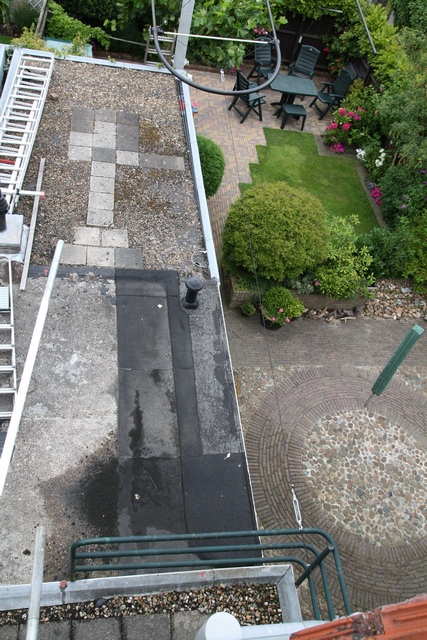
A
neat and very clean sky and garden; the antennas covering 80 - 6M
|
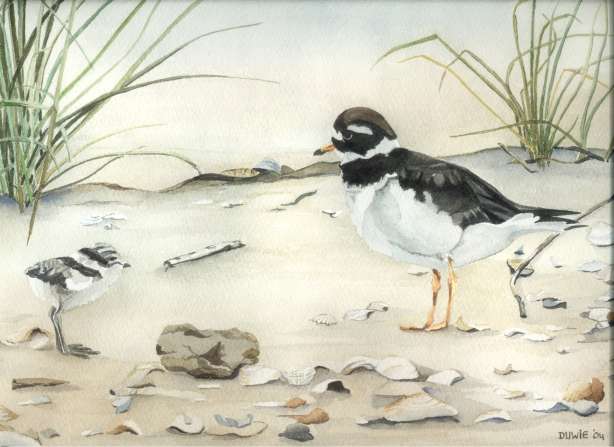
One of the nice paintings of my XYL |
 |
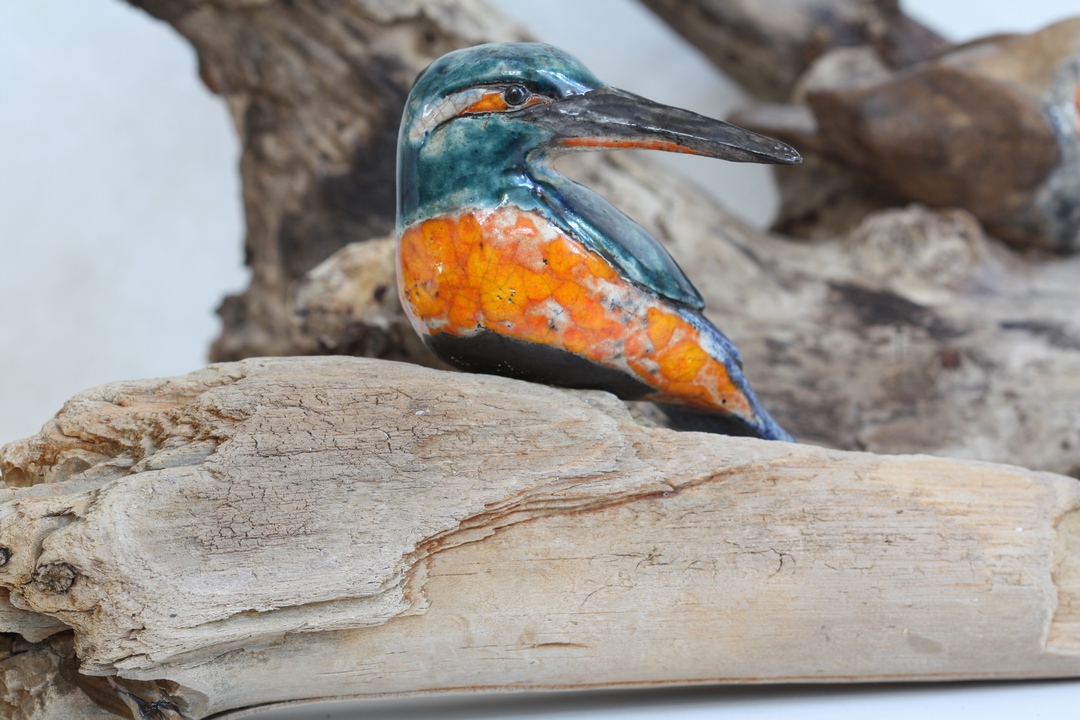 |
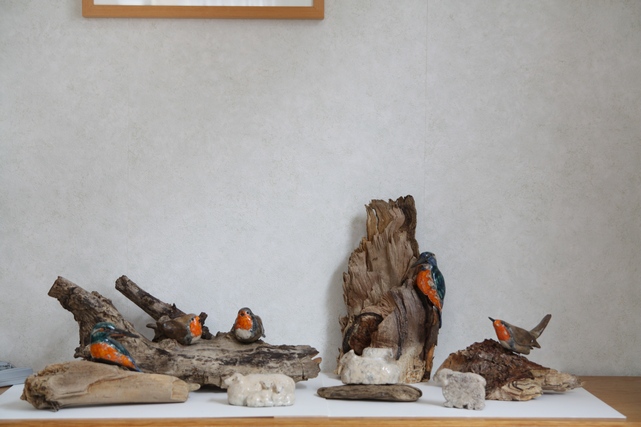
| Enjoy the other hobby of my XYL: Ceramics | You can see them on Texel-Island: Galery 56 |
 |
 |
| Birds on wood |
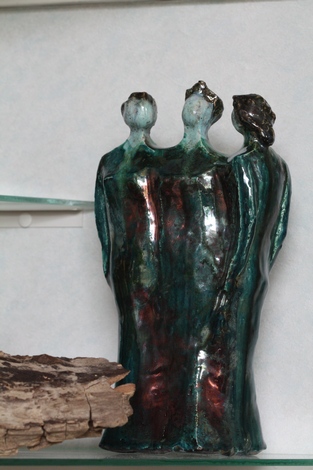
The
3 sisters |